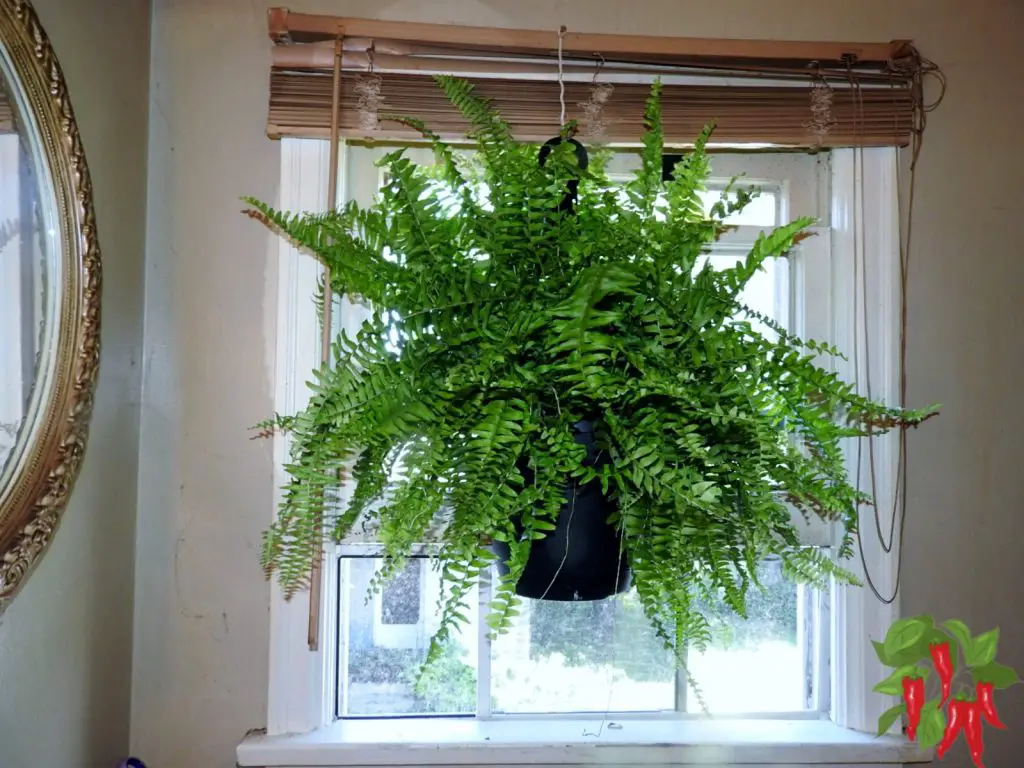
After growing Boston ferns in hanging baskets both indoors and outside, I’ve learned they need slightly different care than potted ferns, especially when it comes to watering and humidity.
Hanging baskets dry out faster, get more airflow, and can lose moisture quickly in warm weather. But when you keep up with those needs, Boston ferns can become one of the best hanging plants for soft, lush greenery.
This guide covers Boston fern hanging basket care, including watering, light, humidity, repotting, and how to fix the most common problems.
🌿 What You’ll Learn
How often to water Boston ferns in hanging baskets
The best indoor and outdoor locations for hanging ferns
Boston fern hanging basket care is all about keeping the basket evenly moist, maintaining high humidity, and giving the plant bright indirect light. Hanging baskets dry faster than pots, so they often need more frequent watering.
Introduction to Boston Fern Hanging Basket Care
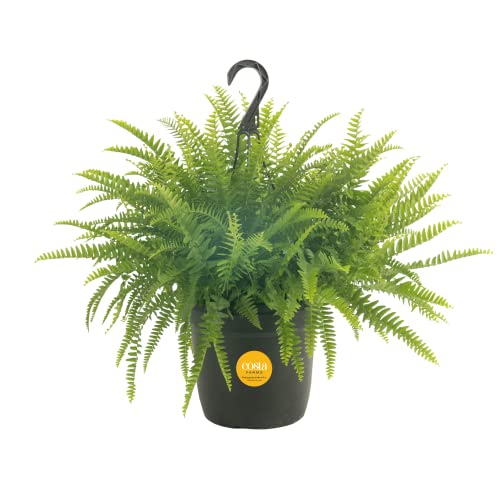
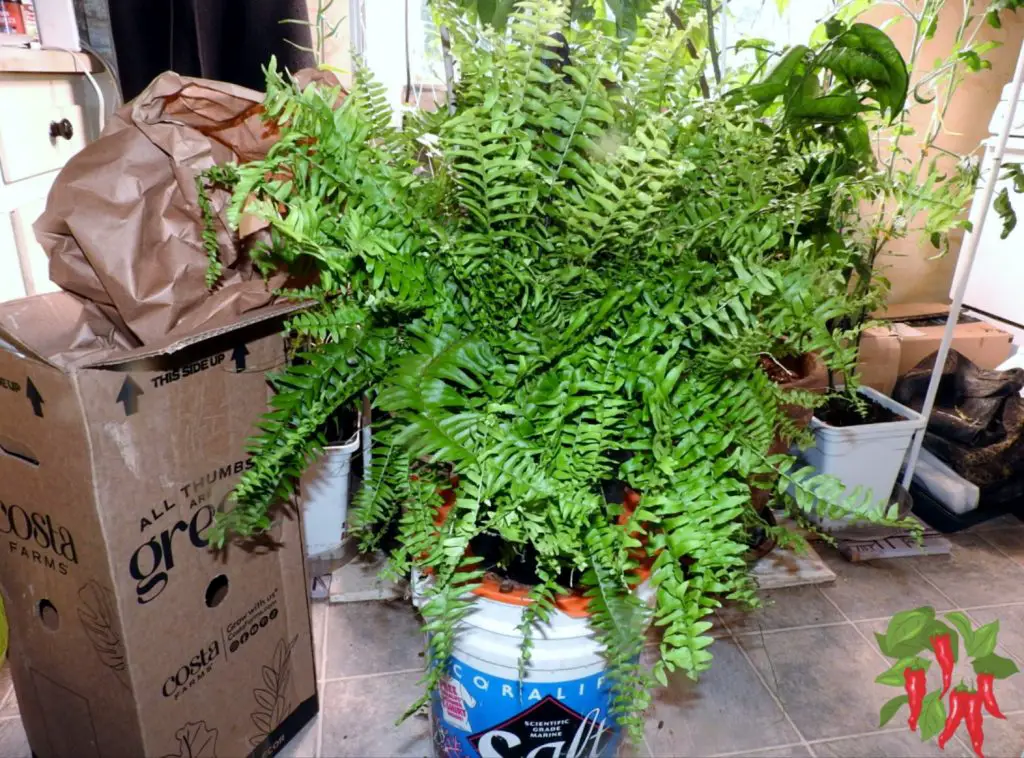
I picked up this Boston fern in a hanging basket from Costa Farms to test indoors and see how it handled real home conditions. It arrived healthy, full, and in better shape than I expected, which gave me a good starting point for this care guide.
Howdy, folks! Boston Fern Hanging Basket Care can be a game-changer for your home or garden.
These lush, green beauties are perfect for adding a touch of nature to any space.
Let’s dive into why proper care is so important and how to keep your hanging ferns looking their best.
Brief Overview of Boston Ferns in Hanging Baskets
Boston ferns (Nephrolepis exaltata) are popular for their graceful, arching fronds and vibrant green color. When placed in hanging baskets, they become stunning focal points indoors or outdoors.
Ideal for Indoor and Outdoor Decor: Perfect for brightening up patios, porches, and living rooms.
Air Purification: Helps to improve indoor air quality by freshening indoor spaces.
Aesthetic Appeal: Adds a lush, tropical vibe to any setting.
Importance of Proper Care for Lush and Healthy Plants
Proper care is key to keeping your Boston fern healthy and vibrant. Without the right conditions, these ferns can quickly become stressed and lose their beauty.
Consistent Watering: Keep the soil moist but not soggy to prevent root rot.
High Humidity: Essential for preventing browning and drying of fronds.
Bright, Indirect Light: Avoid direct sunlight to prevent scorching.
Regular Pruning: Remove dead fronds to encourage new growth and maintain appearance.
By following these care tips, your Boston fern hanging baskets will thrive and bring a touch of green elegance to your home or garden. Keep it green, and happy gardening!
Boston Fern Hanging Basket Care Outdoor
Hey there, fellow gardeners! Taking care of Boston ferns outdoors can be a real treat if you know what to do.
These plants thrive when given the right conditions. Let’s dig into the essentials for keeping your outdoor Boston fern hanging baskets looking lush and healthy.
Ideal Locations
Choosing the perfect spot for your Boston fern is key. They love a bit of sun but can’t handle too much direct sunlight.
Morning Sunlight: Find a spot where your fern can soak up some gentle morning rays. This gives them the light they need without the risk of burning the fronds.
Afternoon Shade: Make sure your fern is shaded during the hot afternoon hours. A place under a tree or on a shaded porch works wonders to keep it cool.
Protection from Elements
Outdoor conditions can be unpredictable, so it’s crucial to protect your fern from extreme weather.
Temperature Sensitivity: Before the temperature drops below 50°F, bring your fern indoors. Cold weather can be a real killer for these delicate fronds.
Wind and Rain: Place your fern in a sheltered area to protect it from strong winds and heavy rains. Too much exposure can cause physical damage to the plant.
Watering
Proper watering is vital to keep your Boston fern happy and healthy. They need more frequent watering during the warmer months but also require well-draining soil to prevent root rot.
Frequent Watering: Keep the soil moist, especially during hot weather. Water your fern regularly but avoid letting it sit in water.
Good Drainage: Make sure your hanging basket has plenty of drainage holes. This helps prevent water from pooling at the bottom and causing root rot.
Check Soil Moisture: Regularly check the soil moisture. Water when the top inch feels dry to the touch but don’t let the soil dry out completely.
With these tips, your outdoor Boston fern hanging baskets will stay lush, green, and vibrant all season long.
Keep an eye on the weather and adjust your care routine as needed. Happy gardening, and keep it green!
Boston Fern Hanging Basket Care Indoors
My Boston Fern Unboxed
Howdy, indoor gardeners! Keeping your Boston fern hanging basket lush and vibrant indoors is all about creating the right environment.
Let’s chat about what your fern needs to thrive inside your home.
Light Conditions
Boston ferns love bright, indirect light. Too much direct sunlight can scorch their delicate fronds.
Bright, Indirect Light: Place your fern near a window where it gets plenty of indirect light. East-facing windows are perfect.
Avoid Direct Sunlight: Direct sun can burn the leaves, so keep it out of the path of those harsh rays. A sheer curtain can help filter the light.
Humidity
High humidity is a must for Boston ferns. They thrive in moist air, which helps prevent the fronds from drying out and turning brown.
Humidifier: Using a humidifier nearby can keep the air moist and your fern happy.
Pebble Tray: Place the fern’s pot on a tray filled with pebbles and water. As the water evaporates, it increases the humidity around the plant.
Regular Misting: Give your fern a gentle misting with water every day or so to boost humidity.
Ideal Spots: Bathrooms and kitchens are naturally more humid, making them ideal spots for your fern.
Temperature
Keeping a consistent temperature is crucial for your Boston fern’s health. They prefer it warm but not too hot.
Consistent Temperature: Aim to keep the indoor temperature between 60-75°F. This range is perfect for their growth.
Avoid Drafts and Heating Vents: Sudden temperature changes from drafts or heating vents can stress your fern. Keep it away from these areas to maintain a stable environment.
By providing the right light, humidity, and temperature, you’ll keep your indoor Boston fern hanging basket thriving.
With just a little attention, your fern will reward you with lush, green fronds that add a touch of nature to your indoor space.
Boston Fern Hanging Basket Care Watering
Watering your Boston fern hanging basket right is key to keeping it lush and healthy. Let’s break down the watering schedule for different seasons.
Watering Schedule
During the growing season, your Boston fern needs regular watering to stay vibrant.
Every 2-3 Days: Give your fern a good drink every 2-3 days. Just make sure the top inch of soil dries out between waterings.
Check Soil Moisture: Stick your finger into the soil to check how damp it is. If it feels dry, it’s time to water.
Winter Watering
In winter, your Boston fern’s watering needs change a bit.
Reduce Frequency: Cut back on watering during the colder months. The fern isn’t growing as much and doesn’t need as much water.
Dry to the Touch: Only water when the soil feels dry to the touch. Overwatering in winter can lead to root rot, so be careful.
By following these watering tips, your Boston fern hanging basket will thrive, looking green and healthy all year round.
Boston Fern Hanging Basket Light
Getting the light just right for your Boston fern hanging basket is super important to keep it thriving. Here’s what you need to know.
Optimal Light
Bright, indirect sunlight is the sweet spot for Boston ferns.
Bright, Indirect Sunlight: Place your fern near an east-facing window or in areas with filtered light. This gives them plenty of light without the harsh rays.
Filtered Light: If you don’t have an east-facing window, a sheer curtain can help filter the light from a south or west window.
Avoid Direct Sun
Too much direct sunlight can scorch those delicate fronds.
Direct Sunlight: Keep your fern out of direct sun, especially during peak hours. Direct sunlight can burn the leaves and cause browning.
Sheer Curtains: Use sheer curtains to diffuse the light or move your fern to a shaded area during the hottest parts of the day.
By making sure your Boston fern gets the right kind of light, you’ll keep it looking lush and green. Happy growing, and keep it green!
Boston Fern Temperature and Humidity
Keeping your Boston fern at the right temperature and humidity levels is essential for its health and happiness. Here’s how to create the perfect environment for your leafy friend.
Temperature Range
Boston ferns like it warm but not too hot.
Ideal Temperatures: Keep your fern in a spot where the temperature stays between 60-75°F. This is their comfort zone for optimal growth.
Protect from Cold: Make sure to protect your fern from temperatures below 50°F. If it gets too chilly, bring your fern indoors or move it to a warmer spot.
Humidity Needs
High humidity is a must for Boston ferns. They thrive in moist environments. In most homes, indoor ferns will not have enough humidity without adding some.
Misting: Regularly mist your fern with water to keep the humidity up. This helps prevent the fronds from drying out and turning brown.
Pebble Trays: Place your fern’s pot on a tray filled with pebbles and water. As the water evaporates, it adds humidity around the plant.
Humid Rooms: Bathrooms and kitchens are great spots for your fern because they naturally have higher humidity levels. Your fern will love it there!
By keeping your Boston fern in the right temperature range and maintaining high humidity, you’ll ensure it stays lush and healthy.
Boston Fern Soil Mix (I Recommend Coco Coir)
Let’s chat about the best soil mix for your Boston fern hanging basket. The right soil can make a world of difference in keeping your fern happy and healthy.
Best Soil Types
Boston ferns need a soil mix that retains moisture but also drains well. Here’s a great combination to try:
Peat Moss: Helps retain moisture and provides an acidic pH that ferns love.
Perlite: Improves drainage and aeration, preventing the soil from becoming compacted.
Coco Coir: An excellent addition to your soil mix. It retains moisture without becoming waterlogged and helps keep the soil aerated.
Benefits of Coco Coir
Coco coir is a fantastic choice for your fern’s soil mix. Here’s why:
Moisture Retention: Coco coir holds water well, ensuring your fern’s roots stay hydrated but not soaked. This is crucial for preventing root rot.
Good Aeration: It provides great aeration for the roots, helping them to breathe and grow healthily.
Sustainable: Coco coir is made from coconut husks, making it a more sustainable choice compared to peat moss.
By using a well-draining potting mix with peat moss, perlite, or a coco coir perlite mix, you’ll give your Boston fern the perfect environment to thrive. Happy planting, and keep it green!
Boston Fern Hanging Basket Repotting
Hey there, plant lovers! Repotting your Boston fern hanging basket is essential to keep it healthy and thriving. Let’s dive into when and how to give your fern a fresh start in a new pot.
When to Repot
Repotting is important to give your fern room to grow and prevent it from becoming root-bound.
Every 1-2 Years: Plan to repot your Boston fern every 1-2 years. This keeps the soil fresh and provides space for new root growth.
Signs of Being Root-Bound: If you notice roots growing out of the drainage holes or the fern seems to be struggling despite good care, it’s likely time to repot.
Best Time: Spring is the ideal time for repotting. This is when the fern is gearing up for its growing season, so it’ll adjust well to its new home.
How to Repot
Repotting is a straightforward process that can give your fern a new lease on life.
Choose a Slightly Larger Pot: Select a pot that’s one size bigger than the current one. This gives the roots more space to grow without overwhelming them.
Fresh Potting Mix: Use a well-draining mix like the one we discussed with peat moss, perlite, and coco coir. This mix retains moisture but also ensures good drainage.
Ensure Good Drainage: Make sure your new pot has drainage holes. Good drainage is crucial to prevent root rot.
Repotting Steps:
Remove the Fern: Gently take the fern out of its current pot. You might need to tap the pot or use a knife to loosen the edges.
Trim the Roots: If the roots are very tangled or circling the bottom, trim them slightly to encourage new growth.
Place in New Pot: Put a layer of fresh potting mix in the bottom of the new pot, place the fern in, and fill around the sides with more mix. Press gently to secure the plant.
Water Thoroughly: Give your fern a good watering to help it settle into its new home.
Repotting your Boston fern may seem like a chore, but it’s a great way to keep your plant healthy and vibrant. Happy repotting, and keep it green!
Boston Fern Propagation
Hey there, fellow plant enthusiasts! If you’re looking to expand your collection of Boston ferns, propagation is the way to go.
It’s a fun and rewarding process that can give you more lush ferns to enjoy or share with friends.
Methods
There are several ways to propagate Boston ferns, but the easiest and quickest method is through division or using offsets.
You can also try propagating through spores, but it takes longer and requires more patience.
Division: This is the simplest method. You’ll be splitting the root ball into smaller sections, each with its own fronds and roots.
Offsets: Boston ferns produce little offshoots that can be separated and planted on their own.
Spores: This method involves collecting and planting the spores from the underside of the fronds. It’s more complex and takes more time to see results.
Step-by-Step Guide
Division Method
Prepare Your Tools: You’ll need a clean, sharp knife or garden shears. Also, have fresh potting soil and new pots ready.
Remove the Fern: Gently take the Boston fern out of its current pot. You might need to tap the pot or carefully work around the edges to loosen the roots.
Divide the Root Ball: Using your knife or shears, divide the root ball into sections. Each section should have several fronds and a good amount of roots. Aim for at least two to three fronds per section to ensure a healthy start.
Pot the Divisions: Fill new pots with fresh potting mix. Place each division into its own pot, filling around the roots with more mix. Press the soil gently around the roots to secure the plant.
Water Thoroughly: Give each new plant a good drink of water. This helps settle the soil and reduces transplant shock.
Offsets Method
Locate Offsets: Find small offshoots that have formed around the base of your Boston fern.
Separate Offsets: Gently pull or cut the offsets away from the main plant, ensuring each offset has some roots attached.
Pot the Offsets: Plant each offset in a small pot with fresh potting soil.
Water and Care: Water the offsets well and place them in a spot with bright, indirect light.
Propagation can be a bit of a project, but it’s a great way to grow your fern family. Give it a try and enjoy watching your new ferns thrive!
Common Boston Fern Hanging Basket Problems
Boston ferns in hanging baskets can dry out faster and deal with more airflow than potted ferns, so problems can show up quickly. The good news is most issues are easy to fix once you know what to look for.
🍂 Brown Tips on Boston Fern
Brown tips usually mean low humidity, dry soil, or too much direct sun. Hanging baskets lose moisture faster, so check the soil often and raise humidity if the air is dry.
🌿 Yellow Fronds
Yellow fronds are often caused by overwatering, poor drainage, or roots staying too wet. Make sure excess water drains freely and never let the basket sit in standing water.
💧 Drooping Fronds
Drooping fronds can happen when the basket dries out too much or the plant is stressed from heat or drafts. Check moisture levels and avoid placing your fern near vents or hot windows.
🔥 Crispy Leaves
Crispy leaves are a strong sign the fern is drying out too often. Hanging baskets dry quicker than regular pots, especially outdoors or in warm rooms, so watering may need to be more frequent.
🪣 Hanging Basket Drying Out Too Fast
This is one of the biggest hanging basket problems. Smaller baskets, heat, and wind can dry the root zone quickly. A coco coir and perlite mix helps hold moisture better while still draining well.
🪱 Root Rot
Root rot happens when the basket stays soggy for too long. Signs include yellowing, drooping, and a sour smell from the soil. Good drainage and consistent but careful watering are key.
🕷️ Spider Mites
Spider mites love dry indoor air and can damage Boston ferns fast. Look for fine webbing, speckled fronds, or dull growth. Raise humidity and rinse the plant regularly to help prevent them.
With hanging basket ferns, the biggest thing to watch is moisture. Once you get watering and humidity dialed in, Boston ferns usually bounce back fast and stay lush for a long time.
FAQs
Howdy, fern enthusiasts! I’ve gathered some common questions about Boston fern hanging basket care and answered them to help you keep your ferns lush and happy. Let’s dive right in!
Q. How often should I water a Boston fern hanging basket?
A. Water every 2-3 days during the growing season and reduce watering in winter. Ensure the top inch of soil is dry before watering again.
Q. How do you keep hanging Boston ferns alive?
A. Provide bright, indirect light, maintain high humidity, and water regularly without waterlogging. These conditions will keep your fern thriving.
Q. Can I put my Boston fern outside?
A. Yes, but bring it indoors before temperatures drop below 50°F to protect it from cold damage.
Q. How to care for Boston ferns outside?
A. Place them in morning sunlight and afternoon shade, water regularly, and ensure good drainage to keep the roots healthy.
Q. How to make Boston fern bushy?
A. Regularly prune dead fronds and ensure it gets enough humidity and light. This encourages fuller growth.
Q. How do I make my Boston fern happy?
A. Provide consistent moisture, high humidity, and indirect light. These conditions will keep your fern lush and vibrant.
Q. Why is my outdoor Boston fern turning brown?
A. Possible causes include low humidity, overwatering, or too much direct sunlight. Adjust these factors to keep your fern healthy.
Q. What does an overwatered Boston fern look like?
A. Yellowing fronds, wilting despite wet soil, and signs of root rot are indicators of overwatering. Adjust your watering schedule accordingly.
I hope these answers help you keep your Boston fern hanging baskets looking their best. Happy growing, and keep it green!
Conclusion
Hey there, fern friends! We’ve covered a lot about taking care of your Boston fern hanging baskets. Let’s do a quick recap and some encouragement to keep those ferns thriving.
Recap of Main Points
Light Conditions: Place your fern in bright, indirect light. Avoid direct sunlight to prevent scorching.
Watering: Water every 2-3 days during the growing season. Reduce watering in winter and ensure the top inch of soil dries out between waterings.
Humidity: Maintain high humidity with misting, pebble trays, or placing your fern in a humid room like a bathroom.
Temperature: Keep indoor temperatures between 60-75°F. Protect from temperatures below 50°F.
Soil Mix: Use a well-draining potting mix with peat moss, perlite, and coco coir to retain moisture while ensuring good drainage.
Repotting: Repot every 1-2 years or when the fern becomes root-bound, ideally in spring.
Propagation: Propagate through division, offsets, or spores to expand your fern family.
Give Taking care of Boston ferns a Try
Taking care of Boston ferns can be a bit of a challenge, but with the right care, they can become a stunning addition to your home or garden.
Remember, it’s all about providing the right light, humidity, and watering routine. Don’t be afraid to experiment with different spots and methods until you find what works best for your fern.
Happy gardening, and keep it green! Your Boston fern hanging baskets are sure to thrive with the love and attention you give them.
Keep up the great work, and enjoy the lush beauty they bring to your space.