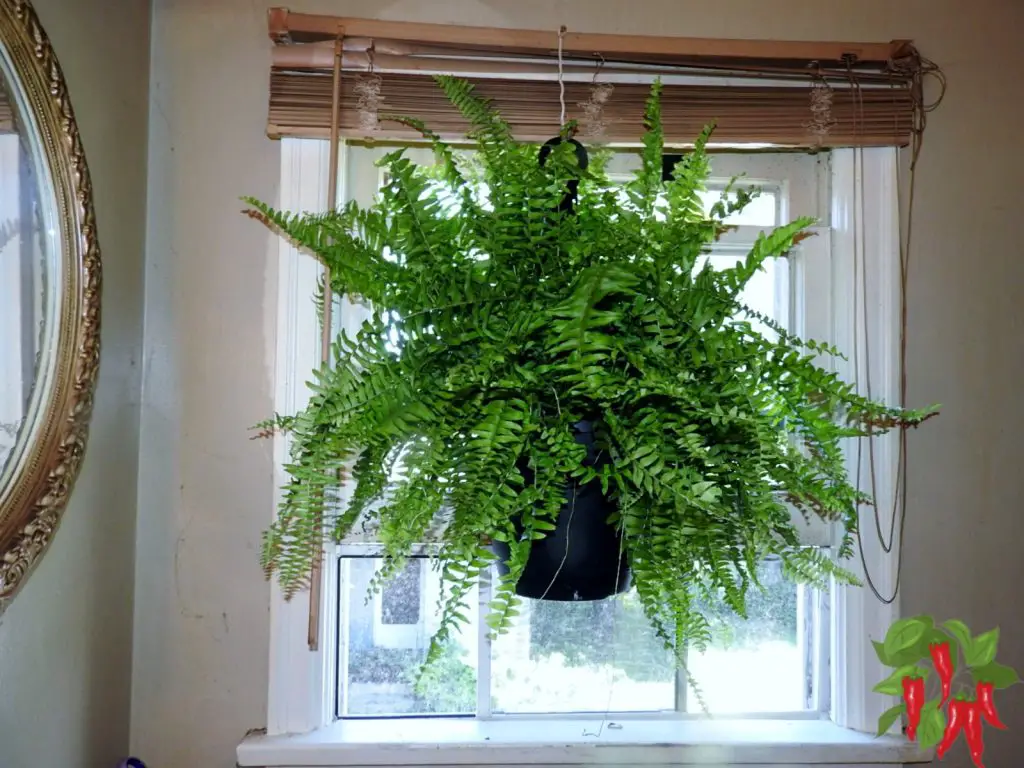
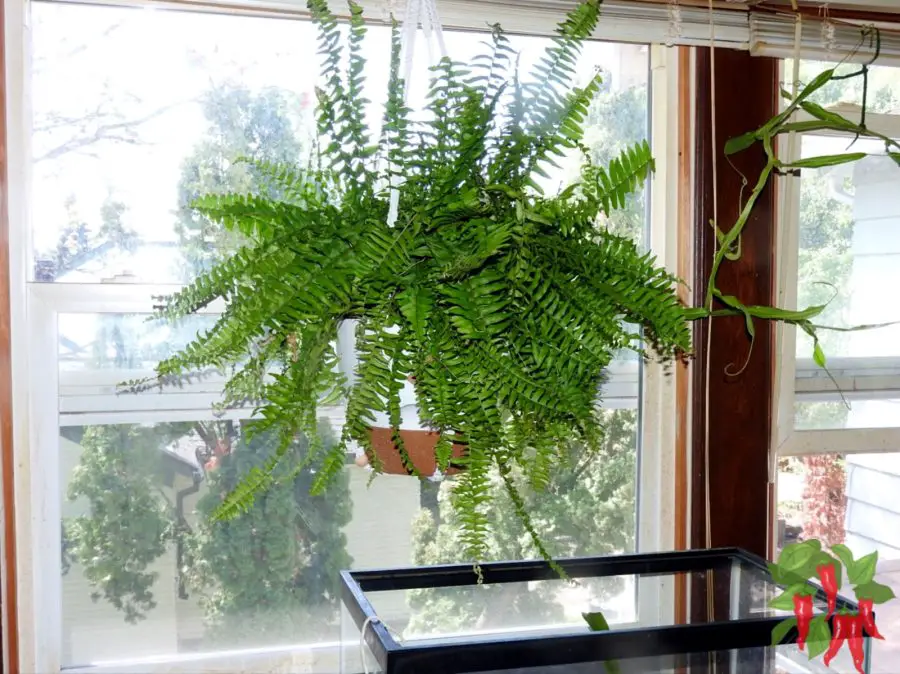
After growing Boston ferns indoors and in hanging baskets, I’ve learned they’re one of the best plants for adding soft, lush greenery to indoor spaces when you get the basics right.
Boston ferns love steady moisture, bright filtered light, and higher humidity than most houseplants. Once you dial those in, they reward you with full, arching fronds and strong growth.
This guide covers Boston fern indoor care, including watering, humidity, lighting, soil, pruning, and how to fix the most common problems before they get worse.
🌿 What You’ll Learn
How often to water a Boston fern indoors
The best light and humidity levels for healthy growth
Why coco coir works well for Boston ferns
How to prune and propagate Boston ferns
How to fix brown tips, yellow fronds, and pest problems
Boston fern indoor care is all about bright indirect light, steady moisture, and high humidity. Keep the soil lightly moist, avoid direct sun, and use a well-draining mix like coco coir with perlite for the best results.
Hey there, fellow plant enthusiasts! Today, we’re diving into the world of Boston ferns, one of the most beloved houseplants around.
These green beauties are not just low-maintenance but also bring a touch of nature indoors.
Stick around as we explore everything you need to know to keep your Boston fern happy and thriving inside your home.
Boston Fern Care – What is a Boston Fern?
Boston ferns ( ‘Bostoniensis’) are well-loved houseplants known for their graceful, arching fronds and vibrant green color. Nephrolepis exaltata is its botanical name.
These ferns have been popular for decades due to their air-purifying qualities and the fresh touch of nature they bring to indoor spaces.
They’re especially favored for their ability to thrive in indirect light and their relatively low-maintenance nature.
Nephrolepis exaltata, known as the sword fern or Boston fern, is a species of fern in the family Nephrolepidaceae. It is native to the Americas. This evergreen plant can reach as high as 40–90 centimetres (16–35 in), and in extreme cases up to 1.5 metres (4 ft 11 in). Wikipedia
Boston Fern Live Plant Unboxing
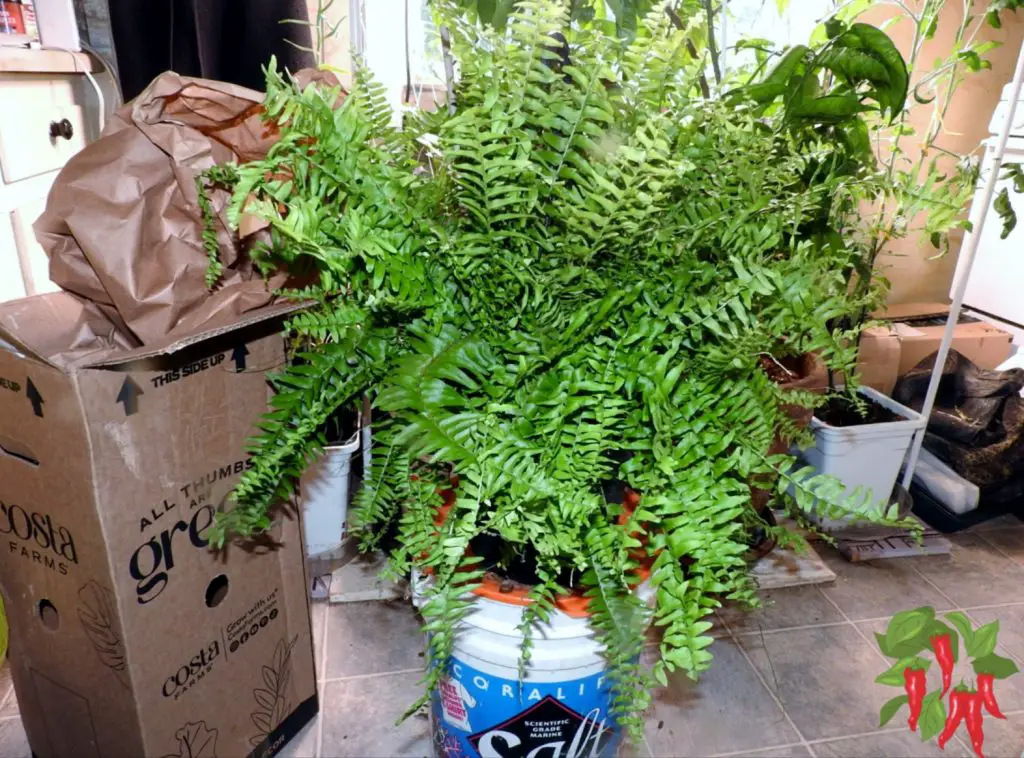
Here is my Boston Fern Live Plant Unboxing. I am adding a bunch of new houseplants as hanging baskets.
This plant is gorgeous and it arrived carefully packed and in great shape. If you want one for yourself there’s a link. If you buy from that link I may earn a small commission.
Keeping a Boston fern healthy indoors involves providing the right light, temperature, and humidity.
They prefer bright, indirect sunlight and temperatures between 65-75°F. High humidity is crucial for these tropical plants, and they enjoy being misted regularly.
Proper watering is essential—keeping the soil consistently moist but not soggy. With regular pruning and occasional grooming, Boston ferns can remain lush and attractive, enhancing any home decor.
By following these care tips, you can enjoy the beauty and benefits of Boston ferns in your home without the hassle. Let’s dive into the specifics to ensure your fern remains a stunning centerpiece in your indoor garden.
Boston Fern Benefits
Howdy folks! If you’re considering bringing a Boston fern into your home, you’re in for a treat. These lovely plants are more than just eye candy—they offer some fantastic benefits too.
Air Purification
Boston ferns are natural air purifiers. They help remove toxins like formaldehyde, xylene, and toluene from the air, making your indoor environment healthier. It’s like having a little green air filter right in your living room!
Aesthetic Appeal
There’s no denying it—Boston ferns are downright gorgeous. Their lush, cascading fronds add a touch of elegance to any room. Whether you hang them up high or let them spill over a shelf, they bring a refreshing, natural vibe to your home decor.
Health Benefits
Besides cleaning the air, Boston ferns also improve indoor humidity levels. They release moisture into the air, which can help with respiratory health and keep your skin from drying out.
It’s a win-win for both your home’s air quality and your well-being.
There you have it—just a few reasons why Boston ferns are a fantastic addition to any indoor space.
Keep reading, and I’ll share more tips on how to care for these beautiful plants!
Boston Fern: Indoor or Outdoor?
Alright, let’s chat about where to grow your Boston fern—indoors or outdoors. Both environments have their perks, so let’s break it down.
Indoor Growth Conditions
Boston ferns are fantastic indoor plants. They thrive in bright, indirect light and love high humidity.
Indoors, you can easily control their environment to keep them happy. Just place them near a window with filtered light and mist them regularly.
Keep the temperature between 65-75°F, and your fern will be a lush, green beauty.
Outdoor Growth Conditions
If you’ve got the space and the right climate, (Hardiness zones: USDA 10-12) Boston ferns can also flourish outside.
They prefer a shady spot with indirect sunlight—think under a tree or on a covered porch.
Outdoor ferns benefit from natural humidity and temperature fluctuations but watch out for extreme temperatures.
If it gets too hot or cold, consider bringing them inside.
Best Practices for Each Environment
Indoors:
Place near east-facing windows or behind sheer curtains.
Maintain high humidity with misting or pebble trays.
Keep temperatures steady and avoid drafts.
Outdoors:
Choose a shaded spot that avoids direct afternoon sun.
Ensure they’re in well-draining soil to prevent root rot.
Bring them indoors if temperatures drop below 35°F or rise above 95°F.
Whether you grow your Boston fern inside or out, the key is to mimic their natural habitat as closely as possible.
Happy ferns mean happy homes! Keep reading for more tips on keeping your ferns in tip-top shape.
Boston Fern Winter Care
Winter can be a challenging time for Boston ferns, but with a few adjustments, you can keep your fern healthy and happy through the colder months.
Indoor Boston Fern Houseplants
Most heated homes will be too dry for Boston Ferns without providing them additional humidity.
Light: Keep your indoor fern in a location with bright, indirect sunlight. East-facing windows are ideal, but avoid direct sun which can scorch the fronds.
Temperature: Maintain indoor temperatures between 60-75°F. Avoid placing the fern near drafts, heaters, or fireplaces to prevent stress from sudden temperature changes.
Humidity: Boston ferns thrive in high humidity. Use a humidifier, mist the fern regularly, or place it on a tray filled with pebbles and water to increase humidity.
Reducing Watering and Maintaining Humidity
Watering: Reduce the frequency of watering during winter. Allow the top inch of soil to dry out between waterings to prevent root rot.
Humidity: Maintain high humidity levels by misting the fern regularly or using a humidifier. The pebble tray method can also help keep humidity levels up.
Maintenance: Regularly check for dead or yellowing fronds and remove them to keep the plant healthy and encourage new growth.
By bringing your Boston fern indoors and adjusting its care routine, you can ensure it stays healthy through the winter months.
This way, your fern will be ready to thrive again come spring.
Keeping a consistent care routine will help your indoor Boston fern houseplants remain vibrant and lush, adding a touch of green to your home all year round.
Boston Fern Water Requirements
Keeping your Boston fern properly hydrated is key to its health and lush appearance. Here’s a detailed watering schedule and tips to ensure your fern gets the right amount of moisture.
Detailed Watering Schedule and Tips
Spring and Summer: During the growing season, water your Boston fern every 2-3 days. The top inch of soil should be kept consistently moist. In warmer weather, you might need to water more frequently.
Fall and Winter: As growth slows, reduce watering to every 7-10 days. Allow the top inch of soil to dry out between waterings to prevent root rot.
Watering Method: Water thoroughly until water drains out of the bottom of the pot. Ensure good drainage to avoid waterlogging. Using room-temperature water is ideal to prevent shocking the roots.
Humidity: In addition to watering, maintaining high humidity is crucial. Mist the fern regularly or use a humidifier to keep the environment humid. Placing the fern on a tray filled with pebbles and water can also help.
Signs of Proper Hydration vs. Over/Under Watering
Proper Hydration: Healthy, vibrant green fronds with no signs of browning or yellowing. The soil remains moist but not soggy, and the plant exhibits steady, healthy growth.
Overwatering: Yellowing fronds, wilting despite wet soil, and root rot are common signs. The soil may remain too wet or feel soggy to the touch.
Underwatering: Browning frond tips, dry and brittle fronds, and slow growth. The soil may feel dry several inches deep, and the fern might look droopy or stressed.
Keeping an eye on these signs and adjusting your watering routine accordingly will help your Boston fern thrive.
Regularly check the soil moisture and adjust the watering frequency to match the fern’s needs throughout the year.
With the right balance of moisture and care, your Boston fern will stay lush and beautiful all year round.
Boston Fern Light Requirements Indoors
Let’s chat about the ideal light conditions for your indoor Boston fern and how proper placement can keep it healthy and happy.
Ideal Light Conditions and Placement in the Home
Boston ferns thrive in bright, indirect sunlight. They’re not fans of direct sun, which can scorch their delicate fronds. Here’s how to get it just right:
East-Facing Windows: Perfect spot for your fern. It gets morning sunlight, which is gentle enough for their liking.
Filtered Light: If you’ve got south or west-facing windows, use a sheer curtain to diffuse the light. This prevents the harsh rays from burning the fronds.
Bright Rooms: Placing your fern in a room that gets a lot of natural light but not direct sunlight works well too. Think of spots where the light is bright but indirect.
Impact of Light on Fern Health
Light is crucial for your fern’s well-being. Here’s why:
Healthy Growth: Adequate light helps your fern grow lush and green. Without enough light, your fern may become leggy, with sparse fronds.
Color and Vitality: Proper lighting keeps the fronds vibrant. Too little light can lead to pale, dull leaves, while too much direct light can cause brown, crispy edges.
Overall Health: Light impacts photosynthesis, which is how your fern gets its energy. Balanced light ensures your fern stays robust and healthy.
So, find that sweet spot in your home where the light is just right. Your Boston fern will thank you by staying green and gorgeous! Keep reading for more tips on how to care for your fern and keep it thriving.
Boston Fern Humidity
If there’s one thing Boston ferns love, it’s humidity. Let’s dive into why humidity is so important and some fun ways to keep your fern feeling tropical indoors.
Importance of Humidity
Boston ferns are native to tropical climates, which means they thrive in humid environments.
High humidity levels help keep their fronds lush and green, preventing the dreaded browning tips.
When the air is too dry, Boston ferns can suffer, showing signs like crispy edges and wilting.
Keeping the humidity up is key to ensuring they stay vibrant and healthy.
Creative Ways to Maintain High Humidity Indoors
Misting: Give your fern a light misting with water once or twice a day. This adds a little extra moisture to the air around the plant.
Pebble Tray: Place your fern’s pot on a tray filled with pebbles and water. As the water evaporates, it adds humidity around the plant.
Humidifier: Invest in a small humidifier to keep the air moist. This is especially helpful in dry climates or during winter when indoor air tends to be drier.
Group Plants Together: Cluster your ferns and other humidity-loving plants together. They create a microenvironment with higher humidity, helping each other out.
Bathroom Placement: If your bathroom has a window with indirect light, it’s a perfect spot for your fern. The steam from showers adds lots of humidity.
By keeping the humidity levels up, you’ll ensure your Boston fern remains happy and healthy.
Experiment with these methods to find what works best in your home, and enjoy watching your fern thrive! Keep those fronds green, folks!
Boston Fern Care Temperature
Let’s talk about the perfect temperature conditions for your Boston fern and how to manage those seasonal changes.
Optimal Temperature Ranges and Seasonal Adjustments
Boston ferns thrive in temperatures between 65-75°F. They enjoy the warmth but can’t handle extreme heat or cold. Here’s how to keep them comfy year-round:
Spring and Summer: Keep your fern in a spot where temperatures are stable, ideally within the 65-75°F range. They love the warmth but make sure they’re not exposed to direct sunlight, which can increase the temperature too much.
Fall and Winter: As temperatures drop, make sure your fern is protected from the cold. If it gets below 50°F, bring your fern indoors or move it to a warmer spot. Maintaining indoor temperatures between 60-75°F during winter will keep your fern happy.
Effects of Temperature Fluctuations
High Temperatures: If the temperature rises above 95°F, your fern might start to suffer. You’ll notice wilting fronds and potential browning edges. It’s important to move them to a cooler spot or provide some shade to keep them from overheating.
Low Temperatures: Cold drafts and temperatures below 35°F can be harmful. The fern’s fronds might turn brown and crispy if they’re exposed to the cold for too long. Always ensure your fern is in a draft-free spot during colder months.
Sudden Changes: Rapid temperature changes can stress your fern out. Avoid placing it near heaters, air conditioners, or open windows where the temperature can fluctuate quickly. Consistency is key to keeping your fern in top shape.
By maintaining the right temperatures and making necessary adjustments with the seasons, your Boston fern will stay lush and vibrant.
Keep an eye on those temps, and your fern will thank you with its beautiful, green fronds!
Boston Fern Soil (Coco Coir)
Hey there, green thumbs! Let’s dig into the best soil options for your Boston fern and why coco coir is a fantastic choice.
Best Soil Types and Mixtures
Boston ferns thrive in well-draining soil that retains moisture without becoming soggy. Here are some top picks for your fern:
Standard Potting Mix: A good quality potting mix works well. Look for one that’s designed for houseplants and contains a mix of peat, pine bark, and perlite.
Homemade Mix: You can create your own mix with equal parts of peat moss, perlite, and vermiculite. This combination provides excellent drainage and moisture retention.
Coco Coir Blend: Mixing coco coir with perlite and a bit of compost creates an ideal environment for ferns. Coco coir is a natural fiber extracted from coconut husks and is known for its water retention and aeration properties.
Benefits of Using Coco Coir for Ferns
Coco coir is a game-changer for Boston ferns. Here’s why it’s so beneficial:
Excellent Water Retention: Coco coir holds water well, ensuring your fern’s roots stay moist without becoming waterlogged. This is crucial for preventing root rot while keeping the fern hydrated.
Great Drainage: While it retains moisture, coco coir also drains excess water effectively. This balance is perfect for Boston ferns, which need consistent moisture but can’t sit in soggy soil.
pH Neutral: Coco coir is naturally pH neutral, providing a stable environment for your fern’s roots. This helps avoid the pH swings that can sometimes occur with other types of soil.
Eco-Friendly: Made from coconut husks, coco coir is a renewable resource. It’s a sustainable choice that’s kind to the environment, unlike peat, which is less sustainable.
By using coco coir or a coco coir blend, you’ll give your Boston fern the perfect foundation to thrive.
It’s all about creating a balance of moisture and aeration, and coco coir does just that. So, get your hands on some coco coir, mix it up, and watch your fern flourish!
Boston Fern Propagation
If you’re looking to expand your collection of Boston ferns, propagation is the way to go. Let’s dive into the methods of division, spores, and using runner offshoots, and I’ll walk you through a step-by-step guide.
Methods: Division, Spores, and Runner Offshoots
Division: This is the most common and easiest method to propagate Boston ferns. It involves splitting the plant into smaller sections, each with its own root system.
Spores: Boston ferns produce spores on the underside of their fronds. Propagating from spores is more complex and takes longer, but it’s a fascinating process if you’re up for the challenge.
Runner Offshoots: Boston ferns sometimes produce small ferns on runners, or stolons. These offshoots can be separated and potted to grow new plants.
Step-by-Step Propagation Guide Division Method
A great time to do this is when you decide it’s time to repot your fern, usually every 3 years in the spring.
Prepare Your Tools: Get a clean, sharp knife or garden shears. You’ll also need fresh potting soil and new pots for the divisions.
Remove the Fern: Gently take the Boston fern out of its pot. You might need to tap the sides of the pot to loosen it up.
Divide the Root Ball: Carefully separate the root ball into smaller sections. Each section should have several fronds and a healthy portion of roots. Use your knife or shears to cut through any tough roots.
Prepare New Pots: Fill the new pots with a mix of coco coir and perlite or your preferred potting mix.
Plant the Divisions: Place each division into a new pot, ensuring the roots are spread out and covered with soil. Press the soil gently around the roots to secure the plant.
Water Thoroughly: Give each new plant a good drink of water until it drains out the bottom. Keep the soil moist but not soggy as the plants establish themselves.
Runner Offshoots Method
Identify Offshoots: Look for small ferns growing on runners or stolons extending from the main plant. These are your new baby ferns!
Prepare Pots: Get small pots ready with a mix of coco coir and perlite or your preferred potting mix.
Detach the Offshoots: Gently separate the offshoots from the main plant, ensuring they have some roots attached.
Plant the Offshoots: Place each offshoot in a prepared pot, making sure the roots are covered with soil. Press the soil gently around the base of the offshoot to secure it.
Water Lightly: Give the newly potted offshoots a light watering. Keep the soil moist but not soggy.
Provide Proper Care: Place the pots in a bright, indirect light location and maintain high humidity. Mist regularly or use a humidifier to keep the environment moist.
Spores Method
This method is really slow so be patient.
Collect Spores: Wait until the spores on the underside of the fronds turn brown and mature. Cut off a few fronds and place them in a paper bag to dry.
Prepare the Planting Medium: Fill a shallow tray with a mixture of peat moss and sand or a specialized spore-growing medium.
Sow the Spores: Sprinkle the dried spores evenly over the surface of the planting medium.
Maintain Humidity: Cover the tray with plastic wrap or place it in a plastic bag to keep the humidity high. Mist the medium lightly to keep it moist.
Provide Light: Place the tray in a spot with bright, indirect light. Avoid direct sunlight as it can be too intense.
Wait for Germination: Be patient! It can take several weeks to months for the spores to germinate and tiny ferns to start appearing.
Transplant Seedlings: Once the seedlings are large enough to handle, carefully transplant them into individual pots with regular potting soil.
Propagating Boston ferns can be a rewarding project, whether you’re splitting an existing plant, growing new ones from spores, or using runner offshoots.
Give it a try, and soon you’ll have a whole family of ferns to enjoy! Keep those green thumbs busy, and happy growing!
Pruning Boston Ferns
Pruning your Boston fern is a key part of keeping it healthy and looking its best. Let’s dive into when and how to prune your fern, along with the benefits of regular pruning.
When and How to Prune
When to Prune: The best times to prune your Boston fern are in January or early spring. Pruning in January allows the plant to go dormant, while spring pruning encourages new growth. Regularly check your fern and remove any dead or yellowing fronds as needed.
How to Prune: Grab a pair of clean, sharp scissors or garden shears. Here’s what you need to do:
Remove Dead Fronds: Start by trimming off any dead or brown fronds at the base of the plant. This helps prevent disease and keeps your fern looking tidy.
Thin Out Dense Areas: If your fern is looking a bit crowded, thin out some of the older, less healthy fronds. This improves air circulation and allows light to reach more of the plant.
Shape Your Fern: Trim around the edges to shape your fern. Avoid cutting the top growth; instead, focus on the sides to maintain its natural form.
Benefits of Regular Pruning
Healthier Plant: Pruning removes dead and diseased fronds, preventing the spread of pests and diseases. This keeps your fern healthy and vibrant.
Encourages New Growth: Cutting back old fronds stimulates new growth, making your fern fuller and more lush.
Improved Air Circulation: Thinning out dense areas allows better air circulation, which reduces the risk of mold and mildew.
Neater Appearance: Regular pruning keeps your fern looking neat and well-groomed, enhancing its aesthetic appeal.
Pruning your Boston fern is a simple task that pays off big time in terms of plant health and appearance.
So grab those shears and give your fern a little TLC—it’ll reward you with beautiful, lush growth all year round.
Boston Fern Maintenance
Keeping your Boston fern in tip-top shape requires some routine care and a few long-term health tips. Let’s break it down so you can keep that fern looking lush and green.
Routine Care Tasks and Frequency
Watering: Keep the soil consistently moist but not waterlogged. Water every 2-3 days during the growing season and every 7-10 days in winter. Always let the top inch of soil dry out before watering again.
Misting: Boston ferns love humidity. Mist the fronds daily or use a humidifier to maintain a moist environment, especially during the dry winter months.
Fertilizing: Feed your fern with a balanced liquid fertilizer diluted to half strength every month during the growing season (spring through early fall). No need to fertilize in winter.
Pruning: Regularly remove dead or yellowing fronds to keep your fern healthy and looking neat. Prune more heavily in January or early spring to encourage new growth.
Dusting: Gently wipe the fronds with a damp cloth every few weeks to remove dust. This helps the plant photosynthesize more efficiently and keeps it looking fresh.
Long-Term Health Tips
Repotting: Every 1-2 years, repot your Boston fern to provide fresh soil and more room for growth. Use a well-draining potting mix, like a blend of coco coir and perlite.
Light: Ensure your fern gets bright, indirect sunlight. Avoid direct sun as it can scorch the fronds. East-facing windows are ideal, but filtered light from a south or west window works too.
Temperature: Maintain a consistent temperature between 65-75°F. Avoid placing your fern near drafts, heaters, or air conditioners to prevent stress from sudden temperature changes.
Humidity: Boston ferns thrive in high humidity. In addition to misting, you can place the pot on a tray filled with pebbles and water. As the water evaporates, it increases the humidity around the plant.
Pest Control: Regularly check for pests like spider mites and aphids. If you spot any, treat them with insecticidal soap or neem oil to prevent infestations from spreading.
Seasonal Adjustments: Adjust your care routine with the seasons. Water less frequently in winter and ensure the fern is protected from cold drafts. Increase humidity during dry periods to keep the fronds lush.
By sticking to these routine care tasks and keeping an eye on your fern’s long-term needs, you can enjoy a healthy, vibrant Boston fern for years to come.
Boston Fern Problems
Boston ferns are beautiful indoors, but they will let you know pretty quickly when something is off. Most problems come from low humidity, watering mistakes, too much sun, or poor drainage.
🍂 Brown Tips on Boston Fern
Brown tips are usually caused by dry indoor air, inconsistent watering, or too much direct sun. Increase humidity, keep the soil lightly moist, and move the fern away from harsh sunlight.
🌿 Yellow Fronds
Yellow fronds often point to overwatering, poor drainage, or low nutrients. Check that the pot has drainage holes and avoid letting the fern sit in standing water. Feed lightly during the growing season if growth looks weak.
💧 Drooping Fronds
Drooping fronds can happen when the fern is too dry, too wet, or exposed to sudden temperature changes. Check the soil before watering and keep the plant away from heaters, air conditioners, and cold drafts.
🔥 Crispy Leaves
Crispy leaves are usually a sign of low humidity or underwatering. Boston ferns like moist air, so a humidifier, pebble tray, or grouping plants together can help keep the fronds softer and greener.
🪱 Root Rot
Root rot happens when the soil stays soggy for too long. Signs include yellowing, wilting, and black or mushy roots. Use a well-draining mix, empty saucers after watering, and let the top of the soil dry slightly before watering again.
🕷️ Spider Mites
Spider mites can show up in dry indoor conditions. Look for fine webbing, speckled fronds, or dull-looking growth. Rinse the plant well, raise humidity, and treat early with insecticidal soap if needed.
🏜️ Low Humidity Damage
Low humidity damage often shows up as brown edges, crispy tips, shedding fronds, and a thin, tired-looking plant. Boston ferns do best with higher humidity, especially in heated homes during winter.
When a Boston fern starts looking rough, check humidity first, then watering, light, and drainage. Fixing those basics usually brings the plant back into better shape.
Are Boston Ferns Toxic?
Hey there, fellow plant enthusiasts! If you’re wondering whether Boston ferns are safe for your home, especially if you have pets or little ones running around, you’re in the right place.
Toxicity to Pets and Humans
Good news! Boston ferns (Nephrolepis exaltata) are non-toxic to both pets and humans.
That means you can have these lush, green beauties in your home without worrying about your cats, dogs, or kiddos getting sick if they decide to nibble on a frond.
Unlike some houseplants that can be harmful if ingested, Boston ferns are safe and pet-friendly.
So, go ahead and enjoy the beauty of Boston ferns throughout your home. They’re a safe and stunning addition to any space, bringing a touch of greenery without any worry. Happy planting, and keep it green!
Displaying Boston Ferns Indoors
Let’s talk about the best spots in your home to display your Boston fern and some great container choices to make it shine.
Best Locations and Container Choices
East-Facing Windows: These are ideal because they offer gentle morning light. Your fern will soak up enough sunlight without getting scorched.
Bathrooms and Kitchens: High humidity spots like these are perfect for Boston ferns. They’ll thrive in the moisture-rich air.
Living Rooms and Bedrooms: As long as they get indirect light, these rooms are great for adding a touch of greenery.
Decorative Pots: Choose pots that complement your decor. Terra cotta, ceramic, or even woven baskets can add a nice touch.
Plant Stands: Elevate your fern with a stylish plant stand. This adds height and makes it a focal point in the room.
Using Boston Ferns for Interior Decorating
Alrighty, now that we’ve picked the best spots and containers, let’s dive into styling your Boston fern to complement your home decor.
Styling Tips for Various Home Decor Themes
Boho Chic: Pair your fern with macrame hangers, wooden accents, and vibrant textiles. The lush green fronds add a relaxed, natural vibe that’s perfect for boho style.
Modern Minimalist: Use sleek, simple pots in neutral colors. Place your fern on a white or black stand to keep the look clean and modern.
Classic Traditional: Choose ornate, ceramic pots and pair them with rich, wooden furniture. The elegance of the fern complements traditional decor beautifully.
Rustic Farmhouse: Go for galvanized metal containers or distressed wood planters. Pair your fern with other greenery like ivy or succulents for a cozy, farmhouse feel.
Pairing Ferns with Other Plants and Decor Items
Plant Clusters: Group your Boston fern with other houseplants of varying heights and textures. This creates a lush, indoor jungle vibe.
Bookshelves and Mantels: Place your fern on a bookshelf or mantel to add a pop of green. It pairs well with books, candles, and small decorative items.
Entryways: Welcome guests with a Boston fern in the entryway. It sets a fresh, inviting tone as soon as they walk in.
By thoughtfully placing and styling your Boston fern, you can enhance the beauty of your home while keeping your plant happy and healthy. Enjoy decorating, and keep it green!
Boston Fern Indoor Care FAQs
Howdy, folks! I know there are plenty of questions about caring for Boston ferns, so I’ve put together a handy FAQ section to help you out. Let’s get those questions answered!
Q. Do Boston ferns do well indoors?
A. Yes, Boston ferns thrive indoors when they have the right conditions. They need bright, indirect light, high humidity, and consistent moisture. Place them near an east-facing window or in a humid room like a bathroom for best results.
Q. How to keep a Boston fern alive indoors?
A. To keep your Boston fern alive indoors, provide it with bright, indirect light, maintain high humidity, and water it regularly. Ensure the soil stays moist but not soggy, and mist the fronds to increase humidity.
Q. How often do you water a Boston fern inside?
A. Water your Boston fern every 2-3 days during the growing season and every 7-10 days in winter. Always let the top inch of soil dry out between waterings to prevent root rot.
Q. Why is my indoor Boston fern turning brown?
A. Browning fronds can be caused by low humidity, underwatering, or too much direct sunlight. Increase humidity by misting regularly, ensure the soil is consistently moist, and move the fern out of direct sunlight.
Q. What does an overwatered Boston fern look like?
A. An overwatered Boston fern may have yellowing fronds, wilting despite wet soil, and signs of root rot, such as mushy, black roots. Adjust your watering routine to allow the soil to dry out slightly between waterings.
Q. How to revive an indoor Boston fern?
A. To revive an indoor Boston fern, trim off any dead or dying fronds, increase humidity by misting regularly, and adjust your watering schedule to ensure the soil stays consistently moist. Place the fern in a spot with bright, indirect light and avoid direct sun.
Hopefully, these answers help you keep your Boston fern thriving! Keep those questions coming, and as always, keep it green!
Boston Fern Care Indoors Conclusion
Well, folks, we’ve covered a lot of ground on Boston fern care! Let’s quickly recap the key points to make sure you’re all set to keep your ferns lush and thriving.
Recap of Key Points
Light Requirements: Boston ferns love bright, indirect sunlight. Avoid direct sun to prevent scorching the fronds.
Watering: Keep the soil consistently moist but not waterlogged. Water every 2-3 days in the growing season and every 7-10 days in winter.
Humidity: High humidity is essential. Mist your fern regularly, use a humidifier, or place it on a pebble tray.
Temperature: Maintain a temperature range of 65-75°F. Protect your fern from extreme temperatures and drafts.
Soil: Use well-draining soil like a mix of coco coir and perlite. Ensure good drainage to prevent root rot.
Pruning: Regularly trim dead or yellowing fronds and thin out dense areas to improve air circulation.
Propagation: Expand your fern family through division, spores, or runner offshoots.
Pests and Diseases: Keep an eye out for common pests like spider mites and aphids. Treat infestations promptly with insecticidal soap or neem oil.
Try Growing Boston Ferns Indoors
Now that you’re armed with all these tips, why not give growing a Boston fern indoors a try?
Howdy, plant lovers! Here are some excellent resources to help you dive deeper into Boston fern care. These authoritative articles provide a wealth of information and handy tips to ensure your fern thrives indoors and out.
University of Wisconsin Horticulture: This resource offers comprehensive insights into Boston fern care, including ideal growing conditions, soil types, and common issues.
North Carolina Extension Gardener Plant Toolbox: This article provides detailed information on different cultivars of Boston ferns, along with care tips for indoor and outdoor growth.
University of Minnesota Extension: Learn about growing tropical ferns indoors, with a focus on light, humidity, and soil requirements for Boston ferns.
UConn Home & Garden Education Center: This resource covers indoor growing requirements for ferns, including light, temperature, humidity, and common pest issues.

 Boston Fern Live Plant, Indoor Houseplant in Hanging Basket Planter