This post may contain affiliate links. If you buy something from one of our links we may earn a commission. Thanks
Hey there, green thumbs! Ready to turn your kitchen into a green oasis? Growing microgreens indoors is your quick start to harvesting fresh, nutritious greens right from your windowsill.
Whether it’s your first venture into gardening or you’re a seasoned pro looking to add microgreens to your mix, we’ve got you covered with simple steps to success.
1. Growing Microgreens Inside
Growing microgreens inside isn’t just about adding a splash of green to your home—it’s about bringing fresh, nutritious food to your plate all year round.
Curious about those tiny, vibrant greens that pack a massive punch in both flavor and nutrition?
They’re called microgreens, and the best part? You can easily grow them right on your windowsill!
What Are Microgreens?
Microgreens are the young seedlings of vegetables and herbs, harvested just after their first leaves appear.
They’re popular because they grow quickly, are packed with flavor, and contain higher nutrient levels than their mature counterparts.
Indoor microgreens need minimal space and grow so fast that you can taste the fruits of your labor within just a couple of weeks.
They’re a perfect project for any indoor space, making gardening accessible to everyone, even if you don’t have a garden.
Key Takeaways:
Choose the Right Setup: Select appropriate trays, lights, and growing medium tailored to indoor conditions.
Light Management: Ensure your microgreens receive 12-16 hours of light daily using natural sunlight or full-spectrum grow lights.
Watering Techniques: Keep the growing medium moist but not waterlogged using a spray bottle or bottom-watering methods to prevent diseases or mold.
Temperature Control: Maintain an indoor temperature between 65-75°F (18-24°C) for optimal growth.
Regular Monitoring: Check your plants daily for any signs of overwatering, under-lighting, or nutrient deficiencies.
Hygiene and Maintenance: Keep the growing area clean and free from debris to prevent pests and diseases.
Harvest Timely: Cut microgreens when their first true leaves appear, usually within 2-3 weeks after planting, to enjoy their peak flavor and nutritional value.
Troubleshooting: Address common issues such as leggy growth, mold, and poor germination by adjusting environmental factors and care routines.
These tips should guide you through the process of growing vibrant and healthy microgreens right in your home. Happy gardening!
All you need is a little know-how about the essentials, and you’ll be harvesting your own fresh greens in no time.
Basic Requirements: Light, Temperature, and Growing Medium
Light: Microgreens thrive under good light. Natural sunlight on a windowsill or a simple grow light can do wonders.
Temperature: Aim for a cozy indoor temperature—around 65-75°F (18-24°C) is ideal for most microgreens.
Growing Medium: You can use a soil mix or a hydroponic medium. Both your soil mix and hydroponic medium should be fine-textured, lightweight, and able to retain moisture effectively.
Selecting the Right Microgreen Varieties for Indoor Cultivation
Not all greens are created equal when it comes to indoor gardening. Choose varieties known for being hearty and quick to harvest, like radishes, kale, and arugula.
These will give you the best success rate and are pretty forgiving for beginners.
3. Growing Microgreens Inside in Pots
Thinking of growing microgreens in pots? It’s a smart move!
Pots make it super easy to control your microgreen environment, and they fit just about anywhere in your home.
Let’s explore how to choose the best pots for your indoor green adventure and why certain features matter.
Choosing Suitable Containers and Pots for Microgreens
When picking pots for microgreens, simplicity works best. Shallow trays or small containers work great because microgreens don’t need much soil to grow.
Look for trays about 1-2 inches deep—baking trays or plastic takeout containers can work if they’re clean and you’ve poked some holes for drainage.
The Importance of Drainage and Container Depth
Drainage: Make sure whatever container you choose has good drainage.
This helps prevent water from sitting at the bottom and causing root rot or mold.
Just a few holes in the bottom of your container will do the trick.
Container Depth: Since microgreens are harvested early in their growth, they don’t need deep soil.
A container depth of 1-2 inches is perfect.
This shallow depth makes it easier to control moisture and prevents wasting your growing medium.
4. Growing Microgreens in Containers
Growing microgreens indoors is a wonderful way to bring fresh, nutritious greens into your diet, and it’s surprisingly easy, even for beginners.
Whether you’re a seasoned gardener or just starting out, microgreens are a great addition to any indoor gardening setup. They require minimal space, grow quickly, and can thrive in simple containers.
Choose the Right Container: Opt for shallow trays or containers, about 1-2 inches deep. Common choices include seed flats, recycled bakery trays, or even take-out containers if you add drainage holes.
Prepare the Growing Medium: Fill your container with a quality potting mix or a soilless medium like coconut coir. Ensure the medium is moist but not waterlogged.
Sow the Seeds: Spread your microgreen seeds evenly over the surface of the medium. For even distribution, consider using a salt shaker for small seeds.
Light and Water: Cover the seeds with a thin layer of soil or press them gently into the medium. Mist the surface gently to avoid disturbing the seeds. Cover the container with a clear lid or plastic wrap to retain moisture until seeds germinate.
Provide Adequate Light: Once seeds sprout, remove the cover and place the container in a well-lit area or under a grow light. Microgreens need plenty of light to prevent them from becoming leggy.
Harvest: Microgreens are ready to harvest when they’ve developed their first true leaves, usually about 2-3 weeks after planting. Use scissors to cut the greens just above the soil line.
Tips for Maximizing Space and Organizing Multiple Containers
Vertical Shelving: Utilize vertical space with shelving units to stack multiple trays of microgreens, ensuring each level has adequate light exposure.
Rotation: Regularly rotate your trays to ensure even light distribution and consistent growth.
Labeling: Keep track of what you’re growing and their planting dates by labeling each tray. This is especially helpful if you are growing multiple varieties at once.
Efficient Use of Space: Organize your trays in a manner that maximizes your available space without overcrowding, to ensure adequate air circulation and ease of maintenance.
Growing microgreens indoors is not only a fun and rewarding hobby but also a practical way to enhance your diet with fresh, nutrient-packed greens. With these simple steps, you can start your own microgreen garden right in your kitchen or any small space indoors.
Growing microgreens in containers is fun and practical, especially if you’re tight on space.
Here’s how you can set up your containers effectively and make the most out of the space you have.
Step-by-Step Guide on Setting Up Your Containers
Choose the Right Container: Opt for shallow trays or containers, about 1-2 inches deep. Common choices include seed flats, recycled bakery trays, or even take-out containers if you add drainage holes.
Prepare the Growing Medium: Fill your container with a quality potting mix or a soilless medium like coconut coir. Ensure the medium is moist but not waterlogged.
Sow the Seeds: Spread your microgreen seeds evenly over the surface of the medium. For even distribution, consider using a salt shaker for small seeds.
Light and Water: Cover the seeds with a thin layer of soil or press them gently into the medium. Mist the surface gently to avoid disturbing the seeds. Cover the container with a clear lid or plastic wrap to retain moisture until seeds germinate.
Provide Adequate Light: Once seeds sprout, remove the cover and place the container in a well-lit area or under a grow light. Microgreens need plenty of light to prevent them from becoming leggy.
Harvest: Microgreens are ready to harvest when they’ve developed their first true leaves, usually about 2-3 weeks after planting. Use scissors to cut the greens just above the soil line.
Tips for Maximizing Space and Organizing Multiple Containers
Vertical Shelving: Utilize vertical space with shelving units to stack multiple trays of microgreens, ensuring each level has adequate light exposure.
Rotation: Regularly rotate your trays to ensure even light distribution and consistent growth.
Labeling: Keep track of what you’re growing and their planting dates by labeling each tray. This is especially helpful if you are growing multiple varieties at once.
Efficient Use of Space: Organize your trays to maximize your available space without overcrowding, to ensure adequate air circulation and ease of maintenance.
Growing microgreens indoors is a fun and rewarding hobband also a practical way to enhance your diet with fresh, nutrient-packed greens.
With these simple steps, you can start your microgreen garden in your kitchen or any small indoor space.
5. Growing Microgreens Inside from Seed
Alright, let’s get those microgreens sprouting! Starting from seed is easy-peasy, but choosing the right seeds and prepping them properly can make all the difference.
Here’s how you can get those little greens going strong right from the get-go.
How to Select Quality Seeds
First things first, picking top-notch seeds is key. You want seeds that are specifically labeled for growing microgreens because they’re often tested for pathogens to ensure they’re safe to grow for eating raw.
Go for organic and non-GMO seeds if you can—these give you the peace of mind that you’re growing natural and healthy microgreens.
Also, consider the variety. Some popular ones include radish, broccoli, and arugula, which are not only tasty but also sprout pretty quickly!
Do not sprout tomatoes, peppers, or any seeds in the nightshade family as the foliage is poisonous.
Preparation and Planting Techniques to Ensure Successful Germination
Now, onto the fun part—getting those seeds into soil!
Personally, I like to use coco coir. It’s great for germinating seeds. It’s light, holds water, and drains well.
It also has the right pH and is a sustainable option, unlike peat.
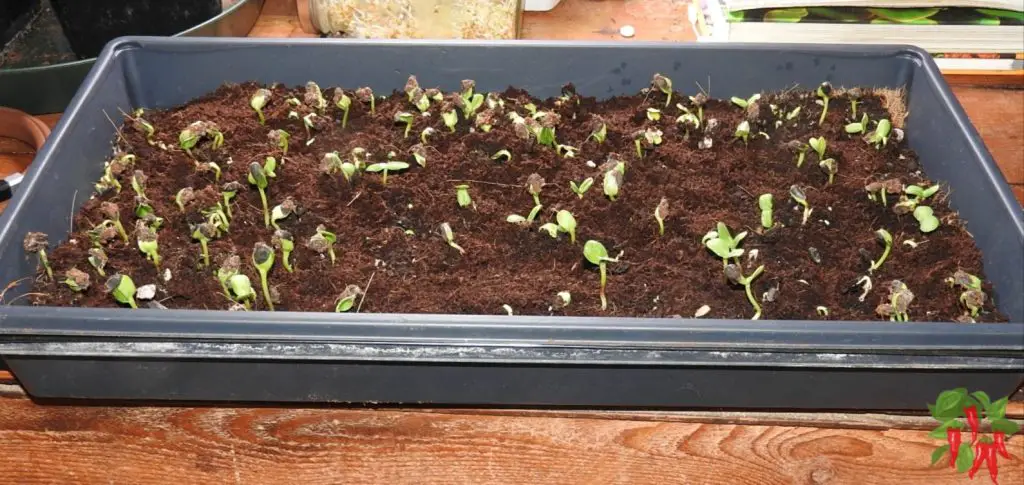
Soil Prep: Grab a shallow tray and fill it with a good quality potting mix—something light and fluffy works best. Make sure it’s moist but not waterlogged.
Sowing the Seeds: Sprinkle your seeds evenly across the surface. You want them almost touching but not too crowded, A nice even spread will ensure they all get enough space to grow. No need to bury them; just a gentle press into the soil will do.
Cover Up: Initially, you might want to cover your seeds with another tray or a light cloth. This helps keep the moisture in and gives them that cozy, dark environment they need to kickstart germination.
Light and Water: As soon as you see those sprouts popping up, remove the cover. Place them under a grow light or in a sunny spot. Keep the soil moist with a spray bottle—gentle misting is the way to go to avoid disturbing those tiny seeds.
Watch Them Grow: It won’t take long, usually just a few days, and you’ll see the magic happening. Once they’ve got their first true leaves, they’re ready to harvest!
And there you have it! Growing microgreens from seed is straightforward and super rewarding. In no time, you’ll be adding fresh, homegrown greens to your meals!
6. Growing Microgreens Indoors Without Soil (Hydroponics)
Growing microgreens hydroponically means saying goodbye to dirt under your fingernails and hello to clean, efficient growing.
Here’s what you need to know about ditching the soil and going hydro for your tiny greens.
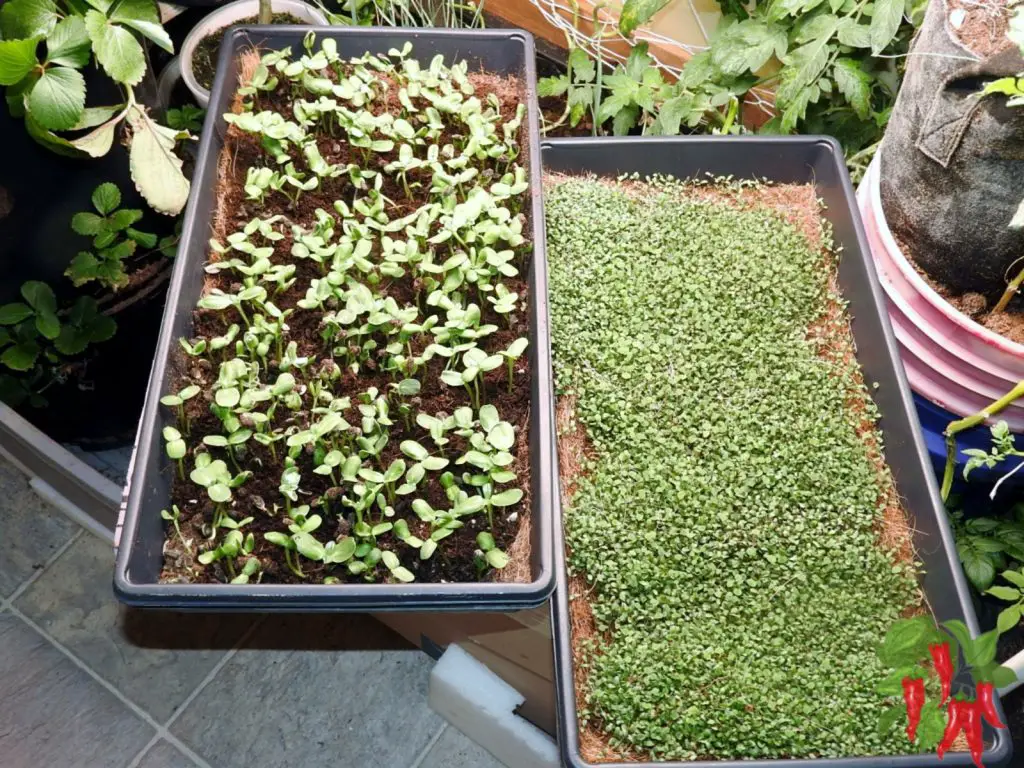
Overview of Hydroponic Systems Suitable for Microgreens
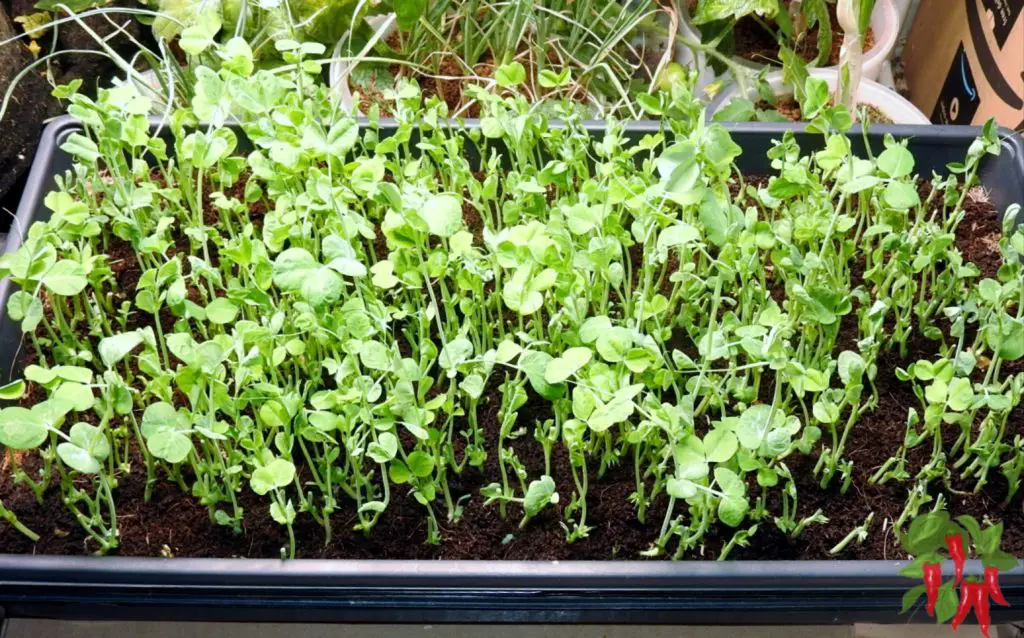
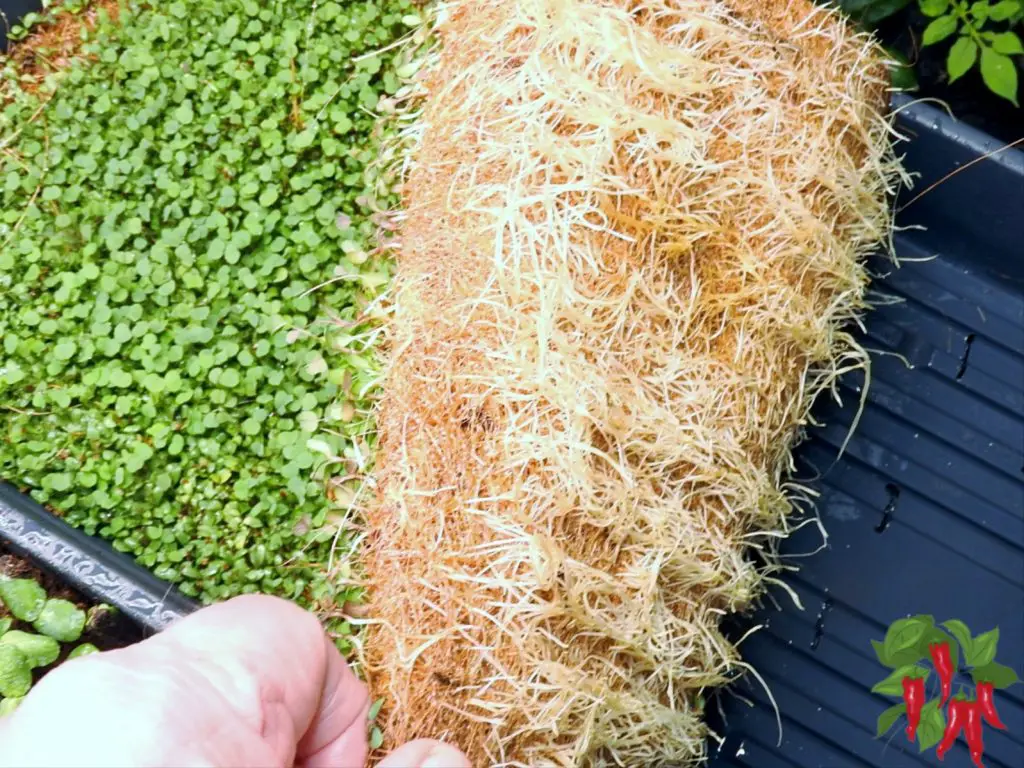
For microgreens, simplicity is key. Hydroponic mats, especially coco mats, are perfect because they’re easy to set up and just right for the short growth cycle of microgreens.
Loose coco coir can also be used. It might look like soil but it is actually an inert hydroponic grow medium.
When I grew peas on a coco mat I also covered them with a thin top layer of coco coir because I was worried the large seeds might have a hard time germinating and rooting into the mat.
Coco mats are made from coconut fibers, which hold moisture and allow roots to spread evenly. You will want to presoak them before planting in them.
This gives your microgreens the ideal environment to sprout and thrive.
Benefits and Challenges of Soil-less Cultivation
Benefits:
Cleanliness: No soil means less mess! Hydroponics is tidy and reduces the common gardening issue of soil-borne pests and diseases.
Efficiency: Hydroponic systems deliver nutrients directly to the roots in a highly soluble form, which can speed up growth and potentially lead to higher yields.
Space and water saving: Hydroponics can use up to 90% less water than soil gardening. Plus, you can set up more densely packed growing areas.
Growing microgreens hydroponically is an excellent way to maximize your indoor gardening efforts, especially if you’re short on space or want to keep things neat and tidy.
Just remember, every method has its learning curve, so take your time to understand the ins and outs of hydroponic gardening!
7. Growing Microgreens Without Soil
Alright, let’s dive into the nitty-gritty of growing microgreens without a speck of soil.
Whether you’re setting up a small kitchen garden or a full-blown indoor farm, using hydroponic mediums like coconut coir, peat moss, or specially designed hydroponic mats can make all the difference.
Here’s how you can manage these mediums and keep your greens growing strong and healthy.
Growing microgreens hydroponically means focusing on water management rather than nutrients since these quick-growing plants primarily use the nutrients stored in their seeds.
Here’s a streamlined approach to managing water and monitoring your hydroponic system for healthy microgreens:
Managing Water and Nutrients in a Soil-less Environment
Water Management:
Without soil, your main job is to keep the hydroponic medium perfectly moist. You don’t want it to dry out or get waterlogged.
Using a bottom-watering tray is an excellent way to maintain ideal moisture levels. This method hydrates the roots from below and keeps the stems and leaves dry, preventing disease.
Nutrient Solutions:
Typically, microgreens don’t require additional nutrients beyond what’s stored in their seeds, especially since they are harvested so young.
However, if you choose to boost growth, use a very dilute solution, but it’s generally not necessary.
pH Levels: Even without adding nutrients, it’s good practice to monitor the pH of your water. Microgreens thrive best in a slightly acidic environment (pH 5.5-6.5).
Keeping within this range ensures any nutrients present are readily available to the plants.
System Checks:
Regularly inspect your hydroponic setup for any issues such as signs of mold and algae.
Clean systems lead to healthier plants and better air circulation around the greens.
By focusing on these aspects, you’ll find that growing microgreens hydroponically can be a clean, efficient, and satisfying way to garden indoors.
You’ll enjoy fresh greens without the mess and fuss of traditional gardening!
Different Hydroponic Mediums
Coconut Coir: This is a natural by-product of coconut husks and is terrific for growing microgreens because it holds water well and provides a stable environment for root growth. It’s also pH neutral, which is great for plant health.
Peat Moss: Another popular choice, peat moss has excellent water retention and air space, making it ideal for root growth. However, it’s a bit more acidic, so you might need to adjust the pH when using peat moss.
Hydroponic Mats: These mats are designed specifically for hydroponic growing. They’re often made from materials like felt or fiber that provide excellent support for roots while maintaining a balanced water content. Mats are convenient, easy to set up, and reusable, depending on the type.
Alright, let’s talk business! If you’re thinking about turning your passion for microgreens into profit, you’re in for an exciting ride.
Here’s how you can get a handle on the financials and start selling those greens!
Calculating Startup Costs and Potential Earnings
Startup Costs: First up, you’ll need some basic gear. Think trays, lights (if you don’t have a sunny spot), seeds, and your growing medium.
Thankfully, microgreens don’t need much space, so you don’t have to rent a big area. A simple setup can be done on a shoestring budget, especially if you DIY some of the equipment.
Calculate how much seeds and supplies will cost for the first few cycles until you start selling. Don’t forget about little things like water and electricity—they add up!
Potential Earnings: Here’s the fun part—microgreens grow fast and sell well, especially if you’re tapping into the organic and healthy eating trend.
Price your products based on local market rates. Keep track of what you spend and earn, and always look for ways to increase efficiency and reduce costs.
Marketing Tips and Finding Buyers for Your Microgreens
Local Chefs and Restaurants: Chefs love fresh, quality ingredients. Make some samples and swing by local eateries during their off hours. Show them what you’ve got and explain how your microgreens can elevate their dishes.
Farmers Markets: Get a booth at local farmers markets. It’s a great way to get direct feedback from customers and build a loyal following.
Social Media and Online Marketing: Set up social media profiles for your microgreen business. Post beautiful photos of your greens and share interesting facts about their health benefits. Consider running ads targeting local foodies or health-conscious consumers.
Subscription Services: Offer a subscription where customers get a regular delivery of fresh microgreens. This can provide you with a steady income stream.
By keeping your startup costs low and finding the right customers, you can turn your microgreen venture into a profitable business.
Just remember, it’s all about quality and consistency. Keep those greens coming, and the customers will follow!
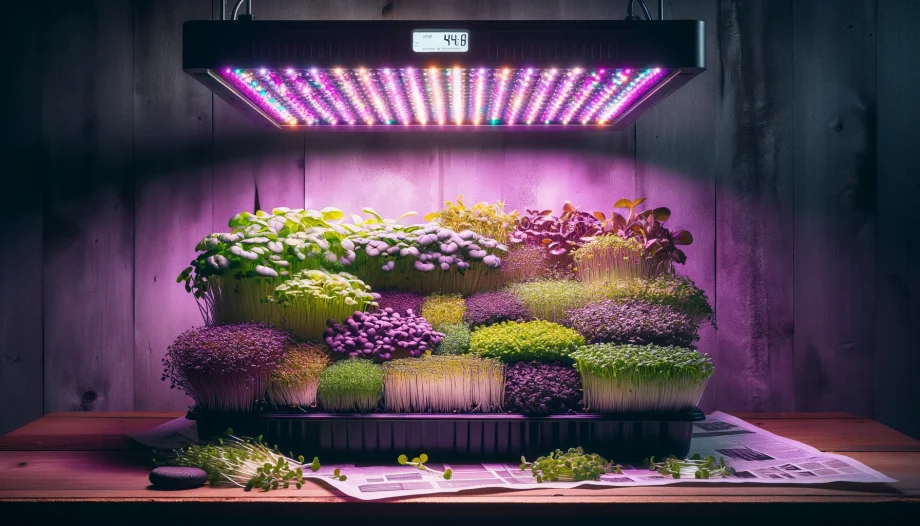
9. Growing Microgreens Indoors Under Lights
Ready to grow microgreens inside but not sure where to start? No worries! Growing these little greens is straightforward and rewarding.
Hey there! If you’re diving into growing microgreens indoors, getting your lighting right is crucial for those little greens to thrive.
If you don’t have natural sunlight LEDs are a great way to supplement light.
Even if you have natural sunlight the low light levels and short days during the winter will make it hard to grow year-round without supplementing light.
Let’s break down the best lights for the job and how to use them effectively.
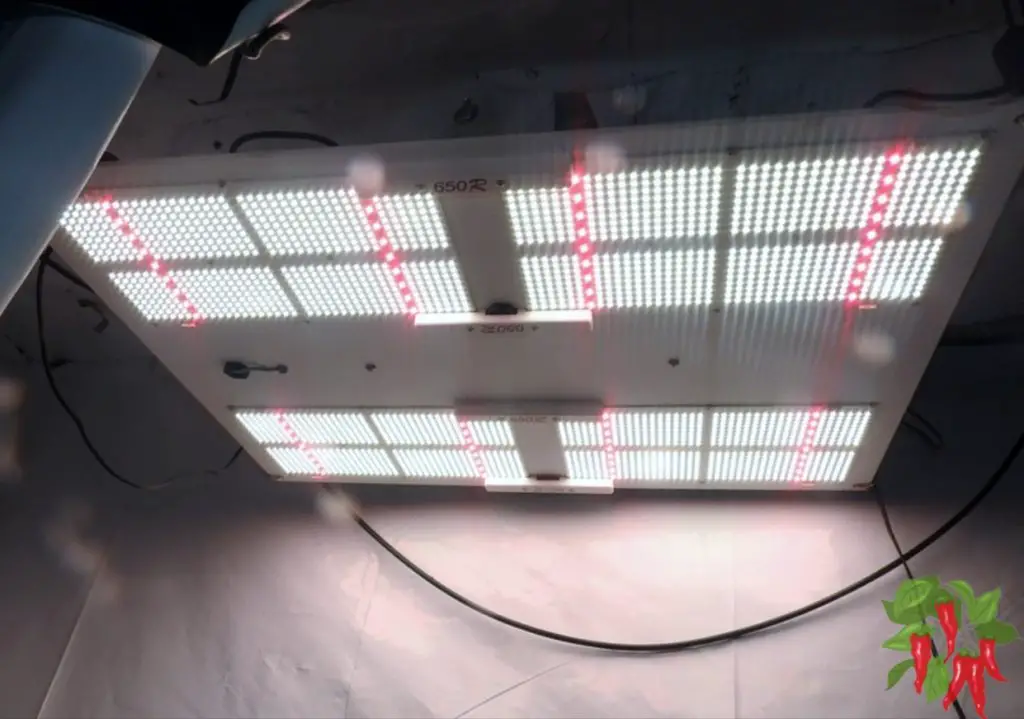
Choosing the Right Grow Lights: LED vs. Fluorescent
LED Lights: LED grow lights are my top pick for several reasons. They’re energy-efficient, don’t heat up too much, and last a long time.
LEDs can provide a full spectrum of light, which mimics natural sunlight and promotes healthy, robust growth in microgreens.
Plus, they’re great for the environment and your electric bill!
Fluorescent Lights: Fluorescent lights, especially T5 or T8 tubes, are another popular option.
They’re cheaper upfront than LEDs and work pretty well for the low-light needs of microgreens.
However, they do use more energy and generate more heat compared to LEDs, which might affect your greens if the lights are too close.
You also will have to replace bulbs regularly (usually yearly) which is an added expense.
Light Schedules and Intensity for Optimal Growth
Light Intensity: Microgreens don’t need super intense light; about 200 to 300 µmol/m²/s (micromoles per square meter per second) is enough.
Make sure your lights are close enough to provide this intensity without overheating the plants.
Depending on the light type and wattage, this usually means positioning them about 12 inches above the plants.
Light Schedule: Microgreens thrive on a consistent light schedule. Generally, providing 12 to 16 hours of light per day mimics the natural day cycle and encourages strong growth.
You can use a simple timer to turn your lights on and off automatically, making this part of microgreen farming a breeze.
By choosing the right type of light and setting up a proper schedule, you ensure your indoor microgreens get all the light they need to grow fast and healthy.
It’s a simple setup that yields big returns in the quality of your greens!
10. How to Grow Microgreens Indoors
Growing microgreens indoors is a fantastic way to keep fresh greens in your diet all year round. Let’s walk through a comprehensive guide on how to nurture these little plants, manage their daily care, and troubleshoot common problems.
Comprehensive Guide to Growing Microgreens Indoors
Daily Care
Watering: Microgreens need consistent moisture to thrive, but they don’t like being waterlogged. The best approach is to mist them lightly twice a day using a spray bottle.
Alternatively, you can water them from the bottom by placing water in a tray underneath the growing containers, allowing the roots to soak up moisture as needed without wetting the foliage, which can lead to disease.
Light Management: Microgreens require about 12-16 hours of light per day. If you’re using artificial lights, LED or fluorescent grow lights are ideal. Keep the lights about 6-12 inches above the microgreens to ensure they receive enough light without scorching them.
Troubleshooting Common Issues
Mold: If you see mold growing, it’s usually a sign of too much moisture and poor air circulation. Reduce watering slightly, increase air flow with a small fan, and make sure the plants aren’t too densely sown.
Leggy Plants: Leggy microgreens are typically stretching towards the light, indicating that the light intensity is too low or the lights are too far from the plants. Lower your lights closer to the microgreens or consider getting a brighter light source.
Additional Tips
Harvesting: Microgreens are ready to harvest when they have developed their first true leaves, generally about 7-21 days after planting, depending on the variety. Use clean scissors to snip the greens just above the soil line.
Rotation: Rotate your trays occasionally to ensure all plants get uniform light exposure, which promotes even growth.
Keeping Your Microgreens Happy
Consistent check-ins will help you catch any issues early, making it easier to maintain healthy plants.
If you’re new to this, don’t worry about getting everything perfect on the first try.
Microgreens are forgiving, and you’ll quickly learn what works best in your indoor gardening setup. Happy growing!
11. Can You Grow Microgreens Inside?
Absolutely, you can grow microgreens inside! In fact, indoor environments are ideal for these little greens because they allow for year-round cultivation, regardless of outdoor weather conditions.
Here’s what you need to know about the minimal requirements and setting realistic expectations for indoor microgreen gardening.
Minimal Requirements for Growing Microgreens Indoors
Light: Microgreens need sufficient light to grow, but don’t require intense sunlight. A sunny windowsill or a basic grow light setup will do the trick.
Growing Medium: You can use soil or a soilless option like coconut coir, peat moss, or hydroponic grow mats. The key is to ensure the medium is clean and free of contaminants.
Containers: Shallow trays or any flat containers about 1-2 inches deep are perfect. Make sure they have drainage holes if you’re using soil.
Water: Microgreens need to be kept moist, but not overly wet. A spray bottle or a bottom-watering tray can help manage this balance.
Temperature: Most microgreens thrive in normal room temperatures, roughly between 65-75°F (18-24°C).
Setting Realistic Expectations
Growing microgreens indoors is relatively straightforward, but it’s important to manage expectations:
Growth Speed: Microgreens grow quickly, typically ready to harvest in 1-3 weeks, depending on the variety.
Yield: While you won’t get massive quantities from each tray, you can harvest a steady supply by starting new trays at different times.
Maintenance: They require daily checks, especially for water and light, but overall, microgreens are low-maintenance compared to other plants.
Challenges
While the process is generally easy, you may encounter issues like mold or uneven growth. These can usually be managed by adjusting watering practices and ensuring good light distribution.
Indoor microgreen gardening is an excellent way for beginners to get into gardening, as well as a fun and productive activity for experienced gardeners.
It doesn’t take much to get started, and the results are rewarding and delicious!
12. Growing Microgreens Indoors in Winter
Growing microgreens indoors during the winter requires some special considerations due to the colder temperatures and reduced daylight hours.
Here’s how you can successfully nurture these tiny greens even when it’s chilly outside.
Special Considerations for Growing During the Colder Months
Insulation: Ensure that your growing area is away from cold drafts and windows that might leak cold air. Microgreens are sensitive to extreme cold, so keeping them in a stable environment is crucial.
Humidity: Winter air can be dry, and indoor heating systems might make it even worse. Microgreens thrive in a more humid environment, so consider using a humidity tray (a tray of water placed near your growing area) or a small humidifier to maintain moisture in the air.
Watering: The soil may dry out less quickly in winter due to reduced evaporation rates, so be careful not to overwater. Check the moisture level of your growing medium regularly to ensure it’s just right.
Adjusting Light and Temperature to Accommodate Seasonal Changes
Light: Natural light is often insufficient during the short days of winter. Supplement with grow lights, placing them about 6-12 inches above the microgreens and leaving them on for about 12-16 hours a day to mimic the longer days of summer.
Temperature: Ideal growing temperatures for microgreens are between 65-75°F (18-24°C). If your home is cooler, consider using a heat mat under your trays to maintain an optimal temperature. Be sure to monitor the soil temperature regularly to avoid overheating your plants.
By making these adjustments, you can create a conducive environment for growing microgreens indoors even during winter.
This ensures that you have a fresh supply of nutritious greens throughout the season, adding a splash of summer to your winter meals.
13. Growing Microgreens Indoors Hydroponically
Let’s focus on a hydroponic setup using trays and hydroponic grow media, which is a common method for growing microgreens indoors.
Here’s a step-by-step guide on how to set up a basic hydroponic system using trays, and an exploration of the pros and cons of hydroponic vs. traditional soil growing.
Detailed Setup Guide for a Basic Tray-Based Hydroponic System
Select Your Trays and Media: Begin with shallow trays—these are your main containers. For the growing medium, you can use specially designed hydroponic mats or felt pads which are excellent for microgreens. These mats allow water and nutrients to reach the roots effectively while supporting the plants evenly.
Sowing Seeds:
Spread Seeds Evenly: Scatter the microgreen seeds evenly across the surface of the moist hydroponic mat. Press them gently into the mat to ensure good contact.
Cover the Seeds: Initially, cover the seeds with another tray or a clear dome to keep humidity high, which helps in germination.
Light and Temperature Control:
Light: Place the trays under a grow light system, ensuring they receive about 12-16 hours of light per day.
Temperature: Maintain an ambient temperature of around 65-75°F (18-24°C), which is ideal for most microgreen varieties.
Maintenance:
Check the Moisture Level: Regularly check that the water or nutrient solution is touching the base of the hydroponic mat. Refill as needed.
Watch for Growth: Germination should occur within a few days, and microgreens are ready to harvest typically within 2-3 weeks.
Pros and Cons of Hydroponic vs. Traditional Soil Growing
Pros of Hydroponic Growing:
Water Efficiency: Uses significantly less water than soil-based systems as water in hydroponics can be reused.
Faster Growth: Plants often grow faster in hydroponic systems because they have direct access to nutrients.
Less Pest and Disease Risk: With no soil, the risk of soil-borne pests and diseases is reduced.
Cons of Hydroponic Growing:
Setup Cost: Initial setup for hydroponic systems can be more expensive than traditional soil. Supplemental lighting may be required.
Technical Knowledge Required: Can require a bit more technical knowledge and monitoring to manage nutrient solutions and pH levels.
Dependence on System: Plants are highly dependent on the hydroponic system’s functioning correctly; a failure in the system (like forgetting to maintain moisture levels) can lead to rapid plant loss.
Pros of Soil Growing:
Simplicity: It’s generally easier and more intuitive to grow plants in soil.
Buffering Capacity: Soil has a natural buffering capacity which helps resist pH and nutrient fluctuations.
Cons of Soil Growing:
Water Usage: Requires more water, and the efficiency of water use is generally lower.
Pests and Disease: Higher susceptibility to pests and diseases that thrive in soil environments.
By understanding these details, you can set up an effective hydroponic system for growing microgreens indoors, reaping the benefits of this soil-less cultivation method while managing its challenges.
14. Growing Microgreens FAQs – Troubleshooting
Got a green thumb for microgreens but running into some roadblocks? Don’t worry, you’re not alone!
Here’s a handy FAQ section where we tackle some common questions and issues that beginners might face while growing microgreens indoors.
Whether it’s about the right type of soil or why your greens aren’t sprouting, we’ve got you covered with straightforward solutions.
Q. Why aren’t my microgreens sprouting?
A. This could be due to a few reasons: old seeds, insufficient moisture, or incorrect temperatures. Ensure your seeds are fresh, the growing medium is consistently moist, and the environment is within the ideal temperature range of 65-75°F (18-24°C).
Q. How do I prevent mold on my microgreen trays?
A. Mold issues often arise from too much moisture and poor air circulation. Try reducing how much you water, increasing airflow with a fan, and ensuring your growing area isn’t overly packed.
Q. What’s the best light for growing microgreens indoors?
A. Microgreens thrive under full-spectrum grow lights or natural sunlight. Ensure they get about 12-16 hours of light per day. If using artificial lights, keep them about 6-12 inches above the plants to avoid scorching.
Q. Can I reuse the soil or growing medium for new batches of microgreens?
A. It’s best not to reuse soil or medium without sterilizing it first, as it can harbor pathogens or depleted nutrients. If reusing, consider sterilizing with heat or replacing a portion of it with fresh medium.
Q. My microgreens are very leggy and weak. What am I doing wrong?
A. Leggy microgreens are usually stretching towards the light, which indicates they need more. Lower your lights closer to the plants or consider getting a more powerful light source.
Q. How often should I water microgreens?
A. Microgreens should be kept moist but not waterlogged. Watering with a spray bottle twice a day or using a bottom-watering system is typically sufficient.
By keeping these tips in mind, you can navigate the common pitfalls of indoor microgreen gardening and enjoy a successful harvest!
Conclusion: Thriving Microgreens Indoors
We’ve covered a lot of ground on growing microgreens indoors, from the basics of setup to detailed care tips. Let’s wrap it up with a quick recap of the key points to ensure you’re well-prepared to start your microgreen garden.
Key Points
Growing microgreens inside is a fast and space-efficient way to enhance your indoor gardening.
Start by selecting shallow trays and suitable growing mediums like coconut coir.
Place the trays in a spot that receives 12-16 hours of light daily and maintain a steady temperature of 65-75°F (18-24°C).
Regular misting keeps them moist but not waterlogged, ensuring healthy growth.
Setting Up Your Indoor Garden: Choose the right location with sufficient light, pick appropriate containers and mediums, and ensure your growing environment is temperature-controlled and well-ventilated to start your microgreens off right.
Daily Care and Maintenance: Regularly check your microgreens for water needs, adjust light as necessary, and keep an eye on temperature fluctuations to maintain optimal growing conditions.
Troubleshooting Common Issues: Be proactive in managing potential problems such as mold, leggy plants, or poor germination by adjusting environmental factors like moisture and lighting.
Growing Microgreens Successfully
With the right setup and a bit of care, growing microgreens indoors can be a rewarding experience.
It provides fresh, nutritious greens year-round and adds a bit of greenery to your indoor spaces.
Remember, the key to successful indoor gardening is consistency and attention to detail.
Monitor your plants closely, make adjustments as needed, and enjoy the harvest of your efforts. Happy growing!


 Ready to grow microgreens inside but not sure where to start? No worries! Growing these little greens is straightforward and rewarding.