This post may contain affiliate links. If you buy something from one of our links we may earn a commission. Thanks

Do you want to know how to grow spinach indoors? Spinach is a nutritious and flavorful leafy green that is easy to grow indoors, making it a great option even for beginners by simply following our 7 easy steps.
Spinacia oleracea is the scientific name for spinach and it is in the amaranth family.
Spinach is a nutritious and flavorful leafy green that is easy to grow indoors, making it a great option for an indoor garden and those who want to have a year-round supply of fresh produce.
In this blog post, we’ll go over everything you need to know about growing spinach indoors, from selecting the right container and soil to caring for and harvesting your plants.
Why Grow Spinach Indoors?
If you’re interested in growing your own food but don’t have a lot of outdoor space, growing spinach indoors is a great option.
Spinach is a relatively low-maintenance plant that grows quickly, and it’s a great source of vitamins and minerals.
By growing spinach indoors, you have more control over the growing conditions, which can help you produce a healthy crop even in less-than-ideal weather.
How To Grow Spinach Indoors In 7 Easy Steps
1: Gather Your Supplies
The first thing you want to do is gather your supplies. You will need spinach seeds, growing containers, a growing medium, and a good source of light. There are several types of spinach seeds so let’s have a look.
What Are The 3 Different Types Of Spinach?
There are three main types of spinach: savoy, smooth-leaf, and semi-savoy.
Each type has its own unique characteristics and is best suited for different types of dishes and growing conditions. Each type will also have different varieties of spinach
• Savoy spinach: This type of spinach has crinkly, dark green leaves and a slightly bitter flavor. It is best suited for use in salads, sandwiches, and cooked dishes.
Savoy spinach is more cold-tolerant than the other types, making it a good option for outdoor cultivation in cool weather.
• Smooth-leaf spinach: As the name suggests, this type of spinach has smooth, flat leaves and a mild flavor. It is often used in salads and sandwiches and is also well-suited for cooking.
Smooth-leaf spinach is less cold-tolerant than savoy spinach, so it may not be the best choice for outdoor cultivation in cool weather.
However, it is well-suited for indoor cultivation and can be grown year-round in a sunny location.
• Semi-savoy spinach: This type of spinach is a hybrid of savoy and smooth-leaf spinach, and it has crinkly leaves that are not as deeply ruffled as savoy spinach. It has a slightly milder flavor than savoy spinach and is well-suited for use in salads, sandwiches, and cooked dishes.
Semi-savoy spinach is less cold-tolerant than savoy spinach and may not be the best choice for outdoor cultivation in cool weather.
However, it is well-suited for indoor cultivation and can be grown year-round in a sunny location.
Which Ones Do Best Indoors?
Overall, smooth-leaf and semi-savoy spinach are the best choices for indoor cultivation, as they are less cold-tolerant and can be grown year-round in a sunny location.
Savoy spinach is a good option for outdoor cultivation in cool weather, but it may not be the best choice for indoor cultivation.
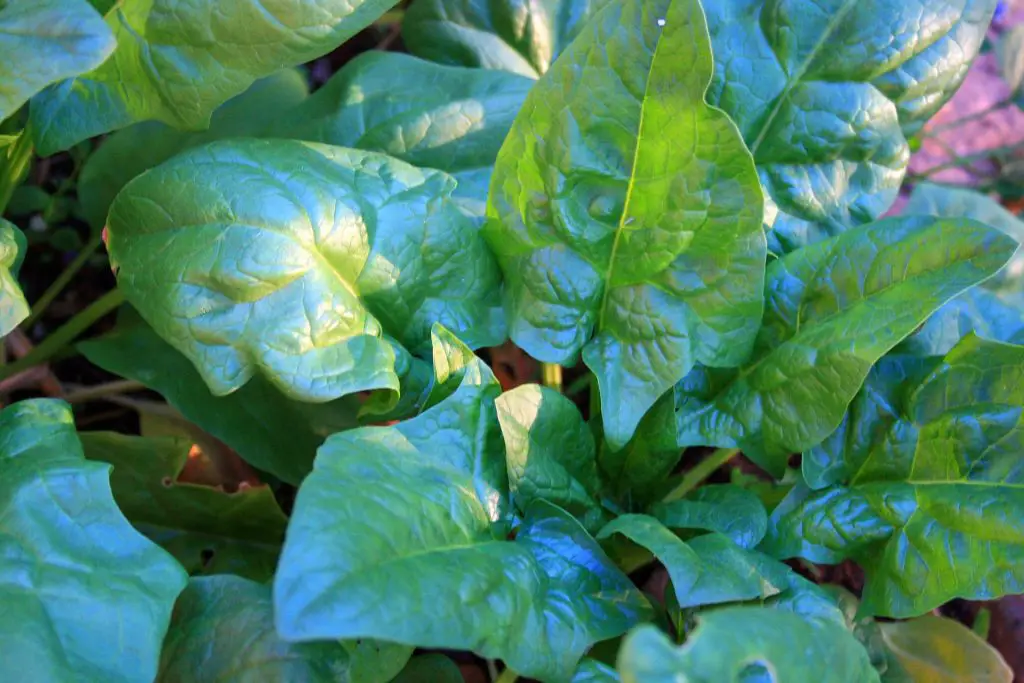
I am growing Burpee Bloomsdale Spinach Seeds pictured below. It is an heirloom variety that makes large spreading plants that finish in 40 days.
In truth, you can grow any type of spinach indoors. You could grow spinach microgreens, baby spinach, or mature spinach plants. The choice is yours.
2: Selecting the Right Container
The first step in growing spinach indoors is selecting the right container. Spinach can be grown in pots, containers with drainage holes, or even in containers made out of recycled materials like plastic bottles or milk jugs.
Just make sure the container is large enough to accommodate the number of plants you want to grow and has good drainage to prevent the soil from becoming waterlogged.
If you want to grow spinach microgreens you will use a seed tray and not pots. Here is how to grow microgreens in trays. The plants are harvested in 10-14 days and don’t need deep soil to grow because they are harvested so young.
I plan on using pots to grow my spinach this time. I will plant about 2-3 seeds in each 5-inch pot. Then I will thin them out as microgreens and grow the rest as baby spinach.

3: Choosing the Right Soil
Next, you’ll need to choose the right soil for your spinach plants. Spinach grows best in soil that is high in organic matter, well-draining, and has a pH between 6.0 and 7.0.
A good quality potting mix or soil-less mix should work well. You can also mix in some compost or fertilizers to give your plants an extra boost.
I prefer using coco coir over peat or peat-based soil mixes.
Why Coco Coir Is A Better Choice For Growing Spinach Than Peat Or A Peat-Based Soil Mix
Coco coir, or coconut coir, is a growing medium made from the outer fibers of coconut husks. It is often used as a soil-less growing medium because it is lightweight, easy to work with, and has excellent water-holding capacity.
There are several reasons why coco coir may be a better choice for growing spinach than peat or a peat-based soil mix:
• Sustainability: Coco coir is a renewable resource, whereas peat is a non-renewable resource that can take hundreds of years to form. The extraction of peat can also have negative impacts on the environment, including habitat destruction and carbon release.
• pH: Coco coir has a slightly alkaline pH (around 6.5-7.0), which is closer to the ideal pH range for spinach (6.0-7.0). Peat, on the other hand, has a very acidic pH (around 3.5-4.5), which may require additional adjustments to make it suitable for growing spinach.
• Water-holding capacity: Coco coir has a high water-holding capacity, which means it can retain moisture for a longer period of time. This can be helpful for growing spinach, which prefers moist but well-draining soil. Peat, on the other hand, can become waterlogged easily, which can lead to root rot and other problems.
• Ease of use: Coco coir is lightweight and easy to work with, making it a convenient choice for growing spinach indoors. It is also available in various forms (e.g., bricks, bags, loose), which makes it easy to use in a variety of growing setups.
Overall, coco coir is a versatile and sustainable growing medium that can be an excellent choice for growing spinach and other plants.
4: Planting the Seeds
Once you have your container and soil ready, it’s time to plant your spinach seeds. To sow seeds, simply scatter them over the soil and gently press them down.
Cover the seeds with a thin layer of soil, about 1/4 inch deep, and water gently with a misting bottle.
Spinach is a cool-weather crop so the soil temperature should be kept cool for the best germination.
Keep the soil moist but not soggy, and your spinach seedlings should germinate in about 7-10 days. Overwatering can result in fungal diseases like downy mildew.
Once your young plants are up you will want to get them into the light so they can start to grow.
5: Give Them Light
Spinach needs at least 4 hours of direct full sun but 6 hours of bright light each day is better. Spinach can tolerate partial shade.
Limit light to less than 14 hours a day because under long days spinach bolts and goes to seed. Hot weather can also cause bolting.
If you grow crops during the winter months you probably won’t have enough natural light so the best way is to use an LED grow light on a timer for 10 -12 hours a day.
Here is an inexpensive LED grow light that will get the job done:
6: Caring for the Plants
Once your spinach seeds have germinated, you’ll need to provide proper care and maintenance to help your plants grow.
Water your plants regularly, but be sure not to overwater them. Spinach grows best in moist but well-draining soil, so it’s important to strike a balance.
Fertilize your plants every couple of weeks using a balanced liquid fertilizer. Because we are growing leafy greens chose a fertilizer high in Nitrogen.
You can use an organic fertilizer like fish emulsion or blood meal. Always follow directions when using any fertilizer.
7: Harvesting the Spinach
Fresh spinach is ready to be harvested when the leaves are young and tender. You can start harvesting the outer leaves when they are about 3-4 inches long.
Simply cut the new leaves with scissors, taking care not to damage the plants. If you just take side leaves the plant will continue to grow more.
You can continue to harvest the leaves as they grow, or you can wait until the plants are fully mature and harvest them all at once.
You can store extra spinach leaves in plastic bags inside your refrigerator for about a week or blanch them and put them in a freezer bag.
Growing Spinach Outdoors
If you have some space outdoors or have an apartment balcony you can grow spinach outdoors in early spring using a cold frame. It can tolerate light frosts and they actually make the leaves sweeter.
Spinach does not do well in warm weather so it’s best to grow it early in the growing season. Then you can replant it in late summer for a fall crop.
Indoor Spinach Grow Journal
Here is where I will be updating my indoor spinach grow. I will be adding videos as it progresses.
Day 1 Planting the Seeds
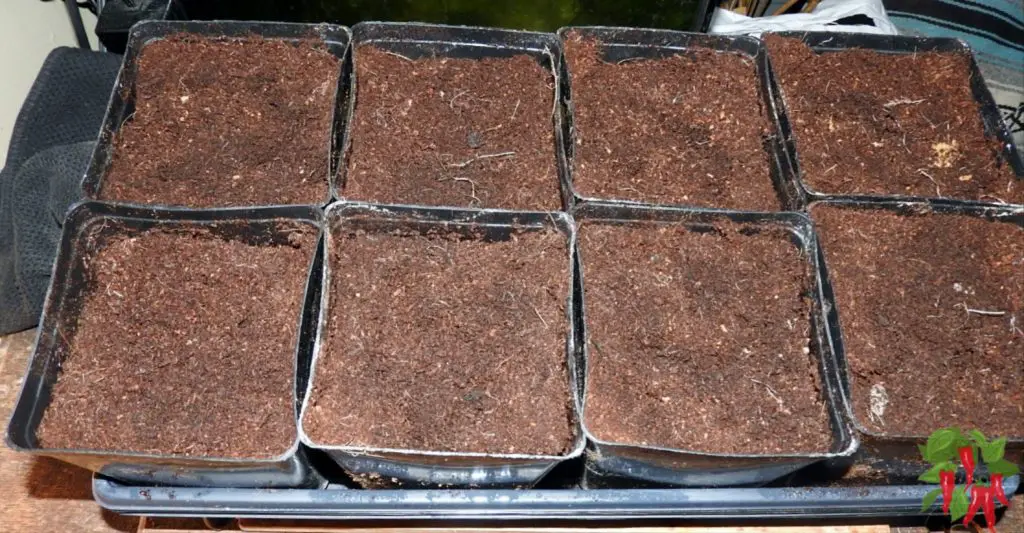
Today I filled 8 5-inch pots with coco coir and planted Bloomsdale Long Standing spinach seeds in the pots.
Day 21 Ready To Thin
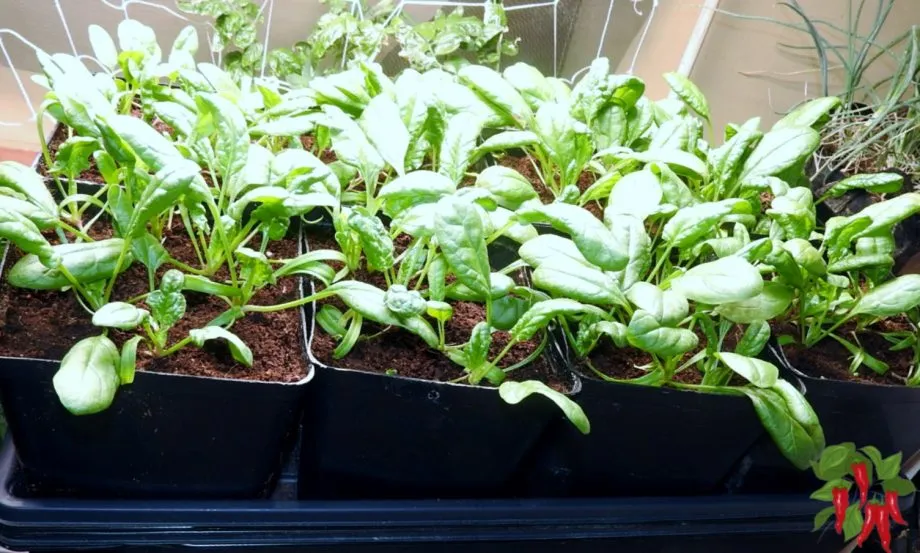
Here we have a nice stand of spinach. In a few days, they will be thinned out to one plant per pot. After this harvest, they will be allowed to get larger and then I will begin harvesting single leaves.
Final Thoughts
Growing spinach indoors is a rewarding and fun hobby that can provide you with a steady supply of fresh, nutritious greens.
By following the steps outlined above, you can easily grow your own spinach indoors and enjoy the taste and benefits of homegrown produce all year round. Happy gardening!
Here is a recap of the seven steps for growing spinach indoors:
1. Select a container: Choose a container that is large enough for the number of plants you want to grow and has good drainage.
2. Choose the right soil: Use well-draining soil with a pH between 6.0 and 7.0, and mix in compost or fertilizers if desired.
3. Plant the seeds: Scatter the seeds over the soil and gently press them down, covering them with a thin layer of soil about 1/4 inch deep.
4. Water the seeds: Keep the soil moist but not soggy, and the seeds should germinate in about 7-10 days.
5. Provide a good light source by a sunny window or use an LED grow light.
6. Provide proper care and maintenance: Water the plants regularly, and fertilize them every couple of weeks.
7. Harvest the spinach: Cut the leaves with scissors when they are young and tender, about 3-4 inches long. You can continue to harvest the leaves as they grow, or wait until the plants are fully mature and harvest them all at once.
Enjoy your homegrown spinach: Spinach is a nutritious and flavorful leafy green that is perfect for salads, smoothies, and many other dishes. Enjoy the taste and benefits of homegrown produce all year round!
Final Thoughts
Growing spinach indoors is a rewarding and fun hobby that can provide you with a steady supply of fresh, nutritious greens.
By following the steps outlined above, you can easily grow your own spinach indoors and enjoy the taste and benefits of homegrown produce all year round. Happy gardening!


