Hydroponic gardening for apartments gives you a practical way to grow lettuce, leafy greens, and herbs without a backyard or traditional garden bed. A compact system can fit near a bright window or under a grow light, making it useful for renters and anyone working with limited indoor space.
For this guide, I use a simple Kratky system made from a 10-gallon storage tote, net pots, growing media, and hydroponic nutrients. It is a passive system that does not require a water pump or electricity, although your plants may still need an LED grow light when natural light is limited.
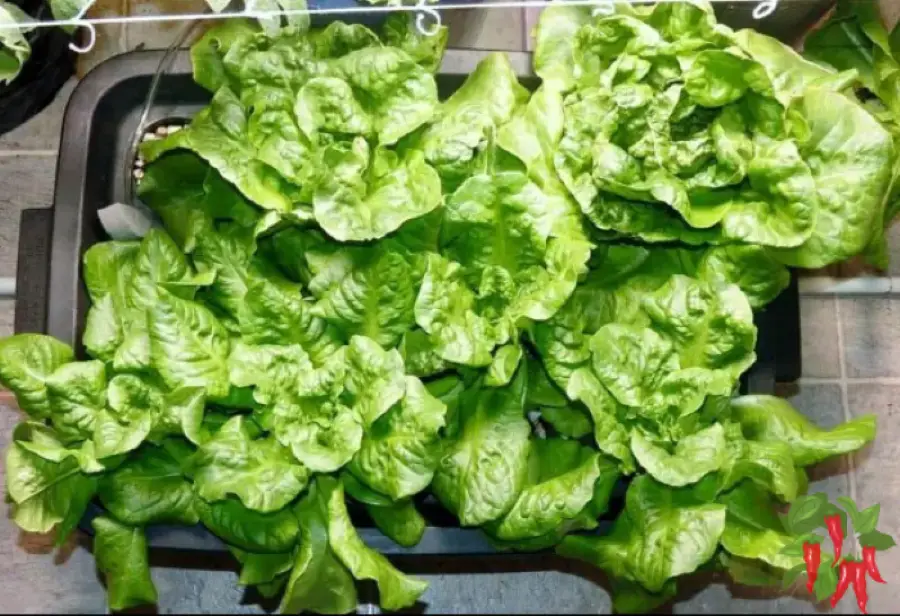
I have used this setup to grow leaf lettuce and Buttercrunch lettuce in my apartment. The photographs throughout this guide show the tote, seedlings, developing plants, and roots from my own system so you can see how the method works in practice.
Before setting up an indoor hydroponic garden, choose a stable location with enough light, convenient access for maintenance, and protection against accidental spills. Once the system is running, you will mainly monitor the plants, nutrient solution, water level, and light.
What You’ll Learn
How apartment hydroponics works without traditional soil
Why the Kratky method is useful for small indoor spaces
Which plants are best suited to a passive Kratky system
What container, net pots, nutrients, and growing media you need
How to prepare and plant a simple hydroponic tote
How the falling water level creates an air space for the roots
When an LED grow light may be necessary
How to monitor the system while your greens develop
The easiest hydroponic garden for many apartments is a compact Kratky system for lettuce, leafy greens, or herbs. Place plants in net pots above a covered reservoir filled with properly mixed hydroponic nutrient solution. As the plants use the solution, the water level falls and creates an air gap around part of the root system. The method does not require a pump, but you still need adequate light, suitable nutrients, and regular observation.
Apartment Hydroponics at a Glance
Consideration
Practical Starting Point
Beginner system
Passive Kratky hydroponic system
Good starter crops
Leaf lettuce, compact head lettuce, leafy greens, and smaller herbs
Less suitable crops
Large, long-season plants such as full-size tomatoes and peppers
Reservoir
Covered, watertight, food-safe container suitable for the crop
Plant support
Net pots held securely in a fitted lid or floating support
Growing media
Perlite, hydroton, or another suitable hydroponic medium
Nutrients
Complete fertilizer formulated specifically for hydroponic growing
Target pH
Commonly around 5.5–6.5, depending on the crop and nutrient directions
Light
Bright window light or an appropriately positioned LED grow light
Electricity
Not required for the passive reservoir; may be needed for a grow light
Apartment placement
Stable, level surface with spill protection and access for maintenance
Regular checks
Plant health, light, nutrient level, pH, water level, and reservoir temperature
An Introduction to Hydroponic Gardening
Think you can’t grow fresh vegetables in an apartment? Hydroponic gardening gives you a way to grow lettuce, herbs, and other greens indoors without a traditional garden or backyard.
Hydroponics replaces soil with a nutrient solution that supplies essential mineral nutrients directly to the roots. The plants are usually supported by net pots and an inert growing medium while their roots extend into or above the nutrient solution.
This approach works particularly well in apartments where growing space is limited. A small system can fit near a window, under an LED grow light, or in another suitable indoor location without bringing garden soil into your home.
You do not need an elaborate setup to get started. In this guide, I’ll show you how I built a simple Kratky system for growing lettuce using a storage tote, net pots, growing media, and hydroponic nutrients.
Whether you are new to gardening or an experienced grower interested in trying hydroponics, this method offers a practical way to enjoy fresh greens from a small indoor space.
What is Hydroponic Gardening?
Hydroponic gardening refers to the process of growing plants without soil, using nutrient-rich water to deliver the necessary minerals directly to the plants’ roots.
In traditional gardening, the soil acts as a nutrient reservoir, but in hydroponics, you control the nutrient mix, making it an efficient and responsive way to nurture plants.
There are several types of hydroponic systems, each with its unique approach, including the DWC (deep water culture), aeroponics, and the Kratky method, among others.
Benefits of Hydroponic Gardening
One of the standout benefits of hydroponic gardening is the efficient use of water.
It generally consumes less water than traditional soil gardening because the system recirculates water, leading to less waste.
Additionally, hydroponic gardening offers control over the nutrients, allowing for precise adjustments, leading to potentially faster growth and healthier plants.
Space efficiency is another perk, making hydroponic gardening particularly appealing for those in urban areas or apartments where outdoor gardening space is limited.
From beginners to advanced gardeners, hydroponic gardening opens up a new frontier of possibilities.
You’ll not only enjoy the fresh taste of homegrown produce but also the rewarding experience of watching your plants thrive in this soil-less world.
Hydroponics is the process of growing plants in water instead of soil. This method has many advantages, including:
• You can grow plants anywhere, even if you don’t have any outdoor space
• Hydroponic gardens use less water than traditional gardens
• Hydroponic gardens are more efficient because all the nutrients the plants need are delivered directly to them.
• You do not need any messy soil inside your home.
How To Build A Simple Hydroponic System
We are going to build a Kratky system for growing lettuce or greens. This is a simple passive hydroponic system that needs no electricity.
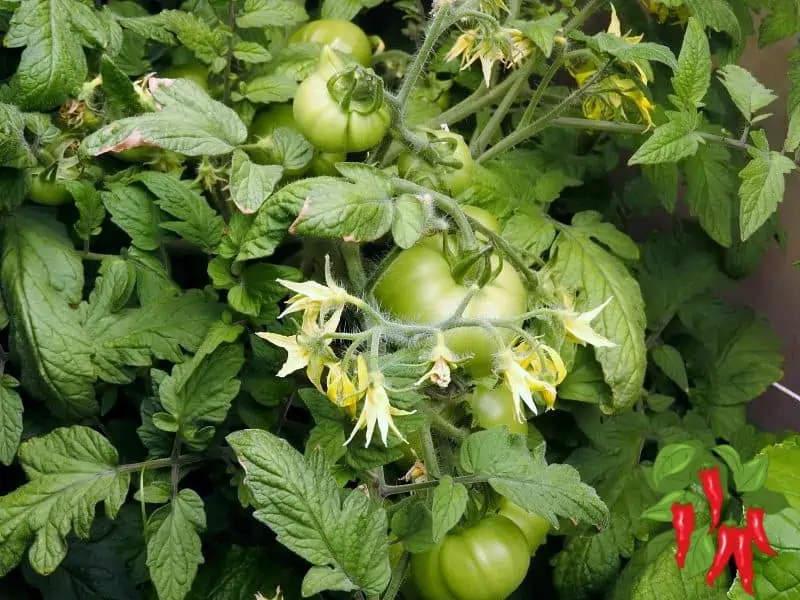
It works great for lettuce or other leafy greens but not for large plants like tomatoes or peppers.
Lettuce and herbs need much less light than tomatoes but you will still need to find a place that gets some sunlight or where you can add a fluorescent or LED light.
If you are interested in starting a hydroponic garden, there are a few things you will need to get started using the Kratky method:
You will need:
• A container to use as a reservoir. Any plastic storage bin with a lid will work just fine. I used a 10-gallon Rubbermaid tote for mine.
• Pots to grow your plants in, plastic net pots work best for this.
• Hydroponic growing media such as perlite, or hydroton.
• Nutrient solution. Follow mixing directions. More is not better!
Once you have all of your supplies, you will need to set up your hydroponic system. There are many different ways to do this, but one of the simplest hydroponic systems is the Kratky method.
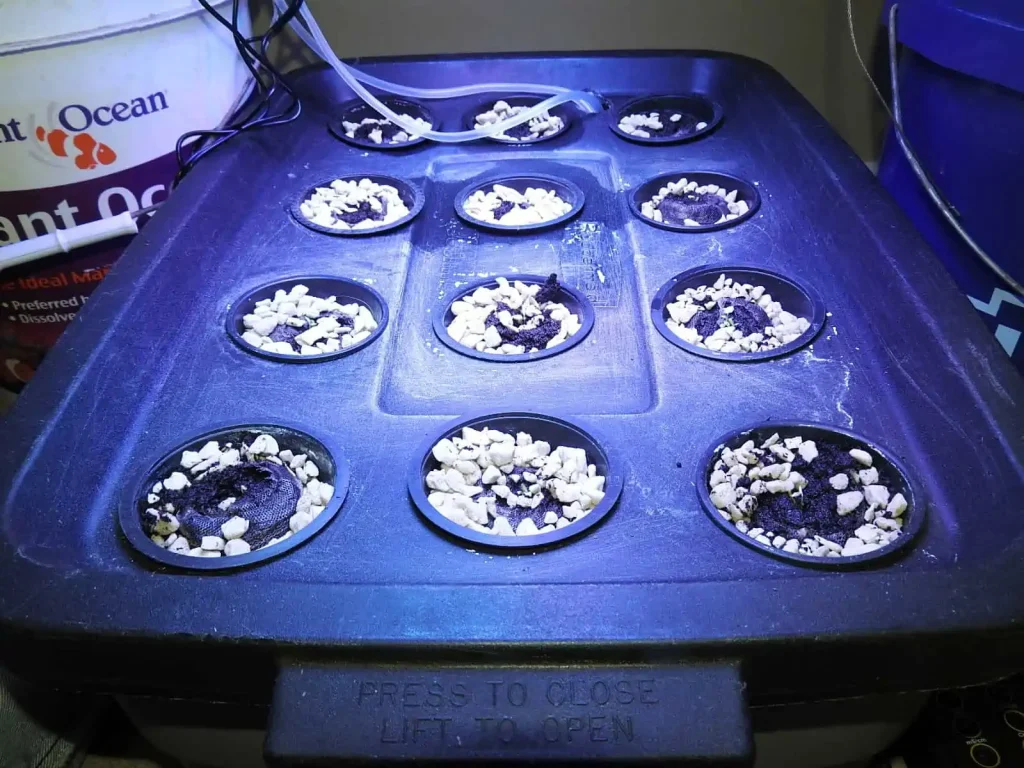
There are 2 ways you can set this up. You can use 3-inch net pots and cut holes in the lid of the tote to fit them in. Here is what mine looks like.
Or you can use a piece of styrofoam that just fits inside your tote. You will need to cut holes to fit your plants or net pots through.
The advantage of using net pots in a lid instead of a styrofoam raft is that it is easy to move plants around.
This system is very flexible so you can grow only one plant or several at a time. A lot will depend on the size of your tote but your plants should be 8-12 inches apart.
I recommend buying transplants if you are new to growing or if you are more experienced you can grow your own from seed.
If you buy transplants you will want to gently wash off as much soil as you can from the roots.
Then you will place the roots in a net pot filling it in with grow medium.
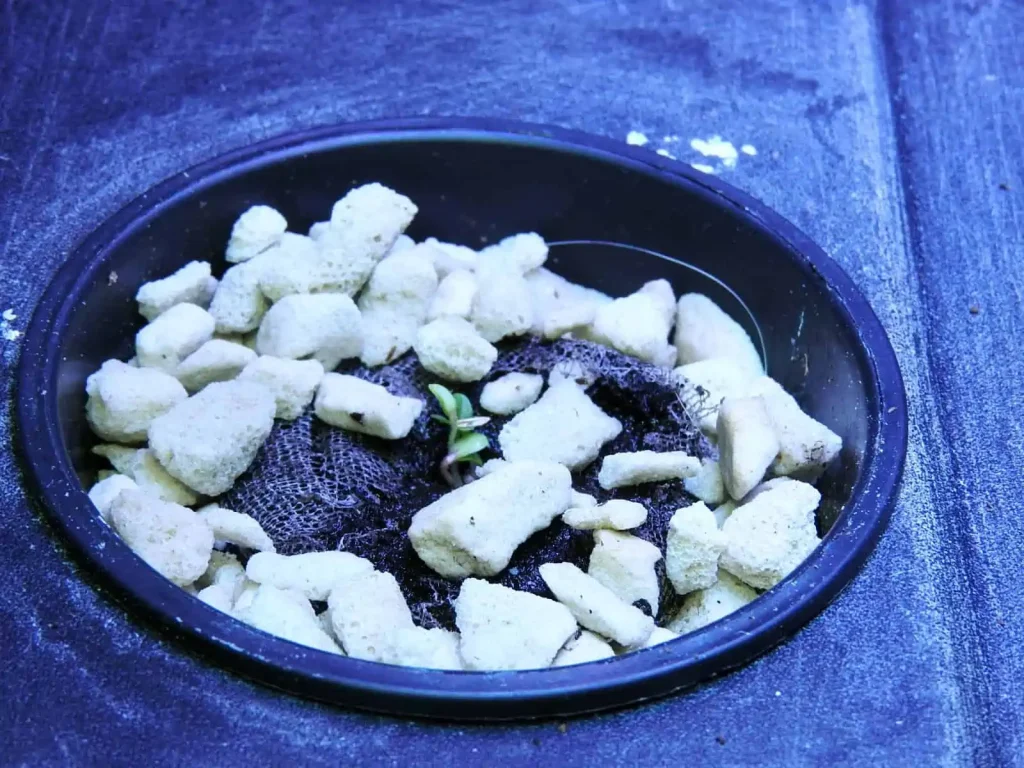
I started my own lettuce seeds in jiffy pellets and then placed them in the net pots.
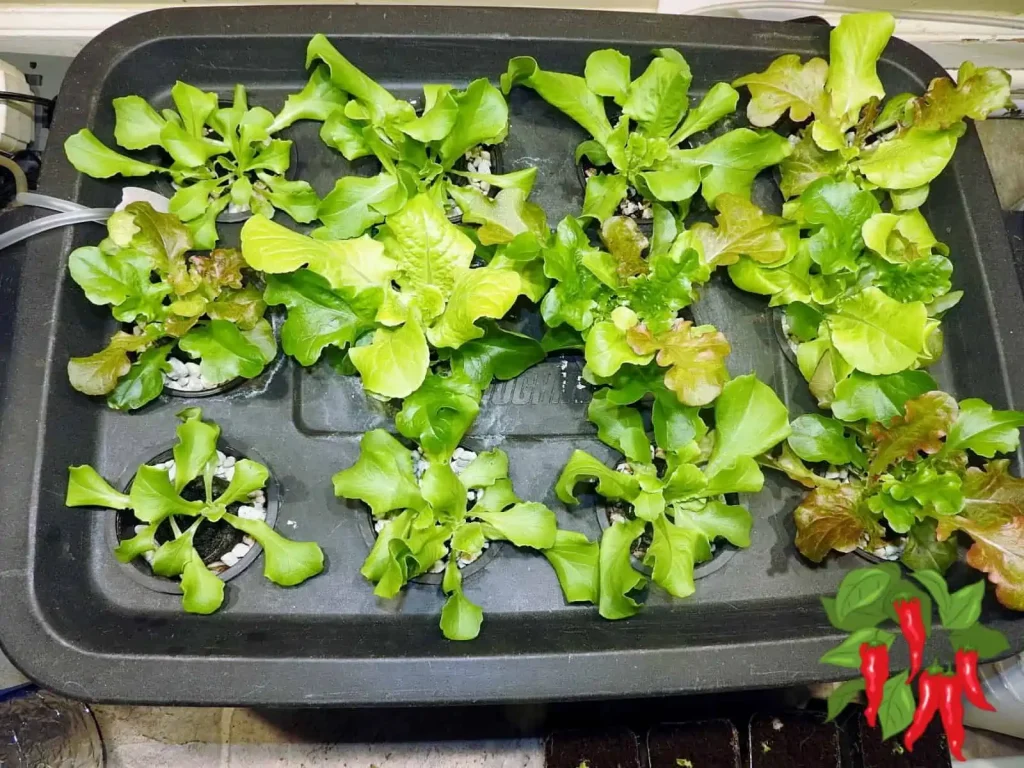
Here they are a few weeks later. I have 12 plants in my Kratky system. Six are leaf lettuce and 6 are Buttercrunch.
The leaf lettuce will be done in 45 days but you can start harvesting leaves much sooner.
The Buttercrunch is a semi-heading lettuce that takes about 60 days. Once the leaf lettuce is gone there will be more room for head lettuce to grow.
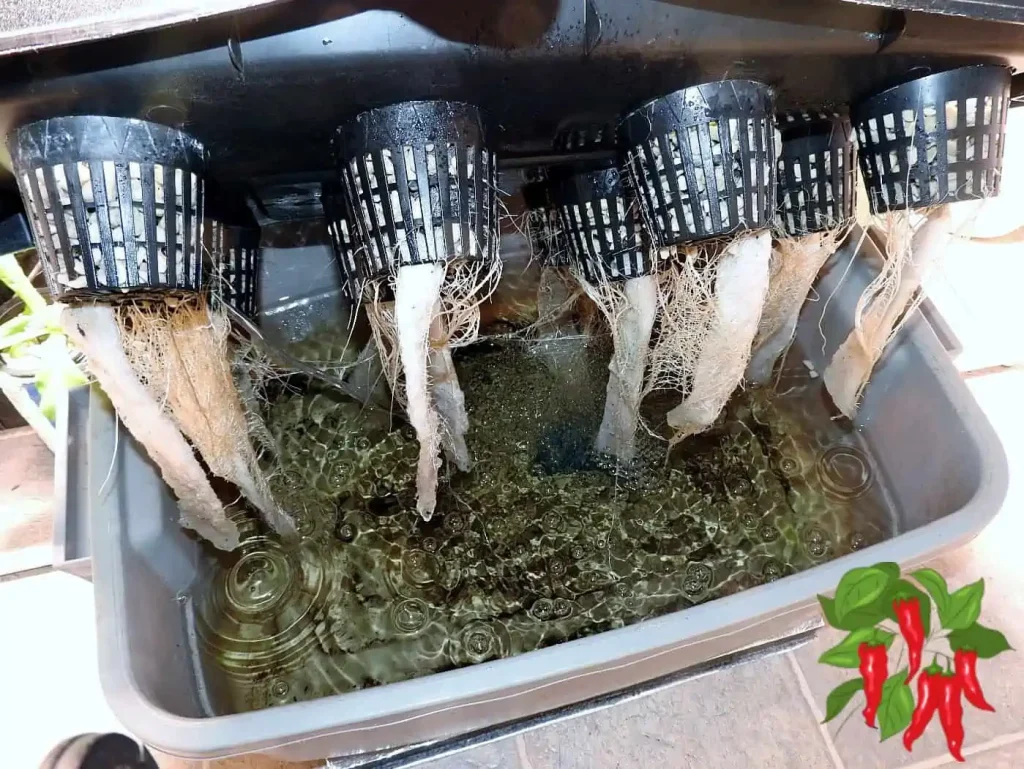
Here are some roots. I added a wick to each pot but this is not really necessary.
If you want you can add an airstone to your tote but again not required.
However, adding an airstone will result in better growth. Once you add an air stone this is technically DWC (deep water culture).
Add your transplanted plants in net pots to the lid or through holes in the styrofoam raft.
If you are careful you may be able to make small holes in the raft that are large enough to get the roots through but won’t let the whole plant fall through.
Fill your reservoir with hydroponic nutrient solution. It should be close to the tops of the net pots.
As your plants grow the water level will drop. The roots above the waterline supply oxygen to the plant while the roots in nutrient solution feed the plant.
Your plants should be done before the water is all gone. This is why this system works best for fast-growing plants.
With the Kratky method, you don’t replace the water as it goes down because it would cover the plant’s air roots. But if you decide to use an airstone you can safely top up your reservoir.
That’s really all there is to it! Hydroponic gardening is a great way to grow plants in your apartment, even if you don’t have any outdoor space give it a try today!
Steps to Set Up Your Kratky Hydroponic System In A Nutshell
Here’s what you will need:
1. Containers:
Type: Plastic storage bins with lids are generally suitable, as they are watertight and easy to modify. Containers like a 10-gallon Rubbermaid tote are commonly used.
Size: Your plants should be spaced 8-12 inches apart, so choose a container that fits your desired number of plants. A larger container means more plants, but it also requires more nutrients and space.
Shape: Containers with a wide, flat bottom work best for distributing the nutrient solution evenly among the plants.
2. Nutrients:
Nutrient Solution: You must choose a nutrient solution formulated specifically for hydroponics. It will contain all the essential minerals your plants need.
Mixing Instructions: Follow the manufacturer’s instructions when mixing the nutrient solution. More is not always better; incorrect concentrations can harm the plants.
pH Levels: Monitor and maintain proper pH levels in the nutrient solution to ensure that nutrients are available to the plants. A pH range of 5.5 to 6.5 is usually optimal for most plants.
3. Additional Accessories:
Net Pots: Plastic net pots work best for holding plants. Use 3-inch net pots.
Growing Media: Choose inert media like perlite, grow stones, or hydroton to support the plants’ roots. With the right choices, your hydroponic system will be off to a great start!
ph pen and TDS meter: You can find cheap ones on Amazon. You need these to make and monitor your nutrient solution.
Steps to Set Up Your Kratky Hydroponic System
Setting up a Kratky hydroponic system is simple and can be done with basic supplies. Here’s a step-by-step guide:
1. Prepare Your Container:
Cut holes in the lid of the tote to fit your net pots, or prepare a piece of styrofoam that fits inside your tote, cutting holes to fit your plants or net pots through. The advantage of using net pots in a lid instead of a styrofoam raft is that it’s easy to move plants around.
2. Plant Your Seeds or Transplants:
If you buy transplants, wash off as much soil as you can from the roots. Place the roots in a net pot, filling it in with grow medium, or start seeds in jiffy pellets and place them in the net pots.
3. Prepare Nutrient Solution:
Mix the nutrient solution according to the instructions and fill your reservoir close to the tops of the net pots. I recommend 500 ppms for young plants and up to 1000 ppms for larger plants.
4. Place Plants in the System:
Add your transplanted plants in net pots to the lid or through holes in the styrofoam raft. Be careful when making holes in the raft to prevent the plants from falling through.
5. Monitor Water Levels:
As your plants grow, the water level will drop, leaving some roots above the waterline to supply oxygen and others in the nutrient solution to feed the plant.
With the Kratky method, don’t replace the water as it goes down. If you decide to use an airstone, you can safely top up your reservoir.
6. Harvest Your Plants:
Harvest your plants once they’ve reached their growth potential. Timing varies depending on the plant type.
By following these steps, you can set up a Kratky hydroponic system easily in your apartment, enjoying fresh produce right at home!
Hydroponic Gardening for Apartments FAQs
What plants grow best in an apartment Kratky system?
The Kratky method works especially well for lettuce, leafy greens, and smaller herbs. These crops grow quickly, remain relatively compact, and can often complete their growth before exhausting a properly sized reservoir.
Large, long-season plants such as full-size tomatoes and peppers need more room, light, nutrients, and root-zone management. I would use an aerated deep water culture system or another active hydroponic method for those crops.
Does a Kratky system require electricity?
The passive reservoir does not require a water pump or air pump. However, you may still need electricity for an LED grow light when your apartment does not receive enough natural light.
If you add an air pump and airstone, the setup becomes a basic deep water culture system rather than a true passive Kratky system.
Do hydroponic vegetables need sunlight?
Plants need light, but it does not have to come directly from the sun. A bright window may provide enough light under suitable conditions, or you can use an LED grow light to provide consistent lighting indoors.
Watch the plants for stretched stems, pale growth, or leaves leaning strongly toward the light. These signs can indicate that the light is insufficient.
Should I refill a Kratky reservoir as the water level drops?
A Kratky system is designed so the falling nutrient level creates an air space around the upper roots. For fast-growing lettuce in a properly sized reservoir, the original nutrient solution may be enough to carry the crop through harvest.
Do not refill the reservoir to its original level after air roots have developed because that can submerge them. If a limited adjustment becomes necessary, maintain a substantial air gap between the nutrient solution and the plant’s crown. An aerated deep water culture system manages the solution level differently.
Do I need to check pH and nutrients?
Yes. Use a complete fertilizer formulated for hydroponics and follow its crop-specific mixing directions. Check the pH after mixing the solution. A range around 5.5–6.5 is commonly used for hydroponic crops, although the preferred range varies by plant.
An EC meter can help you measure the overall concentration of dissolved nutrients. PPM readings can be useful, but different meters may convert EC to PPM using different scales.
How much room does an apartment hydroponic garden need?
A small system needs enough room for the reservoir, mature plant spread, and lighting. My 10-gallon tote can hold several lettuce plants, but you can begin with a smaller container and fewer plants if floor or counter space is limited.
Measure the location before building the system. Leave enough clearance to inspect roots, remove the lid, test the nutrient solution, and harvest the plants.
How can I protect my apartment from water spills?
Place the reservoir on a strong, level surface and inspect it for cracks or leaks before adding nutrient solution. A waterproof tray or mat under the system provides additional protection. Keep electrical connections for grow lights and air pumps elevated and away from possible spills.
Remember that a filled reservoir is heavy. Set up the system where you intend to grow rather than trying to carry it after it is full.
Can I move plants around in the Kratky system?
Net pots held in a rigid lid are relatively easy to reposition while plants are still small. Be careful with mature plants because their roots may become long and tangled inside the reservoir.
Avoid damaging the roots or exposing them to light for an extended period. Keep unused openings covered so light does not enter the reservoir and encourage algae growth.
Final Thoughts
Hydroponic gardening for apartments does not require a complicated commercial system. My Kratky tote uses a covered reservoir, net pots, growing media, hydroponic nutrients, and enough light to grow lettuce without a traditional garden.
The method works best when you match the reservoir and crop. Lettuce and other quick-growing greens are good starting choices because they remain manageable and can often reach harvest using the nutrient solution prepared at the beginning.
Pay attention to light, nutrient strength, pH, root health, and the developing air gap. Do not assume that a passive system requires no observation. Regular checks help you catch algae, nutrient problems, weak lighting, or unhealthy roots before they affect the entire crop.
Start with a few plants and learn how the system behaves in your apartment. Once you successfully harvest your first lettuce crop, you can expand the setup, try different greens, or decide whether an aerated deep water culture system would better suit larger plants.
These university and Extension resources provide additional information about Kratky growing, hydroponic nutrients, pH, electrical conductivity, and indoor plant lighting: