Introduction to Growing Lavender in Pots: A Step-by-Step Guide
Ready to fill your space with the soothing scent and vibrant colors of lavender? Here’s a quick rundown to get you started on your pot-growing journey:
Why Lavender Loves Pots:
Space-Savvy: Perfect for tight spots, from cozy corners to sunny sills.
Easy-Peasy: Container gardening makes it a breeze to manage soil and watering.
Variety is the Spice: Choose from English, French, or Spanish lavender to match your climate and style.
The Perks of Potted Lavender:
Blooms Galore: Get ready for a show of stunning purple flowers.
Scent-sational: Fill your space with that signature calming fragrance.
Aesthetic Boost: Add a touch of elegance to your balcony or indoor garden.
Stay tuned as we dive deeper into each step of growing lavender in pots, from picking the right variety to harvesting those fragrant blooms!
Why Lavender and Pots Are a Match Made in Heaven
Space-Savvy Gardening:
Compact Living: Perfect for small spaces, balconies, or windowsills.
Portable Paradise: Move your lavender to catch the sun or dodge bad weather.
Control at Your Fingertips:
Custom Care: Tailor the soil and water just how your lavender likes it.
A Lavender Variety for Every Taste:
English Lavender (Lavandula angustifolia):
Climate: Loves cooler weather.
Perks: Known for its strong scent – a real aroma powerhouse!
French Lavender (Lavandula dentata):
Climate: Happiest in milder climates.
Perks: Fancy toothed leaves and a softer fragrance.
Spanish Lavender (Lavandula stoechas):
Climate: Perfect for warmer spots.
Perks: Unique bloom shape, bringing a bit of the exotic.
The Bottom Line:
From adding a pop of color to your balcony to filling your space with soothing scents, each type of lavender brings its own charm to the pot.
Whether you’re after a visual treat, a natural air freshener, or a hint of the Mediterranean, lavender’s got you covered.
Video: Young Lavender Plants in a Flood and Drain System
Even the foliage smells great!
Choosing the Perfect Lavender for Your Pot
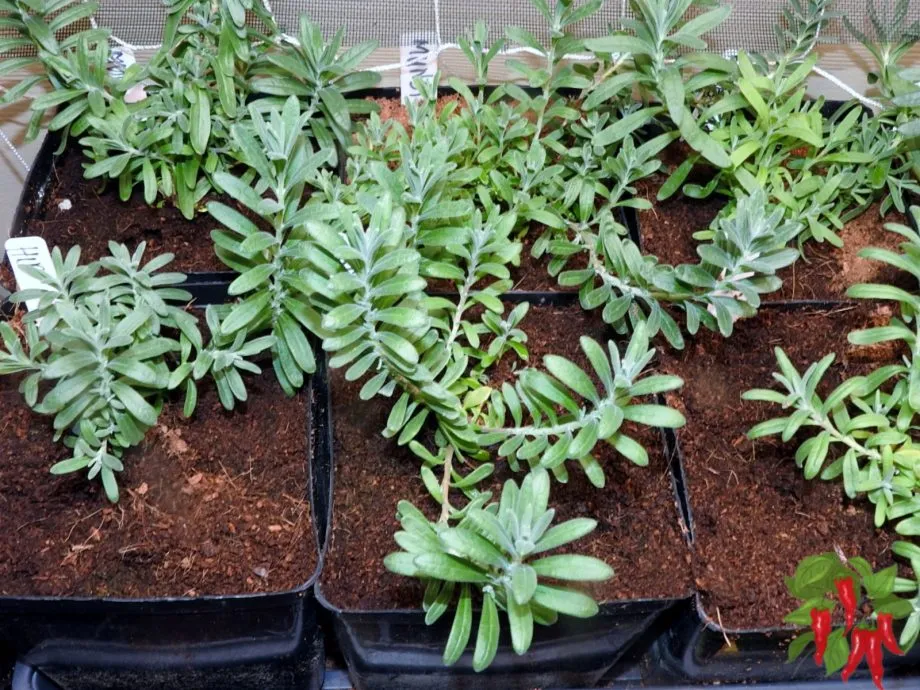
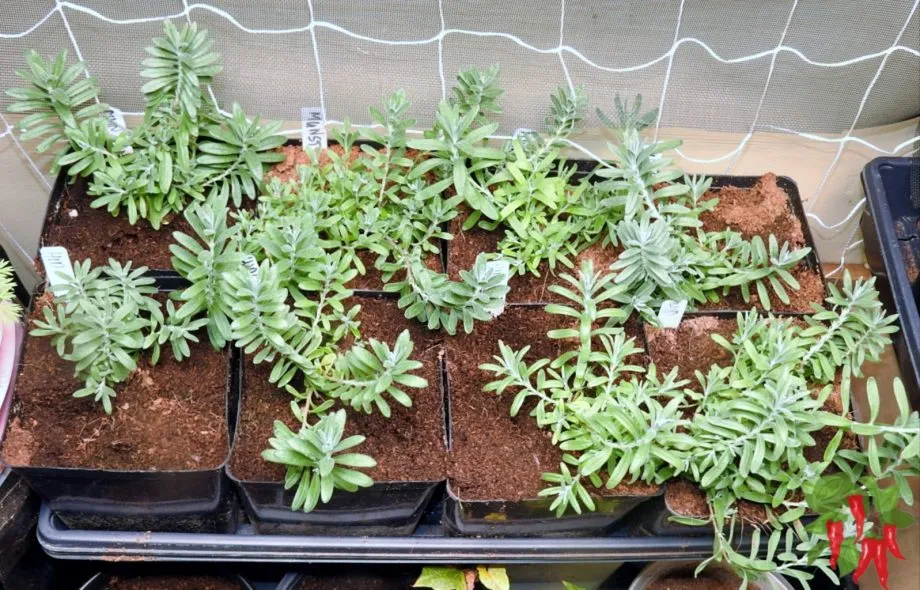
The first image at the top of the post has some baby lavender seedlings and here they are after transplanting into larger pots.
Pick the Right Type for Pot Success: Selecting the ideal lavender variety for your pot is key to a flourishing plant. Look for types that are compact and well-suited for container life.
English Lavender (Lavandula angustifolia):
Pot-Friendly: A top pick for pots due to its neat size and toughness. A champ in cooler climates.
Scent Sensation: Famous for its robust aroma, perfect for a fragrant garden.
Star Varieties:
Munstead: Petite and early-blooming, it stands at 12-18 inches, fitting snugly in smaller pots.
Hidcote: Known for its rich purple blooms and tidy growth, reaching 12-20 inches. A stunner for pot displays.
French Lavender (Lavandula dentata):
Pot Potential: Great for milder spots, with a bit more sprawl that can be tamed in larger containers.
Leafy Look: Spot it by its fringed foliage and gentler scent. A tad larger than their English cousins, but a trim can keep them just right for pots.
Spanish Lavender (Lavandula stoechas):
Sun Lover: Flourishes in the warmth and light, making it perfect for hot, sunny regions.
Unique Blooms: Standout with its pineapple-like flowers and bold fragrance.
Bushy Buddies: These varieties have a fuller figure, so give them roomy pots to stretch out.
Selecting the right variety of lavender for your pot is crucial for successful growth. Different types of lavender offer varying growth habits, sizes, and suitability for container gardening.
Particularly, varieties that are shorter and more compact are ideal for pot cultivation.
My Lavender Seed Choices
These are the lavender varieties I went with. Some lavender can get quite tall but I wanted shorter varieties to use in pots. They are available on Amazon.
Also, I want to keep a few plants indoors, and shorter varieties will work better indoors.
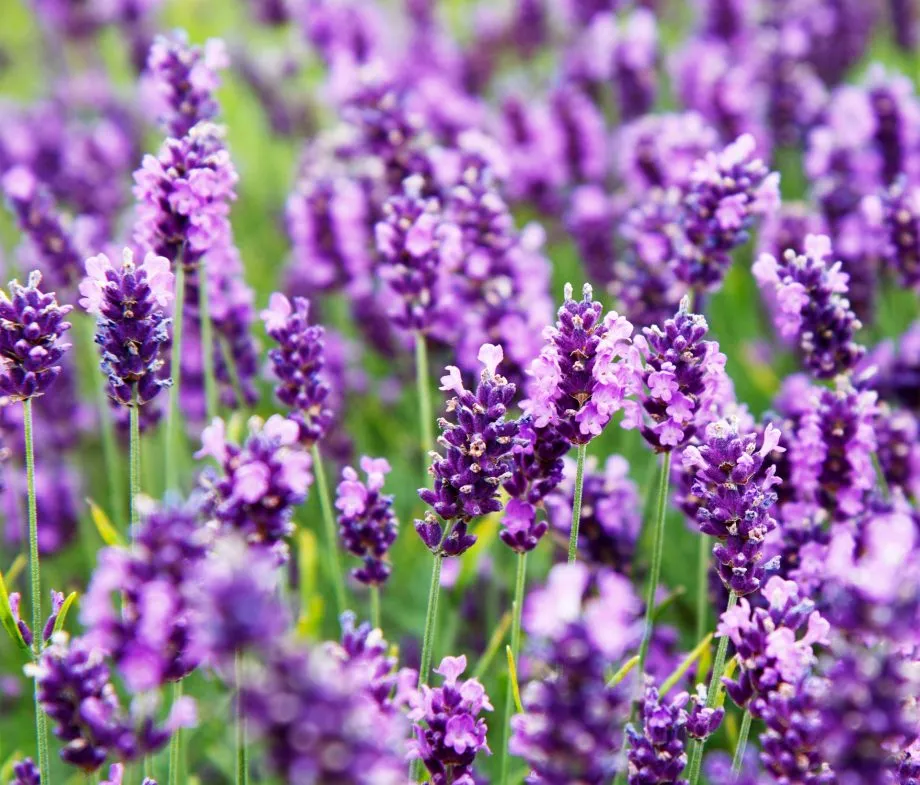
Here is what Munstead Lavender looks like when flowering.
Chilling Lavender Seeds for Better Sprouting
What’s Stratification? It’s a fancy word for giving your lavender seeds a pretend winter in the fridge. This chilly nap wakes them up and gets them ready to grow.
Here’s How to Chill Your Seeds:
Get ‘Em Moist: Start by dampening a paper towel or some sterile sand.
Seed Time: Pop your lavender seeds onto the moist stuff.
Bag ‘Em Up: Tuck the seeds into a sealable plastic bag or container.
Fridge Time: Stash them in the fridge. Aim for a cool 35-40°F (1.5-4.5°C).
Wait It Out: Let them chill for about 4-6 weeks, simulating winter.
Pro Tip: If you’re like me and prefer the easy route, just stick the whole seed packet in the fridge.
Post-Chill Steps:
Planting Time: After their cold vacation, plant the seeds in well-draining soil. A light dusting of soil on top is perfect, as they need some light to sprout.
Keep It Light and Moist: Make sure the soil stays slightly damp and give them plenty of light. A grow light is handy if your windowsill isn’t sunny enough.
Patience, Patience, Patience: Lavender seeds aren’t in a rush. They can take a few weeks to say hello, so hang in there.
Quick Tip: If waiting isn’t your thing, snag some ready-to-go transplants or try rooting cuttings from a grown-up plant for a faster start.
Picking the Perfect Pot for Your Lavender: A Guide to Picking the Perfect Pot
Ready to give your lavender a cozy and stylish home? Choosing the right pot is crucial for your plant’s health and happiness.
Let’s dive into the essentials of pot selection, from size and drainage to material and aesthetics.
With these tips, you’ll be on your way to creating a thriving lavender display that’s not only beautiful but also flourishing.
Size Matters:
Room to Grow: Pick a pot that gives your lavender space to reach its full size. Happy roots mean a happy plant.
Just Right: Aim for a pot 12-16 inches across. Big enough for growth, but not so big it stays soggy.
Starting Small: If you’re beginning with seeds, use smaller pots and upgrade as your lavender grows.
Drainage is Key:
Hole-y Pots: Make sure your pot has holes in the bottom to let excess water escape. Soggy roots are a no-go for lavender.
Material Matters: Terracotta or clay pots are champs at letting soil breathe and moisture escape. Just double-check for those drainage holes.
Coco Coir Plus: Using plastic pots? Fill ’em with a mix that includes coco coir for top-notch drainage.
Choosing the Right Material:
Feel the Heat: Different pot materials handle heat differently. Metal pots can turn into mini ovens in the sun, so consider your climate.
Heft and Lift: Think about the weight. Heavier pots are stable but tough to move. Lighter pots are easier to shift but might tip in the wind.
Style Points:
Lookin’ Good: Pick a pot that matches your garden’s vibe. Lavender can be a showstopper in the right pot.
Extra Tips:
Saucer Savvy: Saucers are great indoors but can trap water outdoors. Empty them after watering.
Elevate Your Game: Raising your pots off the ground can boost drainage and keep away frost and critters.
The Takeaway:
A well-chosen pot makes all the difference for your lavender. It’s not just about looks – the size, drainage, and material all play a part in keeping your plant healthy and blooming.
Picking the Perfect Pot for Your Lavender: A Simple Guide
Ready to give your lavender the best home ever? This guide’s got all the dirt on picking the right pots and soil to make sure your lavender grows happy and healthy.
Whether you’re starting from seeds or potting up mature plants, we’ve got the tips to keep things simple and stress-free. Let’s dive in and get those pots sorted!
The Lowdown on Pots and Growth Stages:
Starting Off Small: Kick things off with your lavender seeds in flats. It’s like their first apartment.
Moving On Up: Once those little guys sprout, upgrade them to 2 1/4-inch pots. It’s all about giving them room to grow.
Medium-Sized Upgrade: As they get bigger, shift them to 5-inch pots. Think of it as their teen phase.
The Big Leagues: Finally, settle them into 12-16 inch pots. This is their forever home, with plenty of space for those deep roots.
Choosing the Right Pot:
Size Matters: Make sure the pot fits the plant’s stage of life. You wouldn’t wear toddler shoes as a grown-up, right?
Drainage is Key: Lavender hates wet feet. Pick pots with holes in the bottom to keep things dry.
Material Magic: Stick to one type of pot material, like terracotta or clay, to keep moisture and temperature steady.
Getting the Soil Right:
The Perfect Mix: Aim for a mix of 70% compost and 30% sand or grit. Lavender loves well-draining soil.
Adjust for Your Weather: If it’s super rainy or humid where you are, add more sand or grit to the mix.
Coco Coir is Cool: This stuff is great for drainage. Mix it in with a slow-release fertilizer to keep your lavender fed and happy.
pH and Air Flow: Lavender likes its soil a bit alkaline. And make sure the mix is light and airy for good root health.
Wrapping It Up:
By getting the pot and soil right, you’re setting your lavender up for success. It’s all about giving it the space and conditions it needs to thrive. So, go ahead and get potting!
Choosing the Right Pot and Soil for Lavender
When you’re growing lavender in pots, picking the right pot and soil is super important. These two things are like the bread and butter of keeping your lavender plants healthy and happy.
Why Pot Size and Drainage Matter:
Pot Size: Your pot needs to be just the right size for your Lavender roots. Too big, and you risk waterlogging and root problems.
Drainage: Lavender loves a well-drained home. Make sure your pots have drainage holes to keep things from getting too soggy and causing root rot.
The Perfect Soil Mix for Your Potted Lavender:
Standard Mix: For happy lavender, mix up a batch of 70% compost and 30% horticultural sand or grit. It’s like the ideal light and airy bed for your plants.
Tweaking for Weather: If you’re in a place that gets a lot of rain or has high humidity, give your lavender some extra drainage love. Boost the sand or grit in your mix to about 50% to keep those roots from getting waterlogged.
Why I Love Coco Coir for Lavender:
Coco coir with 25% perlite is my go to mix for Lavender. You can even skip the perlite and use straight coco coir if you want.
Drainage Superstar: Coco coir is my go-to for lavender because it’s awesome at draining excess water. It keeps the roots nice and dry, lowering the chance of root rot.
Coco coir has a natural pH that Lavender loves.
Feed Me: Just a heads-up, coco coir doesn’t have a lot of nutrients. So, I always mix in a balanced, slow-release fertilizer to make sure my lavender gets all the good stuff it needs.
Additional Soil Considerations
pH Level: Lavender prefers slightly alkaline soil. You may need to adjust the pH of your soil mix accordingly. Not needed with coco coir!
Air Circulation: A light and airy soil mix also promotes good air circulation around the roots, which is essential for healthy lavender growth.
Choosing the right pot and soil mix is a critical step in successfully growing lavender in containers.
By ensuring proper drainage and using a well-suited soil mix like coco coir, you can create an ideal environment for your lavender plants to flourish.
Getting Your Lavender Off to a Great Start in Pots
Planting your lavender right and giving it the care it needs from the get-go is super important.
It’s what makes sure your plants grow up healthy and strong. Let’s walk through the basics to get your lavender off on the right foot!
Getting the Pot Ready for Your Lavender:
Pick a Pot with Holes: Make sure your pot’s got good drainage holes. We don’t want any soggy roots!
Mix Up Your Soil: If you’re using coco coir like me, blend it with some slow-release fertilizer. This way, your lavender gets the right nutrients, even though coco coir isn’t super rich on its own.
Fill ‘Er Up: Pour your soil mix into the pot. Leave some room at the top for your lavender plant and a little extra soil to tuck it in nicely.
Planting Your Lavender in Its New Home:
Ease It Out: Gently coax your lavender out of its old pot, being careful not to mess with the root ball too much.
Set It In: Pop the lavender into the new pot, making sure the top of the root ball is just a tad below the pot’s rim.
Surround It with Soil: Add your soil mix around the lavender, keeping the base of the plant at the same height it was before. No burying it too deep or leaving it too high!
First Watering for Your Newly Planted Lavender:
Give It a Good Drink: Right after you plant it, water your lavender well. Keep going until you see water coming out of the pot’s drainage holes. This helps the soil snug up around the roots.
Don’t Drown It: Remember, lavender’s not a fan of soggy feet. Let the soil dry out a bit before you water it again.
Finding the Perfect Sunny Spot for Your Potted Lavender:
Sunshine Lover: Lavender is all about that full sun life. Aim to give it a spot where it can soak up 6-8 hours of direct sunlight each day.
Beat the Heat: In super hot areas, a little shade in the afternoon can keep your lavender from getting sunburned.
Give It a Twirl: Turn the pot around now and then so every side of your lavender gets some sun time. This helps it grow nice and even.
By nailing the planting and initial care, your lavender’s off to a fantastic start. Getting the soil just right, planting with care, and making sure it gets plenty of sun are key for a healthy, sweet-smelling lavender plant in your pot.
Ongoing Care and Maintenance for Lavender in Pots
Keeping Your Potted Lavender Happy: Ongoing Care Tips
For your lavender to keep thriving in its pot, a little TLC goes a long way. Let’s dive into the essentials of watering, feeding, and trimming:
Watering Your Potted Lavender: Keep It Just Right
How Often: Lavender likes it on the dry side. Give it a drink only when the top inch of soil is dry. Too much water is a no-no and can cause root rot.
How to Water: Go for a good soak, but don’t do it too often. Make sure the water gets down to the roots without leaving the soil waterlogged.
When It’s Hot: In the summer, your lavender might get thirstier, so you might need to water it a bit more.
Drainage Check: Always make sure the water can escape from the pot. You don’t want your lavender sitting in a puddle!
Feeding Your Potted Lavender: Less is More
Easy on the Fertilizer: Lavender isn’t a big eater, so go easy on the feeding. Start with half the dose recommended on the fertilizer package and see how your plant likes it.
Pick the Right Food: A balanced, slow-release fertilizer is the way to go. Stay away from the high-nitrogen stuff – it’ll give you lots of leaves but not many flowers.
When to Feed: Give your lavender a little boost in early spring when you see new growth popping up. Then, feed it every four to six weeks while it’s growing.
How to Apply: Stick to the directions on the fertilizer package for how much to use and how to apply it.
Trimming Your Lavender: Keeping It Tidy and Blooming
When to Prune: Early spring or just after the flowers fade is prime time for pruning.
How to Prune: Snip off about a third of the plant, focusing on the newer, softer growth. Steer clear of the old, woody stems.
Shape It Up: Regular pruning keeps your lavender looking neat and bushy, and encourages more flowers.
After the Blooms: Deadheading, or taking off the old flowers, can sometimes trigger a second round of blooms.
Stick to these pointers for watering, feeding, and pruning, and your lavender will stay in tip-top shape. With a bit of regular care, you’ll get to enjoy those lovely flowers and sweet scents all season long.
Keeping Your Potted Lavender Cozy Through Winter
Even though lavender is pretty tough in the Pacific Northwest winters, potted plants need a little extra love to make it through the chilly months.
Here’s what you can do to keep your lavender happy until spring:
Winter Tips for Your Outdoor Potted Lavender:
Tougher in the Ground: Remember, lavender in pots isn’t as hardy as when it’s planted in the garden. In cold climates, give it some extra protection.
Find a Cozy Spot: Move your pots to a more sheltered place or even bring them indoors if it’s super chilly.
Wrap It Up: A layer of mulch around the base of your lavender can act like a cozy blanket, keeping the cold at bay.
Keep It Dry: Good drainage is crucial, especially in winter. You don’t want your lavender’s roots sitting in icy water.
Out of the Wind: Tuck your pots near a south-facing wall or another spot that’s protected from biting winds and harsh cold.
Caring for Your Indoor Lavender During Winter:
Sunny Spot: Lavender loves light. Keep it near a south-facing window where it can soak up those rays.
Cool and Comfy: Lavender likes it on the cooler side in winter. Keep it away from heaters or radiators to avoid overheating.
Just Right Humidity: Since indoor heating can dry things out, use a humidifier or a water tray near your plant to keep the air moist enough for your lavender.
Winter Care Basics for Your Lavender:
Easy on the Water: Lavender doesn’t get as thirsty in the winter. Water it only when the soil feels dry.
Hold the Food: Skip the fertilizer in the winter months. Lavender is taking it easy, and new growth might not handle the cold well.
Getting Your Lavender Ready for Spring:
Ease Into the Outdoors: If your lavender spent the winter inside, don’t rush it outside. Gradually get it used to the outdoor temperatures before making the move permanent in spring.
Time for a Trim: Give your lavender a good pruning in early spring, just before new growth kicks in. This helps keep it in shape and sets the stage for a burst of fresh growth.
Stick to these winter care tips, and your lavender, whether it’s been cozying up indoors or braving the elements outside, will be all set to flourish when spring rolls around.
Harvesting Your Lavender: Tips for the Perfect Harvest
Timing is Everything: For the best scent and blooms, pick your lavender when the buds are formed but not fully open. This is usually late spring to early summer.
Morning is Best: Snip your lavender in the morning after the dew dries but before it gets too hot. That’s when the oils are at their strongest.
How to Harvest:
Tools: Grab some sharp, clean scissors or pruning shears.
Cutting: Snip the stems just above the first set of leaves. This leaves some green on the plant and encourages new growth.
Stem Length: Aim for 6-8 inch stems. That’s the sweet spot for most uses, like drying.
After the Harvest:
Drying: Tie your lavender stems in small bunches and hang them upside down in a dark, dry place with good air circulation. This keeps the color and scent strong.
Storing: Once they’re dry, store your lavender in an airtight container away from light and moisture.
Ways to Use Your Lavender:
In the Kitchen: Dried lavender flowers can add a unique flavor to your cooking and baking.
For Relaxation: The oils in lavender are great for chilling out and making your place smell amazing.
Decoration: Use dried lavender in arrangements, wreaths, or sachets for a touch of natural beauty.
Harvesting your lavender at the right time and in the right way means you’ll get the most out of this lovely, fragrant plant.
Whether you’re using it for its scent, flavor, or looks, properly harvested lavender is a real treat for the senses.
Common Challenges and Solutions in Growing Lavender in Pots
Growing lavender in pots can sometimes present challenges. Here are some common issues and their solutions:
1. Root Rot
Cause: Often caused by overwatering or poor drainage.
Solution:
Ensure pots have adequate drainage holes.
Water only when the top inch of soil is dry.
Consider using a well-draining potting mix, such as a blend with coco coir.
2. Lack of Flowering
Cause: Insufficient sunlight, over-fertilization, or not enough pruning.
Solution:
Relocate the pot to a spot where it receives full sun (6-8 hours of direct sunlight).
Test the soil pH and adjust accordingly, using lime to increase alkalinity if needed.
By addressing these common issues with the appropriate solutions, you can ensure your lavender plants remain healthy and vibrant throughout the growing season.
Regular observation and maintenance are key to preventing and managing these challenges.
FAQ Section: Growing Lavender in Pots
Got questions about growing lavender in pots? You’re in the right place! We’ve rounded up some of the most common questions to help you get the hang of it and make your lavender-growing journey a breeze.
Q: How often should I water potted lavender?
A: Lavender prefers dry conditions, so water only when the top inch of soil is dry.
This usually means watering once every 1-2 weeks, but adjust based on temperature and humidity.
Overwatering can lead to root rot, so it’s important to let the soil dry out between waterings.
Q: Can lavender in pots survive winter?
A: In the Pacific Northwest, lavender is generally winter hardy. For pots, provide extra protection by placing them in a sheltered location.
If you’re in a colder region, consider bringing the pots indoors or providing mulch for insulation.
Q: What is the best type of pot for lavender?
A: Use pots with good drainage, made of materials like terracotta or clay. The final pot size should accommodate the mature size of the lavender plant, typically 12-16 inches in diameter for most varieties.
Q: How do I know if my lavender needs more sunlight?
A: If your lavender isn’t flowering well or the plant appears leggy with sparse foliage, it might need more sunlight. Lavender thrives in full sun, requiring 6-8 hours of direct sunlight daily.
Q: When is the best time to prune lavender?
A: Prune lavender in early spring or after it finishes blooming. Pruning encourages new growth and helps maintain a compact, bushy shape. Remove about one-third of the overall growth, focusing on the softer, newer growth.
Q: Can I use regular potting soil for lavender?
A: Lavender prefers well-draining soil. A mix of 70% compost to 30% horticultural sand or grit is ideal. If using coco coir, which has excellent drainage properties, supplement with a balanced, slow-release fertilizer.
Q: How do I protect my lavender from pests?
A: Regularly inspect the plants for pests. If you find aphids, spittlebugs, or whiteflies, use a strong jet of water to dislodge them or apply an appropriate organic insecticide or neem oil as a treatment.
Q: Is it possible to grow lavender from seeds in pots?
A: Yes, but growing lavender from seeds can be challenging due to their slow germination. It’s often easier to start with seedlings or cuttings. If starting from seeds, use a well-draining soil mix and be patient as they can take a while to sprout.
Wrapping It Up: The Wonderful World of Potted Lavender
Growing lavender in pots is a whole lot more than just a hobby—it’s like going on a fun adventure that’s all about enjoying the sights, smells, and sheer beauty of this awesome plant.
Imagine having those stunning purple flowers and that super relaxing scent right on your balcony or windowsill. It’s like bringing a little piece of the Mediterranean to your own space, all packed into a neat little pot.
Why Lavender in Pots Rocks:
Looks Amazing: A pot of lavender adds a lovely rustic charm wherever you put it.
Fits Anywhere: Great for all sorts of climates, especially when you can move the pots around.
Chill Vibes: Known for its soothing scent, lavender is like natural aromatherapy.
Have Fun with It:
Mix It Up: Try out different types of lavender—English, French, Spanish—and see which ones you like best and which ones do best in your space.
Enjoy the Ride: Take pleasure in the whole process, from planting to pruning to picking. Watching your lavender grow and thrive is super rewarding.
Final Thoughts:
Gardening is all about experimenting, learning, and having a good time. So don’t be afraid to try new things, tweak your approach, and soak in the beautiful sights and smells of your lavender.
Whether you’re a seasoned green thumb or just starting, the journey of growing lavender in pots is full of fun surprises. Dive in and let the sweet aroma of lavender brighten your days. Happy gardening!

")
")
")
")