This post may contain affiliate links. If you buy something from one of our links we may earn a commission. Thanks
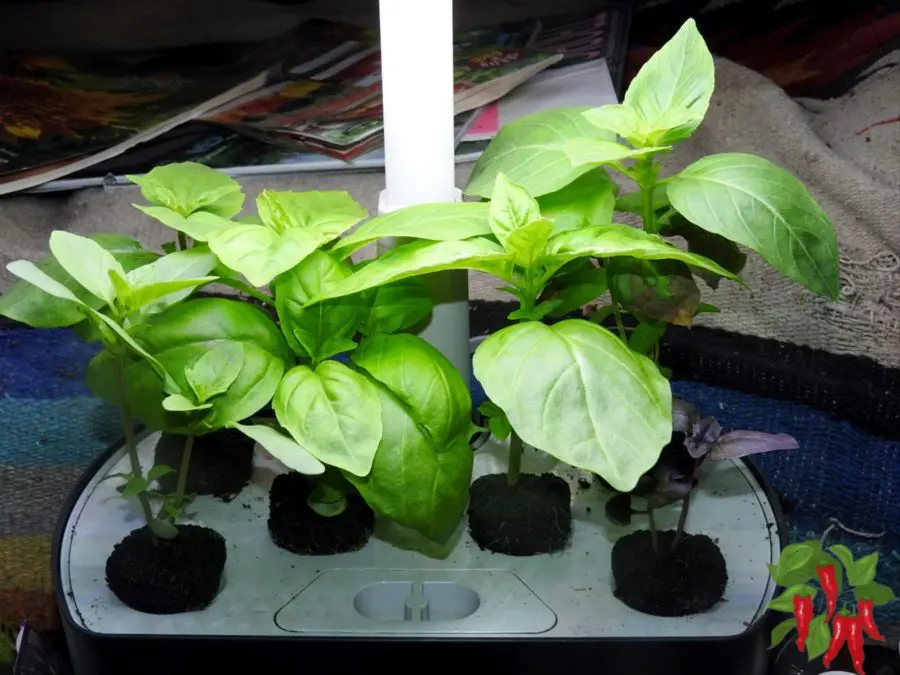
Growing basil hydroponically in your AeroGarden is a simple and efficient way to enjoy fresh herbs right in your kitchen.
This method not only saves space but also accelerates growth, allowing you to harvest flavorful basil in just a few weeks.
Dive into the world of hydroponics and discover how easy and rewarding it is to grow your own basil at home!
Key Takeaways: Your Quick Guide to Hydroponic Basil in the AeroGarden
Here are the essential points to remember as you embark on your journey of growing basil hydroponically in your AeroGarden:
- Start Simple: Choose the right AeroGarden model that fits your space and gardening goals. Compact models are great for beginners, while larger models cater to more ambitious gardening projects.
- Efficient and Eco-Friendly: Hydroponic gardening with an AeroGarden saves space and water, boosts growth speed, and yields more than traditional gardening methods. Plus, it’s almost pest-free!
- Easy Setup and Maintenance: Setting up your AeroGarden is straightforward. Regularly check water levels, adjust nutrients, and maintain the right pH balance to keep your basil thriving.
- Prune for Prosperity: Regular pruning keeps your basil bushy and healthy and encourages a continuous supply of fresh herbs.
- Harvesting Hints: Harvest your basil when it’s vibrant and before any flowers appear for the best flavor. Store fresh basil in the fridge wrapped in a damp paper towel, or dry it for long-term use.
- Expand Your Green Thumb: Once you’ve mastered basil, explore growing other herbs and vegetables in your AeroGarden. The versatility of this system allows for endless possibilities, enriching your diet and greening your home.
- Troubleshooting Tips: Keep an eye out for common issues like yellowing leaves or slow growth. Adjusting light settings and nutrient mixes can often quickly resolve these problems.
By keeping these key takeaways in mind, you’ll be well on your way to enjoying fresh, flavorful basil and perhaps a full garden of hydroponically grown plants in no time.
Embrace the simplicity and efficiency of your AeroGarden, and enjoy the gardening journey!
Introduction: Growing Basil Hydroponically in Your AeroGarden
AeroGarden Pesto Basil Seed Pod Kit (6-pod)
Dive into the world of hydroponic basil with your AeroGarden! It’s an effortless, fun way to enjoy fresh herbs at home.
Whether you’re starting your first garden or looking to simplify your green routine, growing basil hydroponically offers space efficiency, quick growth, and many other benefits.
There are many hydroponic systems you can buy or build yourself but the AeroGarden stands out as the easiest system for beginners.
It is bulletproof with no green thumb needed. In this article, I will show you how to grow hydroponic basil in an AeroDarden harvest..
Welcome to the World of Hydroponic Basil
Join us as we explore the vibrant and lush world of growing basil with hydroponics.
Learn why so many gardeners use this innovative method for fresher, faster herbs.
The Ease and Benefits of Growing Basil Hydroponically in an AeroGarden
Discover how your AeroGarden makes it simple to cultivate basil hydroponically.
We’ll dive into how growing hydroponically frees up space and keeps those pesky soil bugs at bay, all while you harvest loads of fresh basil right from your kitchen or any cozy corner of your home.
Benefits of Hydroponic Basil
Growing basil in your AeroGarden isn’t just convenient; it’s a game changer for indoor gardening. Here’s why:
- Space-Saving & Water-Wise: Hydroponics lets you grow basil anywhere, even in tight spots! Plus, it’s super water-efficient, using much less than traditional gardening.
- Faster Growth, More Yield: Your basil gets all the nutrients and water it needs directly, speeding up growth and boosting yield. More basil, less waiting!
- Fewer Pests and Diseases: Say goodbye to most soil-borne pests and diseases. Hydroponics keeps your basil healthier and reduces the need for pesticides.
These perks make growing hydroponic basil a smart choice for fresh herbs year-round, from the comfort of your home.
Setting Up Your AeroGarden Hydroponic System
Getting started with your AeroGarden is a breeze, and choosing the right model is the first step to fresh basil at your fingertips. Here’s how to set it all up:
Choosing the Right AeroGarden Model:
AeroGarden Sprout – Indoor Garden with LED Grow Light
- Compact Models: Ideal for beginners or those with limited space. The AeroGarden Sprout fits almost anywhere.
- The AeroGarden Harvest is a mid-sized model and it’s what I use to grow basil and other plants.
AeroGarden Harvest with Gourmet Herb Seed Pod Kit
- Larger Models: If you’re looking for higher yields or want to grow multiple herbs alongside basil, consider the AeroGarden Bounty
AeroGarden Bounty Basic – Indoor Garden with LED Grow Light
- The Aerogarden Farm models offer more space and advanced features. They are larger and more versatile.
AeroGarden Farm 24 Plus with Salad Bar Seed Pod Kit
Necessary Equipment and Supplies Included:
- Hydroponic System: Your AeroGarden kit includes everything to get started.
- Grow Lights: Built-in LED lights provide your basil with the full spectrum of light it needs.
- Nutrient Solution: A specially formulated hydroponic nutrient solution to feed your basil efficiently.
- Seed Pods: All models come with seeded starter seed pods and others are available online.
Setup Instructions:
- Assemble Your AeroGarden: Follow the instructions in the box to assemble. Typically, this involves connecting the base to the grow light arm and setting up the water reservoir.
- Install Grow Lights: Attach the LED lights to the arm. Make sure they are secure and evenly positioned above where your plants will be.
- Add Water and Nutrients: Fill the reservoir with water up to the fill line. Then, add the recommended amount of nutrient solution.
- Insert Seed Pods: Place the pre-seeded basil pods into the pod slots. If using custom seeds, ensure they are adequately sown into the grow sponges.
- Turn On and Set the Timer: Power up your AeroGarden and set the light timer according to the basil’s needs—typically around 16 hours of light per day.
With these simple steps, your AeroGarden will be ready to sprout fresh basil in no time.
Watch as your kitchen or living space transforms with the addition of vibrant, green herbs, ready for your next culinary adventure!
Planting and Caring for Your Basil
Ready to grow your own lush basil right at home? Here’s a no-fuss guide to planting and nurturing your basil in the AeroGarden:
Getting Those Basil Seeds Started:
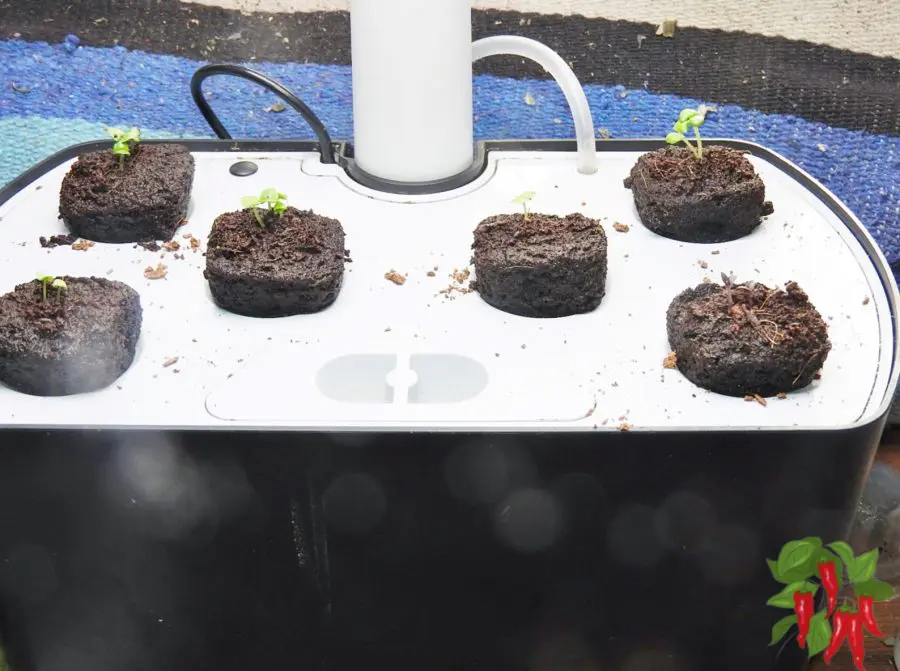
- Pop In the Pods: Just slip your pre-seeded basil pods into the AeroGarden. If you’re going the DIY route, gently press a couple of basil seeds into each grow sponge and tuck them into the pod holders.
- Light It Up: Set your AeroGarden lights to shine for about 16 hours daily to mimic the best sunny day, perfect for sprouting those seeds. You’ll see little green shoots in no time—usually within a week or two!
Root Riot Plant Starter Plugs Vs AeroGarden Baskets and Sponges
I no longer use the AeroGarden pods and sponges. I use Root Riot seedling plugs instead.
You can see how they fit nicely into the holes. Using the starter plugs I can choose what seeds I want to grow instead of only what AeroGarden offers.
Water and Nutrient Know-How:
- Keep It Quenched: Check the water level frequently; basil loves to drink up, especially as it grows.
- Feed Your Greens: Mix in the nutrient solution as outlined in your AeroGarden guide—typically a top-up every couple of weeks keeps them happy.
- Balance the pH: Aim for a pH between 5.5 and 6.5 to make sure your basil can absorb all those good nutrients. A simple pH test and adjustment here and there ensure your water’s just right.
Pruning Like a Pro:
- Promote a Bushy Vibe: When your basil stands about 6 inches tall, encourage a bushy growth by snipping the top leaves just above a set of leaves. This tells your plant to spread out more rather than shoot up.
- Keep on Trimming: Regularly give your basil a little haircut to help it stay full and compact, which also means more leaves for your cooking!
With these easy steps, you’ll have a thriving basil garden that’s not only a delight to look at but also a joy to cook with.
Keep up with the simple care tips, and your kitchen will always have that fresh herb aroma. Happy gardening!
Hydroponic Basil Day 7
These plants took a week to germinate and now they have been up for a week. Here is a day 7 video.
Hydroponic Basil Day 14 In My AeroGarden Harvest
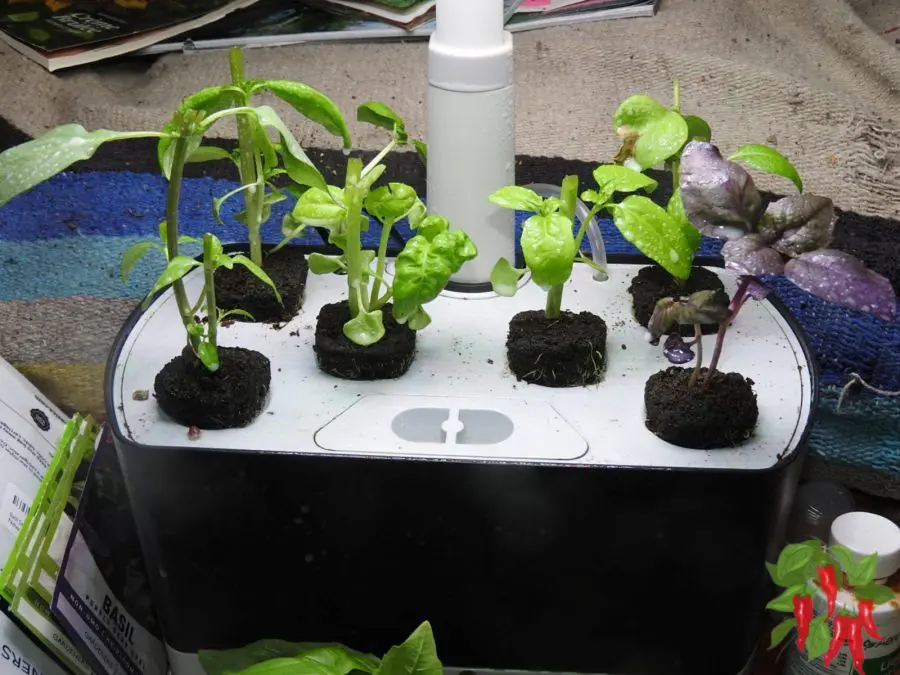
These basil plants are growing well except for the purple basil. It looks healthy but it is much smaller than the other plants.
I raised the light up and the plants are taking off. It looked like they were getting too much light with it all the way down. It looked like the leaf edges were turning away from the light if that makes any sense.
These plants are drinking well and I have been topping up the reservoir about every 2-3 days. I have been adding a capful of the AeroGarden nutrients every second refill.
I will let these plants grow another week or so and then top them so they get bushier. At that point, I may need to remove some plants but we’ll see.
Here is a video of the basil plants on day 14
Harvesting and Storing Basil
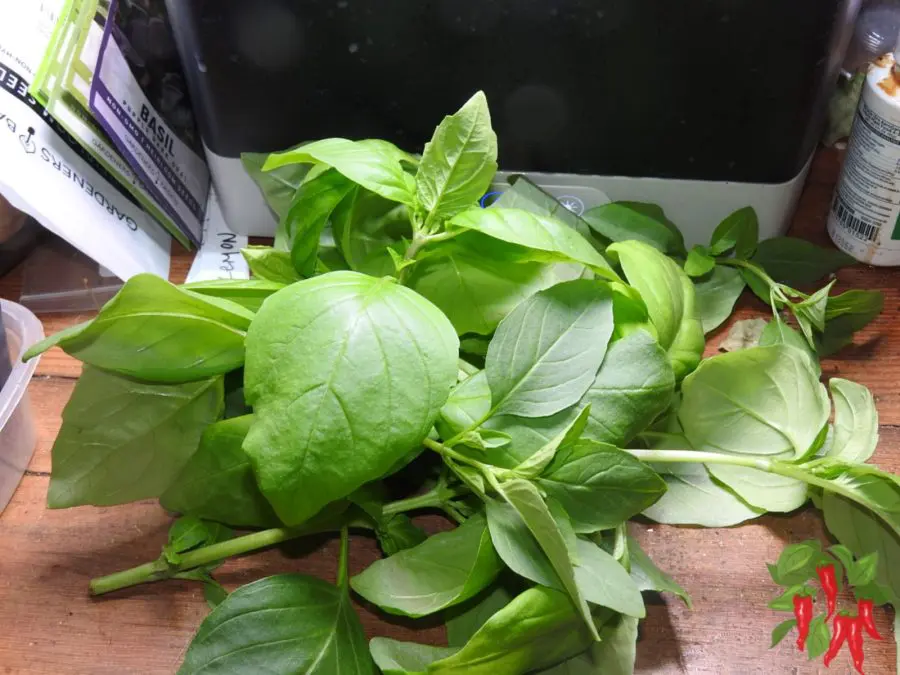
Harvesting your basil at just the right time maximizes its flavor and also extends its shelf life. Here’s how to make sure you get the most out of your lush, green herbs:
When and How to Harvest Your Basil:
- Timing is Everything: Harvest your basil when it’s vibrant and the leaves are fully opened before any flowers appear. This is when the oils are most concentrated, offering the best flavor.
- The Right Way to Cut: Use scissors or your fingers to pinch off the tops of the plants, taking the leaves from just above a leaf pair. This encourages more growth and keeps your plants producing.
Keeping Your Basil Fresh and Flavorful:
- Short-Term Fresh Storage:
- Damp Paper Towel Method: Wrap the freshly harvested basil leaves in a slightly damp paper towel and store them in a plastic bag in the fridge. This can keep them fresh for about a week.
- Water Glass Method: Alternatively, trim the stems and place the basil bouquet in a glass of water, just like fresh flowers. Cover them loosely with a plastic bag and keep them in the fridge.
-
Long-Term Drying and Storage:
- Air Drying: Tie the basil stems together and hang them upside down in a warm, dry area away from direct sunlight. Once dried, crumble the leaves and store them in an airtight container.
- Oven Drying: For a quicker method, lay the leaves on a baking sheet and put them in an oven set to the lowest possible temperature. Check frequently until the leaves are dry but not browned. Store as mentioned above.
With these simple harvesting and storage tips, you can enjoy the taste of fresh basil in your cooking all year round.
Whether adding a sprinkle of dried basil to a sauce or garnishing a dish with fresh leaves, you’ll have the perfect herb right on hand.
Troubleshooting Common Issues
Even the most attentive gardeners can run into a few hiccups with their hydroponic basil.
Here are some tips to help you tackle common issues like yellowing leaves, slow growth, and pesky bugs:
Dealing with Yellowing Leaves and Slow Growth:
- Check Your Water and Nutrients: Yellow leaves can be a sign of overwatering or nutrient deficiency. Make sure your water level isn’t too high and adjust your feeding schedule if needed. Basil thrives with consistent, balanced nutrients—too little can slow growth, and too much can overwhelm your plants.
- Light It Right: Basil loves light. If your plants are growing slowly or the leaves are turning yellow, they might not be getting enough light. Adjust your AeroGarden’s light to be closer to the plants, but not so close that the leaves can get scorched. Ideally, keep the lights on for about 16 hours a day.
Handling Pest Infestations:
- Keep an Eye Out: Regularly check your basil for signs of pests. Common culprits like aphids, spider mites, and whiteflies can be managed early before they cause serious damage.
- Natural Remedies: If you spot pests, try spraying your basil plants with water to dislodge them. For stubborn infestations use insecticidal soap or neem oil applied directly to the affected areas. These solutions are effective and safe for use in your AeroGarden.
Adjusting Nutrient Mix and Light Settings:
- Fine-Tuning Nutrients: If your basil isn’t thriving as expected, tweak the nutrient ratios slightly. Basil generally prefers a higher nitrogen mix to support leafy growth. Consult your nutrient solution’s guidelines to adjust for the best balance.
- Optimize Light Exposure: Make sure your basil is getting enough but not too much light. If the leaves are pale, they might need more light. Conversely, if the leaves seem burnt, they might be too close to the lights. Adjusting the height of the lights or their duration can often remedy these issues.
By keeping a close eye on these factors and adjusting as necessary, you can keep your hydroponic basil healthy and vibrant. With a little troubleshooting, you’ll keep those lush green leaves flourishing, ready for your next culinary creation!
Expanding Your Hydroponic Garden
Now that you’ve mastered growing basil in your AeroGarden, why not expand your indoor garden with more herbs and even some vegetables?
Here’s how you can diversify your green space and enjoy a wider variety of fresh, home-grown flavors:
Experiment with Different Basil Varieties:
- Branch Out: Beyond the classic sweet basil, consider trying Thai basil for a hint of licorice in your dishes, or purple basil to add a splash of color to your garden and plate. Each variety brings its unique flavor and aesthetic.
- Mix and Match: Planting multiple basil varieties not only beautifies your AeroGarden but also enhances your cooking with a spectrum of basil flavors right at your fingertips.
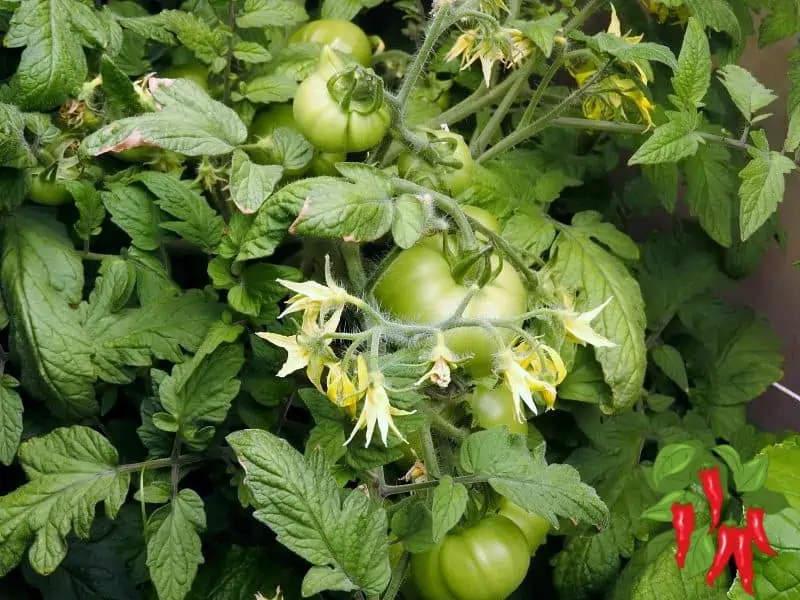
- Try Patio Tomatoes or Peppers: If you have a Harvest or larger AeroGarden you can grow them easily but pruning becomes essential.
Growing Other Herbs and Plants:
- Herb Varieties: Your AeroGarden isn’t just for basil. Why not try mint, cilantro, thyme, or parsley? These herbs are also well-suited for hydroponic growing and can thrive alongside your basil.
- Venture into Vegetables: If you’re feeling adventurous, expand your hydroponic garden to include plants like cherry tomatoes, peppers, or even lettuce. These plants generally do well in systems like the AeroGarden and can add fresh, vibrant produce to your harvest.
Tips for Managing a Diverse Hydroponic Garden:
- Space Them Out: Make sure each plant has enough room to grow. Some plants, like tomatoes, might require more space and resources, so plan your garden layout accordingly.
- Adjust Nutrients and Light: Different plants may have different nutritional and lighting needs. Be prepared to adjust these elements based on what you’re growing to keep all your plants healthy and thriving.
Expanding your hydroponic garden can be rewarding, offering a continuous supply of fresh herbs and vegetables. You can enjoy cultivating a variety of plants.
Whether you’re looking to enhance your meals or enjoy the beauty and satisfaction of gardening, the possibilities with an AeroGarden are nearly limitless. Go ahead, grow something new today!
FAQ Section: Growing Basil Hydroponically in Your AeroGarden
Got questions about growing basil hydroponically in your AeroGarden? You’re not alone!
Many gardeners have questions about the ins and outs of hydroponic gardening.
Here’s a handy Q&A to help you navigate through some common inquiries and get your garden thriving:
Q. How often should I add nutrients to my hydroponic basil?
A. Usually, you should add nutrients to your AeroGarden every two weeks, but this can vary slightly depending on the growth stage of your basil. Always follow the nutrient guidelines provided with your AeroGarden for the best results.
Q. Can I grow other herbs alongside basil in my AeroGarden?
A. Absolutely! Your AeroGarden can support a variety of herbs like thyme, oregano, and parsley. Just make sure to consider the space each plant will need; basil can get quite bushy.
Q. How long does it take for basil to be ready for harvest in an AeroGarden?
A. Basil grown in an AeroGarden is typically ready for its first light harvest about 4 weeks after planting. You’ll know it’s time when the plants have three to four sets of true leaves.
Q. Can I use tap water in my AeroGarden?
A. While tap water is generally okay, using distilled or filtered water is better to avoid any mineral buildup and to ensure your plants remain healthy.
Q. What’s the best way to store harvested basil?
A. For short-term use, wrap the basil leaves in a damp paper towel and store them in the refrigerator. For long-term storage, you can dry the leaves and keep them in an airtight container.
Q. How can I ensure the pH level is right for growing basil hydroponically?
A. Basil prefers a pH level of 5.5 to 6.5. It’s a good idea to use a pH testing kit to regularly check the water in your AeroGarden and adjust with pH up or down solutions as needed.
Q. What should I do if I see pests on my hydroponic basil?
A. If pests appear, start with a gentle treatment like rinsing your plants with water. If the problem persists, applying an insecticidal soap or neem oil can be effective. Always try to use organic or safe options since you will be consuming these leaves.
This FAQ should help address some of the basic concerns and set you on the path to successful hydroponic gardening with your AeroGarden. Happy gardening!
Conclusion: Embrace the Joy of Hydroponic Gardening
Well, folks, we’ve covered a lot about growing basil in your AeroGarden, and I hope you’re feeling pumped to give it a whirl.
Let’s wrap this up with a quick recap and a little nudge to get you started on your own green adventure.
Key Takeaways: Growing Hydroponic Basil
- Growing basil hydroponically in an AeroGarden is efficient and space-saving.
- Start by inserting pre-seeded pods into the AeroGarden, add water and nutrients, and set the light for 16 hours a day.
- You’ll see sprouts in 5-10 days and can harvest your first leaves in about 4 weeks, enjoying fresh basil at your convenience.
The Sheer Delight of Hydroponic Basil
Growing basil hydroponically isn’t just about harvesting those fragrant leaves; it’s about enjoying the process.
The simplicity and efficiency of using an AeroGarden mean you get to experience the joy of gardening without the usual fuss.
Plus, watching those tiny seeds sprout into lush, green plants right before your eyes is nothing short of magical.
Kickstart Your Hydroponic Gardening Journey
Now that you know how easy and rewarding it is to grow basil hydroponically, why stop there?
Your AeroGarden is a gateway to an exciting world of indoor gardening. From spicy herbs to crisp vegetables, the possibilities are endless.
So, why not expand your plant family and see what other gardening treasures you can cultivate?
Explore the Versatility of the AeroGarden
Remember, your AeroGarden isn’t just for basil. It’s a versatile tool that can bring a slice of nature into any corner of your home.
Whether you’re a seasoned gardener or a curious newbie, the AeroGarden adjusts to fit your lifestyle, providing fresh herbs, vibrant flowers, and even vegetables year-round.
It’s the perfect companion for your culinary experiments and a green thumb’s delight.
So, what are you waiting for? Grab that AeroGarden, plant some seeds, and let the good thymes roll!
Here’s to fresh basil, delicious meals, and the joy of growing your own greens. Happy gardening, everyone!
Learn more: Hydroponic Gardening At Home: Easy Gardens Without Soil


