Growing Tomatoes Indoors for Beginners: The Complete Guide
Well howdy! Have you ever thought about growing tomatoes indoors? It’s honestly such a rewarding experience.
Whether it’s the middle of a chilly winter or you’re just short on outdoor space, you can still enjoy the taste of fresh, juicy tomatoes right from your very own garden.
Getting your indoor tomato garden up and running is totally doable with the right setup and a bit of care.
Imagine having a lush tomato crop right inside your home, producing a bountiful harvest all year round. How awesome would that be?
With some good light, a bit of water, and a little love, your tomatoes can thrive indoors just as well as they would outside.
In fact, my tomatoes do better inside my apartment than outside. Let’s get growing and turn those tomato dreams into delicious reality!
What You’ll Learn
In this comprehensive guide, you’ll learn everything you need to know about growing tomatoes indoors successfully.
We’ll cover variety selection, setting up your indoor garden space, seed starting, plant care, dealing with pests and diseases, harvesting, and much more.
By the end, you’ll have all the knowledge to confidently grow lush, productive tomato plants right inside your home.
Benefits of Growing Tomatoes Indoors
There are many advantages to cultivating tomatoes in an indoor garden environment:
Year-round fresh tomatoes: No more being limited to the summer growing season outside. Indoor tomatoes allow you to enjoy that fresh, homegrown taste anytime.
Save money: Skip the expensive grocery store tomatoes and grow your own affordable supply.
Control environment: You have full control over temperature, light, water, and soil conditions for optimal growth.
Avoid harsh weather: No worries about extreme heat, cold, heavy rains, or other uncooperative outdoor conditions.
Fun hobby: Watching and caring for your indoor tomato plants is an enjoyable, rewarding pastime.
So whether you live in an apartment, have a short outdoor season, or just love gardening year-round, growing indoor tomatoes is an awesome option!
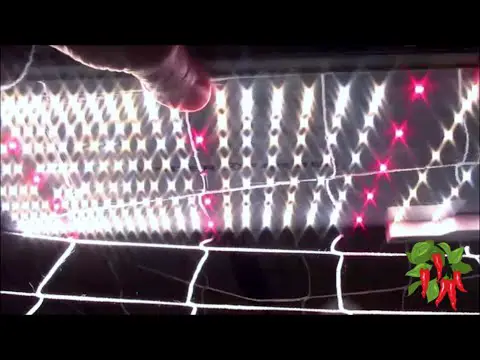
Hydroponic Tomatoes and Peppers Closet Grow
Here is a video with my Early Girl Tomato Plant and my pepper plants
Let’s dive into the specifics of how to make it happen.
Choosing the Right Tomato Varieties for Indoor Growing
Not all tomato varieties are equally well-suited for indoor gardens. When selecting which tomatoes to grow inside, there are a few key characteristics to look for:
Best Tomato Types for Indoors
Cherry/Patio Tomatoes These small-fruited varieties are among the most popular and productive for indoor gardens.
They’re known for being well-suited to container gardening and generally have compact growth habits, making them excellent choices for smaller spaces like balconies or patios. Here’s a quick rundown:
They have a compact, bushy habit and don’t require as much space as larger slicing tomatoes. Some great cherry/patio options include:
Tiny Tim: A very compact variety, often not exceeding 12 inches in height. It’s perfect for window boxes or small pots.
Window Box Roma is a good variety for small spaces, although not typically classified under cherry tomatoes.
Red Robin: Another super compact variety, similar to Tiny Tim, which grows very well in small pots and produces sweet, cherry-sized tomatoes.
Patio Prize: Known for its robust growth in containers and produces a good yield of flavorful tomatoes.
If you’re planning to grow these in containers, make sure they get plenty of sunlight and regular watering!
Dwarf/Micro-Dwarf Tomatoes
These ultra-compact tomato plants top out at just 1-3 feet tall, making them excellent candidates for limited indoor spaces. Try varieties like:
Red Robin: This variety is a true micro-dwarf, perfect for container gardening. It typically grows to about 12 inches in height. Red Robin produces small, cherry-sized tomatoes that are sweet and flavorful, ideal for snacking. The compact size makes it suitable for growing indoors on windowsills or in small pots on balconies.
Floragold Basket: Often referred to as Flora Gold, this variety is another excellent choice for limited spaces. It usually grows slightly larger than the Red Robin, reaching heights of up to 18 inches. It produces golden-yellow, cherry-sized tomatoes that are juicy and have a mild flavor. This variety is particularly decorative as well, making it a popular choice for hanging baskets.
Micro-Tom: Known as one of the smallest tomato plants, the Micro-Tom reaches about 6 to 8 inches in height. It’s highly suited for indoor environments, even in very small containers. Despite its diminutive size, it produces a prolific quantity of small, red tomatoes. The fruits are more for novelty and snacking, given their small size and the plant’s compact growth.
These varieties are all great choices if you’re looking to grow tomatoes in a confined space, and they offer the fun and satisfaction of harvesting home-grown tomatoes without needing a lot of room.
Determinate (Bush) Tomatoes
Determinate varieties are bred to be compact bushes rather than vining plants. They tend to have a shorter harvest period but take up less room – ideal for indoor gardeners. Some determinate choices are:
Bush Goliath: This is a determinate variety that is bred to be compact yet produces large, flavorful tomatoes. It’s suitable for container gardening and small space gardens.
Glacier: Known for its early ripening, Glacier is a determinate variety that produces small, flavorful tomatoes. It’s very cold-tolerant, making it an excellent choice for cooler climates.
Northern Delight: This is a determinate variety that matures early and is well-suited for cooler, shorter growing seasons. It produces small to medium-sized tomatoes.
Determinate tomatoes, also known as “bush” tomatoes, grow to a certain height and then stop growing once fruit sets on the top bud.
All the tomatoes from the plant ripen at approximately the same time (usually over a period of 1-2 weeks), and then the plant begins to decline.
These characteristics make them ideal for gardeners who want a large harvest for canning or processing, or who have limited space for sprawling plants.
They managed to breed a more bushlike variety. It is really what I would call semi-determinate. It gets quite large with long vines but seems to ripen a lot of fruit at once.
Indeterminate Tomato Varieties
I like indeterminate varieties because they can be trained vertically up a string, stake, or trellis which saves floor space. I also prefer the taste of beef steak tomatoes.
The main thing about determinate tomatoes is they bear most of their fruit at about the same time which can be overwhelming unless you’re canning.
I prefer indeterminate tomatoes for their extended bearing season and more manageable harvests.
Other Traits to Consider
Beyond plant size and growth habit, look for tomato cultivars described as:
Early maturing
Disease-resistant
High yields
Performing well in containers/small spaces
It’s also a good idea to grow a couple of different varieties to hedge your bets and extend the harvest season.
With so many excellent dwarf and patio tomato options available nowadays from seed companies, you’re sure to find some winners that thrive in your indoor garden!
Setting Up Your Indoor Tomato Garden
To set the stage for successful indoor tomato growing, you’ll need to create the right environment and gather some key supplies.
Containers and Potting Mix
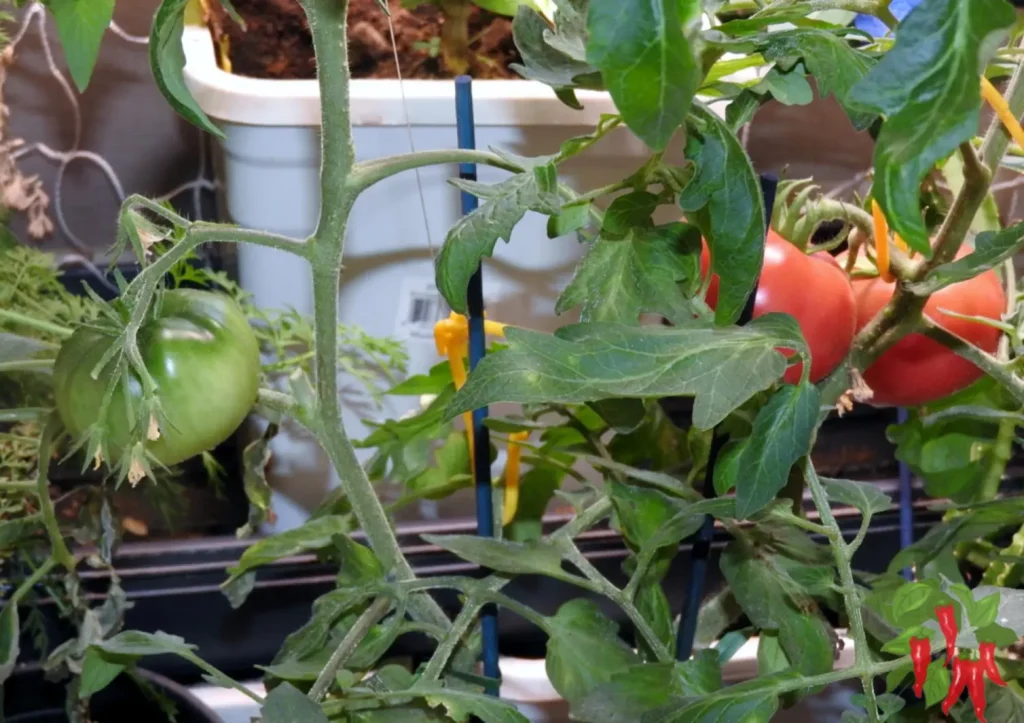
Tomatoes need a decent amount of root space to stabilize their top growth, so avoid using containers smaller than 5 gallons for full-sized or cherry varieties, and stick to 1-2 gallon pots for ultra-dwarfs.
Terra cotta, plastic, or fabric pots all work well as long as they have good drainage holes.
If you use coco coir instead of potting mix you can reduce your pot size by 25% and it weighs less too making plants easier to move.
I grow full-size indeterminate tomato plants in a 2 1/2 gallon pot using coco coir. More on coco coir in a bit.
Use a premium quality potting mix made for vegetable gardens.
These are lighter and better draining than outdoor garden soil which can get compacted in containers and harbor pests or disease. Don’t do it!
Hey there, fellow plant enthusiasts! Today, I want to chat about one of my favorite secrets to successful gardening—coco coir.
If you haven’t tried it out yet, you’re in for a treat! Coco coir has been a game-changer for me, and here’s why I think it might just rock your gardening world too.
First off, coco coir is incredibly friendly to our planet. It’s made from the natural fibers found in the husk of coconuts, which means it’s not only renewable but also a byproduct of coconut production. So, using it helps reduce waste—how cool is that?
One of the things I love most about coco coir is how it manages water. This stuff holds moisture like a champ without getting soggy.
That means my plants stay hydrated just right, which is super important for those days I might forget to water them (oops!).
Plus, it provides great drainage, so there’s no worry about overwatering—your roots are safe from getting waterlogged.
Another big win? Coco coir is fantastic for root development. It’s light and airy, which lets roots breathe and grow freely, making for some pretty happy and healthy plants.
Whether you’re nurturing delicate seedlings or growing robust veggies, coco coir gives them the perfect environment to thrive.
And let’s not forget how user-friendly it is. Coco coir is easy to handle and store, making it a no-brainer for indoor gardens and tight spaces.
Plus, it’s naturally resistant to pests, fungi, and bacteria, which means less trouble for you and more growing power for your plants.
So, whether you’re a seasoned green thumb or just starting your gardening journey, give coco coir a try. It might just make your gardening a little greener, a lot easier, and a whole lot more fun. Happy gardening!
Canna Coco Is What I Use And Recommend
All coco coir is not created equally. Some cheaper brands contain high levels of salt making them unsuitable for growing plants. Canna coco is prebuffered and very low in salts.
It also has consistently high quality and I have tried other brands but it still remains the best quality coco coir on the market.
Coco has unique properties and requires a fertilizer made for coco for best results. Canna started the coco revolution and Coco A & B is still the best.
Coco coir doesn’t provide essential nutrients for plant growth, so you’ll need to supplement with a balanced fertilizer to ensure your plants receive the necessary nutrients.
Light Requirements
One of the biggest challenges of indoor tomato growing is ensuring your plants receive enough light.
Most homes and apartments don’t provide sufficient natural light alone.
Winter days are short and often cloudy so you will need to provide them with supplemental lighting.
Grow Lights
For best results, you’ll want to use supplemental grow lights. There are several good options:
LED Grow Lights: Very energy-efficient, minimal heat output, full spectrum for all growth stages.
Fluorescent: More affordable but need to hang closer to plants. Look for “grow bulb” varieties.
HID Lights: High-intensity discharge lights like metal halide (for veg growth) and high-pressure sodium (for fruiting/flowering). Very bright but run hot.
Many indoor gardeners have success with basic 4-6 bulb T5 fluorescent grow light setups or quality LED grow panels like those made by Spider Farmer.
Providing 14-18 hours of light daily during growth stages is ideal. Make sure you are using full-spectrum LEDs.
Natural Light
If you have a large sunny window, you may be able to grow tomatoes with just sunlight for at least 6 hours each day.
A bright sunroom or greenhouse is perfect. However, most homes don’t have enough light in winter.
I recommend using LED grow lights. HID lights run hot and use a lot of electricity and fluorescent grow lights need yearly bulb changes and may not provide enough light.
Climate Control
Tomatoes need warm soil and air temperatures to really thrive indoors. Aim for:
Day temps: 70-85°F
Night temps: 60-70°F
Potting soil temps: 60°F minimum
You may need to set up a heat mat and small fan to maintain ideal conditions if your home runs cool. Some space heaters can be used as well.
Air circulation is important too. A gentle fan breeze will strengthen stalks and stems while also preventing mold issues from standing air.
Other Supplies
Here are a few other handy items to have on hand for your indoor tomato garden:
5-6 foot tomato cages, stakes, or trellis to support plants
High-quality balanced fertilizer like fish emulsion or compost
Manicure scissors/pruners for trimming and pinching
Small electric oscillating fan
Seed starting trays and seed starter mix (if growing from seed)
Perlite or vermiculite for improving soil drainage
Having all these supplies assembled beforehand will make the growing process much smoother. Now let’s talk seeds!
Starting Tomatoes from Seed Indoors
For the biggest head start, it’s best to grow your indoor tomatoes from seed rather than transplants. The ideal time to start tomato seeds is:
6-8 weeks before your last expected frost if you’ll be moving them outdoors eventually
Any time of year if they’ll be kept indoors their whole life!
Seed Starting Equipment
You’ll need:
Seed starting trays (or disposable dishes/cups)
Seed starting soil mix. I use coco coir for starting seeds.
Spray bottle for misting
Heating mat (optional but helps a lot)
First, moisten the seed starter mix so it’s damp but not soggy wet. Fill your containers and plant seeds about 1/4 inch deep, spacing them 1-2 inches apart. Gently mist the surface.
Use a heat mat underneath your trays to keep temps in the ideal 75°F-90°F range for fast, even germination.
Seedling Care
Once sprouted, make sure seedlings get 14+ hours of light by moving them under grow lights or providing supplemental fluorescent lighting a couple of inches above.
Keep soil moist by misting or bottom watering. Thin out seedlings and transplant them into individual small pots.
Once the first set of true leaves emerges, begin giving a half-strength liquid fertilizer every 2 weeks.
Around 4-6 weeks after germination, your tomato seedlings will be ready for their final potting containers!
Caring for Indoor Tomato Plants
After transplanting, continue these simple but important care practices for healthy vegetative growth and fruiting.
Water and Humidity
Consistent soil moisture is key – tomato plants hate sitting in soaking wet or bone dry conditions for too long.
Check containers daily and water thoroughly when the top inch of soil is getting dry.
Try to water in the morning, directly at the soil surface. Try to avoid getting the leaves wet.
Morning watering prevents moisture from sitting on leaves overnight, reducing disease risks.
Air humidity also benefits tomatoes. Shoot for 40-60% relative humidity if possible.
Using a shallow tray of pebbles filled with water under plants can help raise humidity levels.
Feeding and Nutrients
Tomatoes are heavy feeders that will need regular fertilization to produce their best. A balanced liquid fertilizer applied every 1-2 weeks is ideal. Some great fertilizer options include:
Fish emulsion or seaweed extract
Compost tea
Balanced 10-10-10 or 20-20-20 vegetable fertilizer
Worm castings or manure tea
Be sure to fertilize the soil directly and avoid getting fertilizer on the leaves. You can alternate with an occasional foliar seaweed spray for added micronutrients as well.
As tomato plants begin flowering and setting fruit, switch to a higher phosphorus “bloom” fertilizer like 5-10-10 to promote better fruiting.
Pruning and Training
Most tomato varieties will benefit from regular pruning and training, especially indoors where space is limited. Try these pruning tips:
Remove all suckers (side shoots) below the first flower cluster for a central leader plant
Thin out any overcrowded branching to allow light and air flow
Prune off any dead, diseased, or excessive branches/foliage
Stop pruning once the plant is the desired size
Using cages, stakes, or a trellis system is highly recommended to support your tomato plants indoors.
For indeterminant varieties only allow one or two stems to grow upward. Regularly remove suckers to send more energy to the flowers.
Determinant varieties will have a more bushlike growth habit but still benefit from training.
Training vines upwards opens up the plant interior to better air flow and light exposure.
Pollination
Since indoor settings lack natural wind and insect movements for pollination, you’ll need to help this process along:
Give plants a gentle shake daily when flowering
Use an electric toothbrush to vibrate flower clusters
Lightly brush a cotton swab or small paintbrush over the flowers
Some resort to hand-pollinating with a cotton swab
Consistent pollination is important for indoor plants to set full crops of tomatoes successfully.
Growing Tomatoes Indoors with Grow Lights
While some tomato varieties may produce decent yields in a sunny window or sunroom, using supplemental grow lights allows you much more control and consistency for indoor gardening.
There are several types of grow lights well-suited for raising tomatoes:
LED Grow Lights
LED technology has made great strides in recent years in providing full spectrum light for all stages of plant growth. LEDs run very cool while being highly energy efficient. Some excellent LED grow lights are:
Basic shop lights outfitted with T5 fluorescent bulbs make a simple and affordable grow light setup. Make sure to use a combination of “cool” and “warm” bulbs like:
HIDs like metal halide (MH) and high pressure sodium (HPS) bulbs provide incredibly intense light output. However, they run very hot and use a lot more electricity than LEDs or fluorescents. Some options:
For tomatoes, 14-18 hours of light per day is ideal when using grow lights indoors. Make sure to keep lights raised at the proper distance from plants based on manufacturer recommendations.
You may need separate “veg” and “bloom” bulbs if not using full spectrum LEDs.
Common Problems and Pests for Indoor Tomatoes
Like any tomato plants, your indoor crop may encounter some disease or pest issues to watch out for:
Common Diseases
Early Blight: Early blight is caused by the fungus Alternaria solani, marked by dark, concentric rings on leaves and stems. To prevent this disease, use resistant varieties, remove infected foliage, and apply fungicides in humid conditions. Adequate spacing and crop rotation also help reduce its spread.
Verticillium Wilt: Verticillium wilt, caused by Verticillium albo-atrum and Verticillium dahliae, results in yellowing and wilting from the lower leaves upwards. It can persist in soil for years, so use resistant varieties and avoid planting in contaminated areas. Crop rotation and good soil drainage are crucial management strategies.
Fusarium Wilt: Fusarium wilt is caused by Fusarium oxysporum f. sp. lycopersici, blocking water flow inside the plant, leading to wilting. Plant resistant varieties and practice crop rotation to manage this soil-borne disease. Healthy soil and careful handling of plants also reduce infection risks.
Leaf Mold: Leaf mold is caused by Cladosporium fulvum, appearing as yellowish spots on leaves with a velvety underside. It thrives in humid conditions with poor air circulation. Improve ventilation, keep foliage dry, and consider resistant varieties to control this disease.
Prevention is key – avoid overwatering, increase air flow, sanitize containers, and isolate any diseased plants immediately.
Pests
Aphids: Aphids are small, soft-bodied insects that cluster on the undersides of leaves and stems, sucking plant sap and weakening the plant. They produce a sticky substance called honeydew, which can lead to sooty mold growth. Controlling aphids can be done by using natural predators like ladybugs, applying insecticidal soaps, or using neem oil treatments.
Thrips: Thrips are tiny, slender insects that feed on plants by puncturing and sucking up the contents, causing leaves to become pale, splotchy, and deformed. They can also transmit plant viruses. Management of thrips includes using reflective mulches, applying appropriate insecticides, and encouraging beneficial insects that prey on them.
Whiteflies: Whiteflies are small, winged insects that feed on plant sap, causing yellowing or wilting of leaves. Like aphids, they excrete honeydew, promoting mold growth and attracting other pests. Controlling whiteflies involves using yellow sticky traps, horticultural oils, or insecticidal soaps.
Spider Mites: Spider mites are tiny arachnids that attack the undersides of leaves, causing fine webbing and speckled, discolored foliage. They thrive in hot, dry conditions and can rapidly infest plants. To manage spider mites, increase humidity, use forceful water sprays to dislodge them, or apply miticides.
Use insecticidal soaps or neem oil as needed. Introduce beneficial insects like ladybugs or lacewings. Increase humidity levels with a mister.
If you start to experience issues, check with your university extension service for cultural controls and approved treatments.
Environmental Stresses
Blossom end rot: Caused by calcium deficiency, uneven watering
Leaf roll/curling: Often from too little water or low humidity
Cracking/splitting: Improper watering or excessive nitrogen
Monitoring plants daily and providing proper nutrients, watering, and humidity is the best way to avoid most problems!
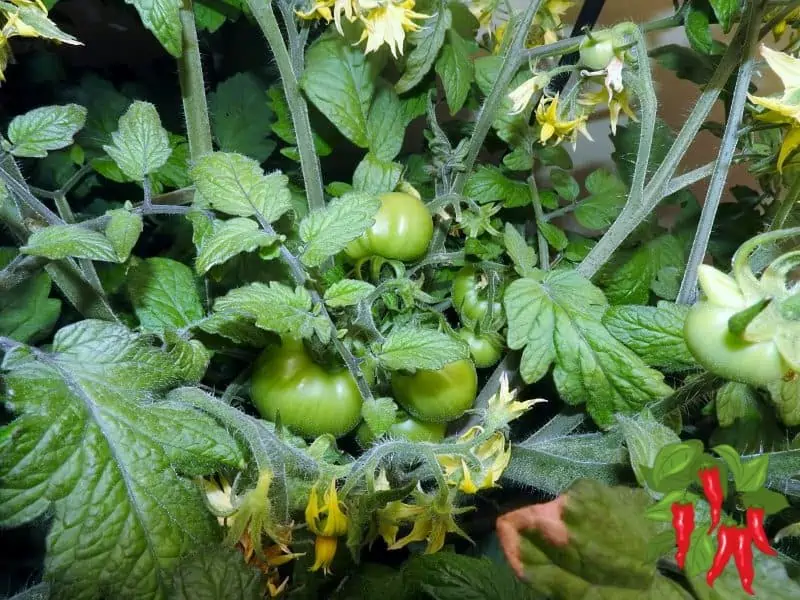
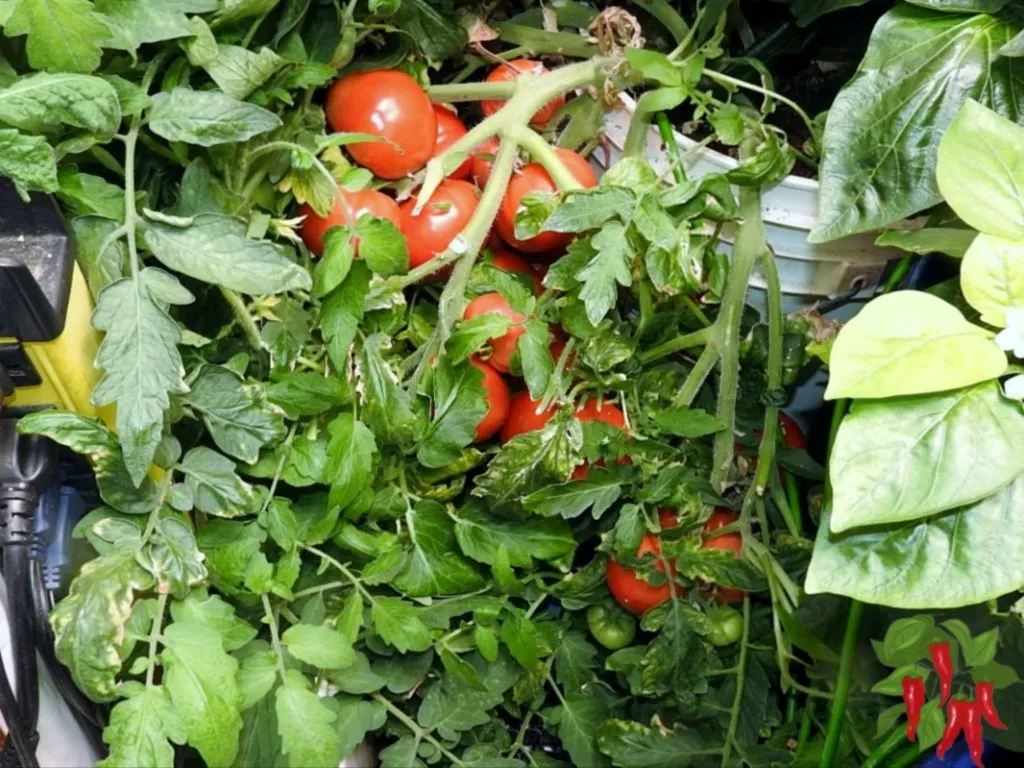
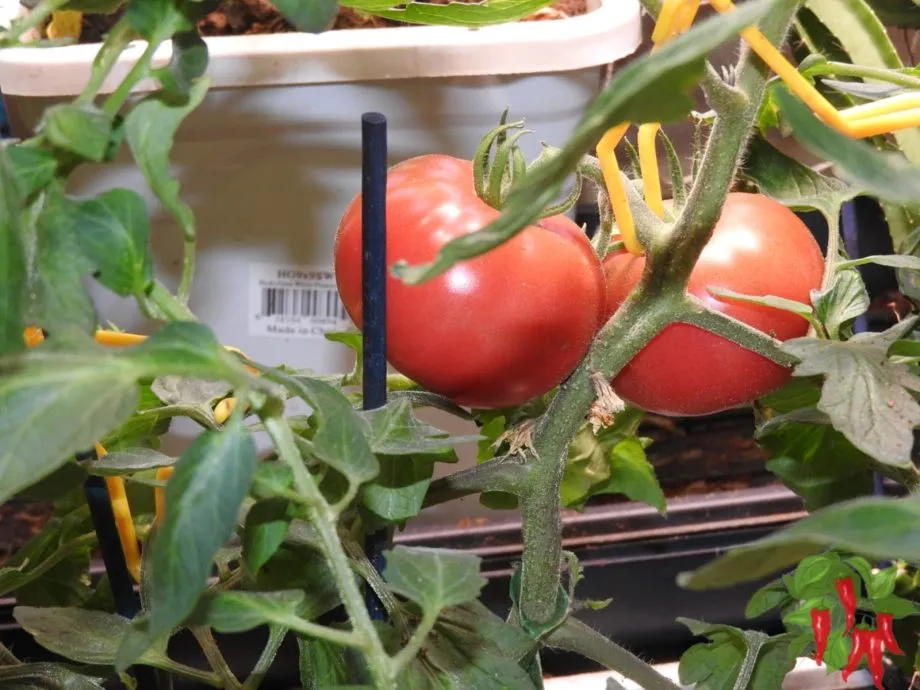
Harvesting and Enjoying Your Indoor Tomatoes
One of the greatest rewards of growing tomatoes is getting to enjoy that unbeatable fresh-off-the-vine flavor! When your indoor tomato plants have ripened their full crop, it’s harvest time:
Signs of Ripe Tomatoes
Full size and deep color developed
Give a gentle squeeze – they should be slightly soft but not mushy
Tomatoes on the same truss ripen together within 5-7 days
Harvesting Tips
Use a pair of clean scissors or pruners to snip fruit clusters away
Harvest in the morning before day heats up
Handle gently and separate into shallow containers to prevent bruising
Don’t pull fruits or you may damage the plant
Storage
Enjoy those fresh indoor tomatoes right away for optimal taste and texture! Any extras can be stored:
At room temperature for up to 1 week
Refrigerated at 55°F for up to 3 weeks
Consider preserving your harvest through canning, drying, or making delicious sauces and salsas to enjoy your indoor tomato bounty all year long.
With the right tomato varieties, grow lights, temperature, nutrients, and care, you can have non-stop homegrown tomato harvests from your indoor garden! Don’t be afraid to start – it’s an immensely rewarding experience.
Frequently Asked Questions About Growing Tomatoes Indoors
Even after explaining indoor tomato care in-depth, some common questions are bound to come up.
Here are the answers to some of the most frequently asked questions about growing tomatoes inside:
Q. Do I need to pollinate indoor tomatoes myself?
A. Yes, since indoor tomato plants are isolated from natural outdoor air movements and insects, you’ll need to help with pollination. This can be done by gently shaking the plants daily when flowering, using small electric vibrators, or lightly brushing over the flowers with a cotton swab.
Q. Can any tomato variety be grown indoors?
A. While technically possible with enough light, heat, etc., it’s best to choose tomato varieties specifically bred for container gardening and indoor spaces. Patio, dwarf, micro-dwarf, and determinate bush types work much better than large indeterminate slicing tomatoes.
Q. How much light do indoor tomatoes need?
A. Tomatoes need a relatively high amount of light – at least 6-8 hours of direct sunlight or 14-18 hours under quality grow lights. Most indoor spaces don’t provide enough natural light alone, so supplemental LEDs, fluorescents or HIDs are recommended.
Q. Do I need a grow tent for indoor tomatoes?
A. Not necessarily. A grow tent helps control light, temp, humidity and pest environments. But many indoor gardeners have success growing on racks, shelves or in a spare room or closet with sufficient grow lights.
Q. Why are my indoor tomato plants not setting fruit?
A. There are several possible reasons like lack of pollination, excessive heat or cold, improper light levels, or nutrient/water deficiencies. Provide ideal conditions and hand pollinate if necessary.
Q. How close can I place grow lights to my tomato plants?
A. Follow the manufacturer guidelines for your grow light model, as different types have different ideal distances from plants. In general, 12-30 inches is common for LEDs, 4-12 inches for fluorescents. Adjust as needed.
Hopefully, these FAQs clear up any other major questions! Don’t be afraid to experiment with indoor tomato growing.
Conclusion: Enjoy Homegrown Tomatoes Year-Round
Growing tomatoes indoors allows you to experience the incomparable taste of fresh homegrown tomatoes any time of year, even in the middle of winter.
With the right tomato varieties, lighting setup, containers, and care practices, it’s completely doable for gardeners of any skill level.
Key Takeaways: Set Yourself Up for Success
To grow tomatoes successfully indoors, keep these key points in mind:
Choose dwarf, patio, or determinate bush varieties ideal for containers/indoor
Use a high-quality potting mix in containers with good drainage
Ensure plants receive 14-18 hours of bright light daily (supplement with grow lights)
Maintain ideal temperature ranges of 70-85°F days, 60-70°F nights
Provide consistent moisture and nutrients with proper watering and fertilizing
Hand pollinate flowers with a small vibrator or cotton swab
Stake, trellis, or cage plants to support heavy fruiting
Monitor regularly for any pests, diseases, or environmental stresses
With this knowledge in hand, you’re ready to start planning your indoor tomato garden and take the first step toward year-round homegrown harvests!
Don’t hesitate to reach out if you have any other questions.
The Indoor Gardening Adventure
Don’t be intimidated by the prospect of raising tomatoes inside. It’s a fun, rewarding process to nurture plants from seeds or starters through to a bountiful harvest.
Indoor gardening opens up a whole new growing season that lets you enjoy your gardening hobby year-round.
With experience, indoor tomato gardening gets even easier as you dial in your specific setup and learn what works best.
The ability to control all the environmental factors makes it almost foolproof compared to outdoor gardening once you have it dialed in.
Fresh and Sustainable
By growing tomatoes indoors, you’ll always have a ready supply of the freshest, most nutritious produce available at your fingertips.
No more settling for bland, large-scale greenhouse or imported tomatoes at the grocery store. Your indoor-grown tomatoes are about as local as it gets!
Indoor gardening is also a very sustainable way to grow food while using minimal resources like water and land.
With an efficient setup, you can produce abundant yields in a very small footprint.


")


")

")